Install CloudWatch Agent on Windows instance and configure to collect logs and metrics
The CloudWatch Agent can be used to collect logs and metrics.
Collect internal system-level metrics from Amazon EC2 instances across operating systems…
Collect logs from Amazon EC2 instances and on-premises servers, running either Linux or Windows Server.
Collecting metrics and logs from Amazon EC2 instances and on-premises servers with the CloudWatch agent
This time, we will target a Windows instance (Windows Server 2019).
For the procedure to install CloudWatch Agent on a Linux instance (Amazon Linux 2), please refer to the following page.
Environment
The configuration is the same as the Linux version. For details, please refer to Install CloudWatch Agent on Linux and collect data – Environment.
CloudFormation template files
The configuration differs from the Linux version.
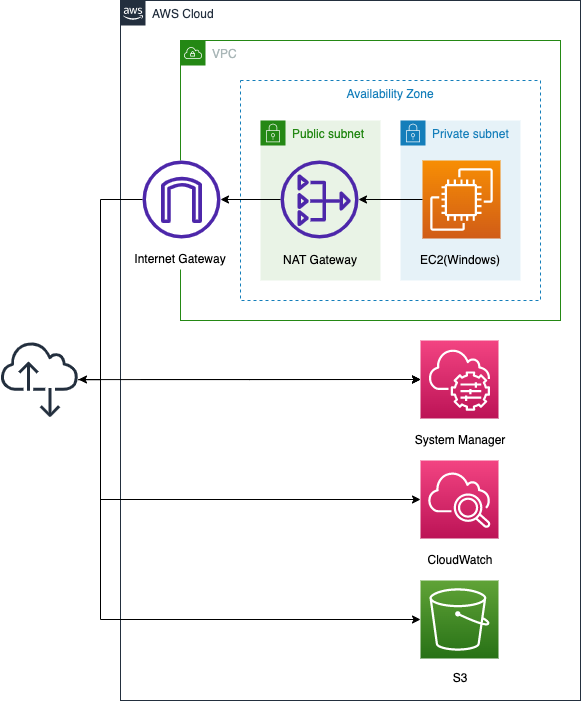
In the Linux version, access to various services (Sysmtem Manager, CloudWatch, S3) was via VPC endpoints, but this time a NAT gateway is used.
CloudFormation template files
Build the above configuration with CloudFormation.
The CloudFormation template is located at the following URL
https://github.com/awstut-an-r/awstut-fa/tree/main/016
Template file points
The configuration differs between the Linux and Windows versions, but the approach is similar.
This means that whether you are using Linux or Windows, you can install the CloudWatch Agent in the same way by using the following two SSM documents.
- AWS-ConfigureAWSPackage
- AmazonCloudWatch-ManageAgent
This page focuses on the differences from the Linux version.
NAT gateway to access various services
The first difference from the Linux version is the access routes to the various services, which use NAT gateways.
Resources:
  EIP:
    Type: AWS::EC2::EIP
    Properties:
      Domain: vpc

  NATGateway:
    Type: AWS::EC2::NatGateway
    Properties:
      AllocationId: !GetAtt EIP.AllocationId
      SubnetId: !Ref PublicSubnet
Code language: YAML (yaml)
The Linux version used a VPC endpoint. This was because the instance was Amazon Linux 2023 and we could run yum against the S3 bucket. Therefore, there was no need to go through the Internet to install the CloudWatch agent.
Please see the following page for more details.
In contrast, this Windows version requires access to the Internet when installing the CloudWatch agent. Therefore, VPC endpoints alone cannot meet the requirement. Therefore, a NAT gateway is installed to provide a pathway for Windows instances in the private subnet to access the Internet.
CloudWatch agent config
The method of storing CloudWatch agent configurations in SSM parameters is the same as in the Linux version, but the contents are slightly different.
Resources:
  CloudWatchConfigParemeter:
    Type: AWS::SSM::Parameter
    Properties:
      Name: AmazonCloudWatch-windows
      Type: String
      Value: !Sub |
        {
          "logs": {
            "logs_collected": {
              "windows_events": {
                "collect_list": [
                  {
                    "event_format": "xml",
                    "event_levels": [
                      "VERBOSE",
                      "INFORMATION",
                      "WARNING",
                      "ERROR",
                      "CRITICAL"
                    ],
                    "event_name": "System",
                    "log_group_name": "${LogGroup}",
                    "log_stream_name": "${InstanceId}"
                  }
                ]
              }
            }
          },
          "metrics": {
            "append_dimensions": {
              "ImageId": "${!aws:ImageId}",
              "InstanceId": "${!aws:InstanceId}",
              "InstanceType": "${!aws:InstanceType}"
            },
            "metrics_collected": {
              "Memory": {
                "measurement": [
                  "% Committed Bytes In Use"
                ],
                "metrics_collection_interval": 60
              },
              "Paging File": {
                "measurement": [
                  "% Usage"
                ],
                "metrics_collection_interval": 60,
                "resources": [
                  "*"
                ]
              }
            }
          }
        }
Code language: YAML (yaml)
In the Windows version, define the logs and metrics sections and configure them to collect logs and metrics for the instance. Specifically, the logs section should be set to collect system-related content from the event log, and the metrics section should be set to collect items related to memory paging.
Architecting
We will use CloudFormation to build this environment and check its actual behavior.
Create CloudFormation stacks and check resources in stacks
Create a CloudFormation stacks.
For more information on how to create stacks and check each stack, please refer to the following page.

After checking the resources for each stack, the information for the main resources created this time is as follows
- ID of Instance1: i-0d6ab5e24e2453ef4
- S3 bucket name: fa-016
- CloudWatch Logs log group name: fa-016
Checking execution status of SSM Run Command
Check the execution status from the AWS Management Console.
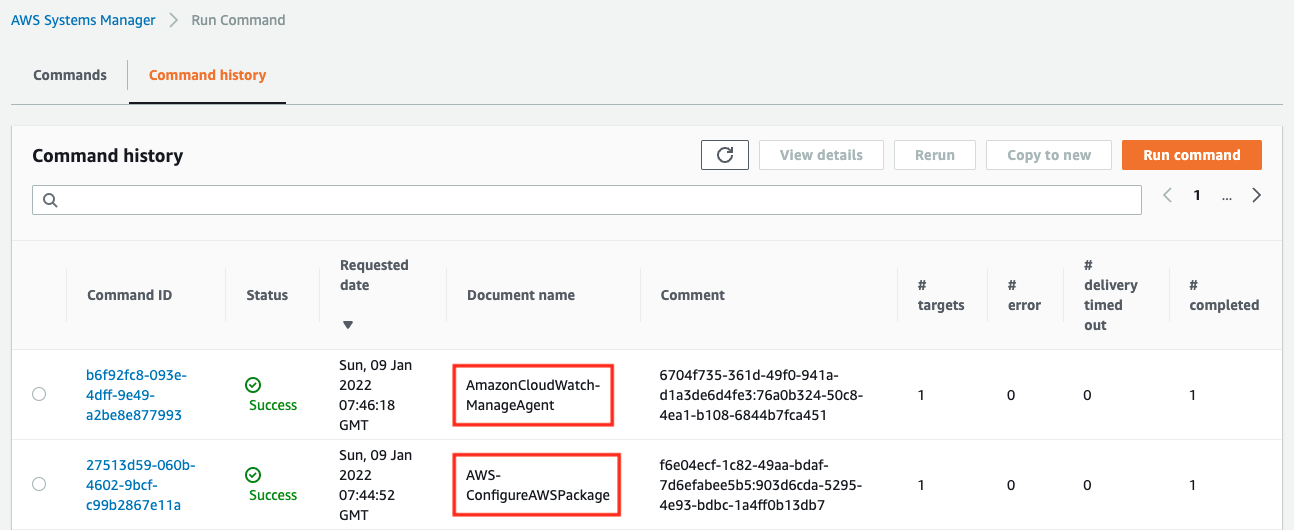
You can see that the two commands have indeed been executed and completed successfully.
Next, access the S3 bucket and check the log of the SSM Run Command execution.
First, here is the execution result of the CloudWatch Agent installation.
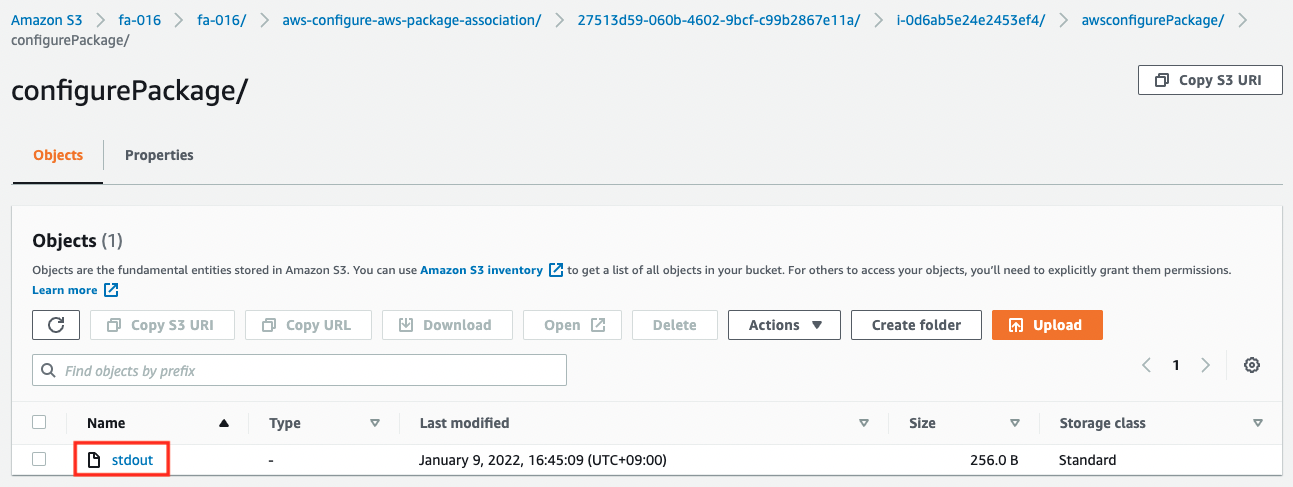
The contents of the file are as follows
Initiating arn:aws:ssm:::package/AmazonCloudWatchAgent 1.247349.0b251399 install
Plugin aws:runPowerShellScript ResultStatus Success
install output: Running install.ps1

Successfully installed arn:aws:ssm:::package/AmazonCloudWatchAgent 1.247349.0b251399
Code language: plaintext (plaintext)
You can see that it has been installed successfully.
Next is the result of running the CloudWatch Agent.
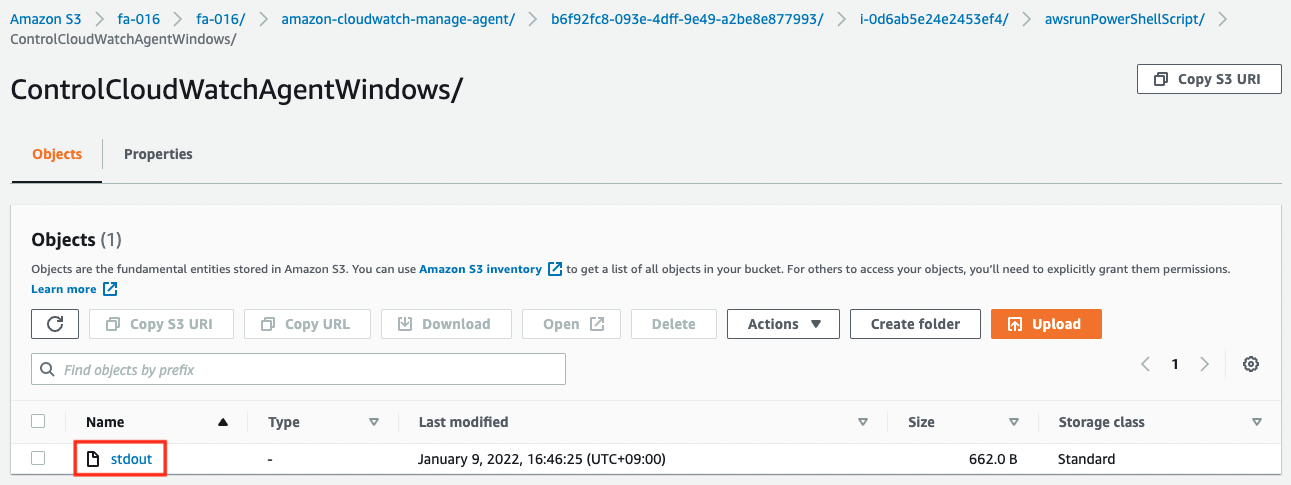
The contents of the file are as follows
****** processing amazon-cloudwatch-agent ******
Region: ap-northeast-1
credsConfig: map[]
Successfully fetched the config and saved in C:\ProgramData\Amazon\AmazonCloudWatchAgent\Configs\ssm_AmazonCloudWatch-windows.tmp
Start configuration validation...
2021/12/28 07:32:23 Reading json config file path: C:\ProgramData\Amazon\AmazonCloudWatchAgent\Configs\ssm_AmazonCloudWatch-windows.tmp ...
Valid Json input schema.
No csm configuration found.
Configuration validation first phase succeeded
Configuration validation second phase succeeded
Configuration validation succeeded
AmazonCloudWatchAgent has been stopped
AmazonCloudWatchAgent has been started
Code language: plaintext (plaintext)
You can see that it has been started successfully.
Access instance and check CloudWatch Agent is running
In the meantime, we will access the instance and check the activation status of CloudWatch Agent.
To access the instance, we will use SSM Session Manager.
$ aws ssm start-session \
--target i-0d6ab5e24e2453ef4

Starting session with SessionId: root-04cc7fc7ea067957c
Windows PowerShell
Copyright (C) Microsoft Corporation. All rights reserved.

PS C:\Windows\system32>
Code language: Bash (bash)
For more information on accessing instances using the SSM Session Manager, please refer to the following page.
Now that you have access, check the startup status.
PS C:\Windows\system32> Get-Service -Name AmazonCloudWatchAgent

Status   Name               DisplayName
------   ----               -----------
Running  AmazonCloudWatc... Amazon CloudWatch Agent
Code language: PowerShell (powershell)
You can see that the “Status” item is “Running”, indicating that it is working properly.
Check logs delivered by CloudWatch Agent
Let’s check the data that was delivered.
First, check the status of the streams in the log group.
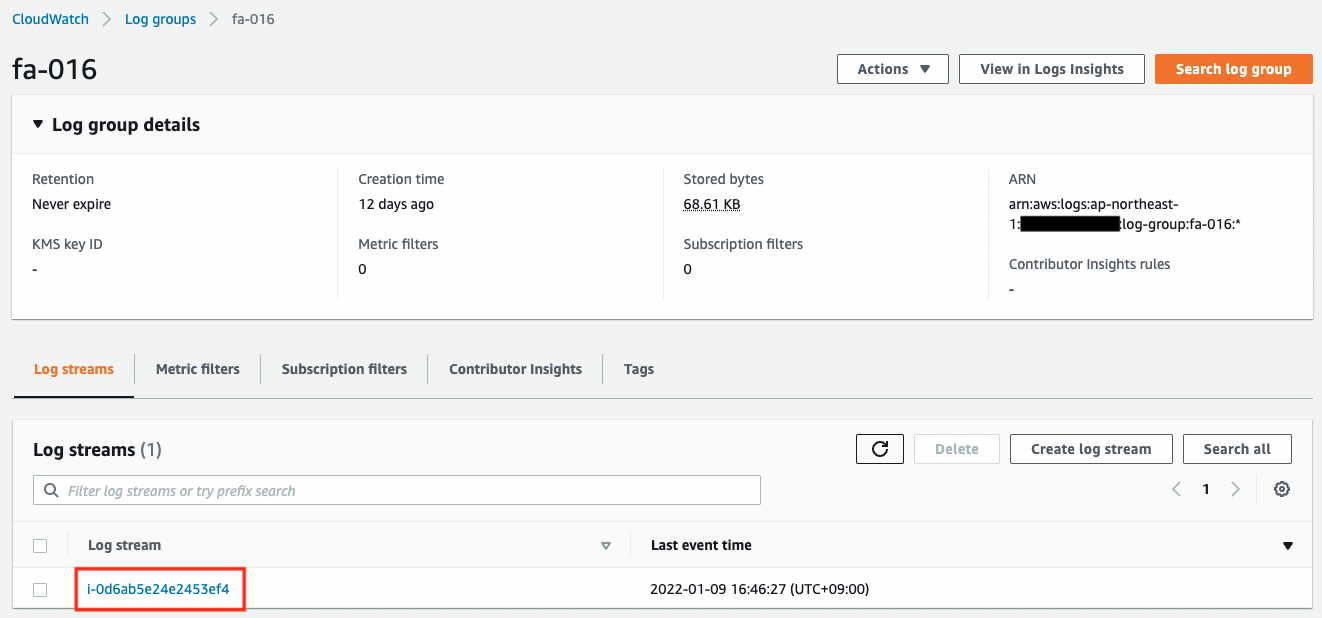
The log group name and stream name are as specified in the CloudWatch Agent configuration.
Next, we will check the logs delivered to the stream.
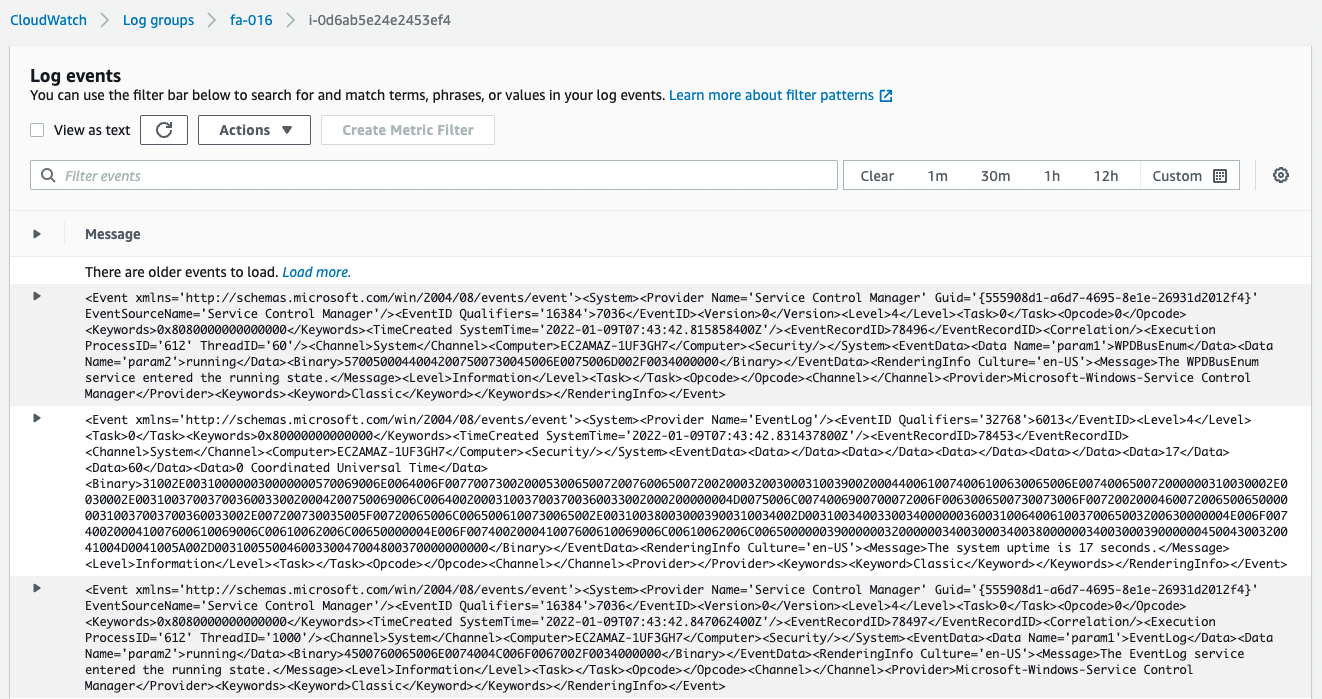
You can see that the logs are being distributed normally.
Check metrics delivered by CloudWatch Agent
Finally, we will check the metrics.
In the AWS Management Console, access the following
CloudWatch > Metrics > All metrics > CWAgent
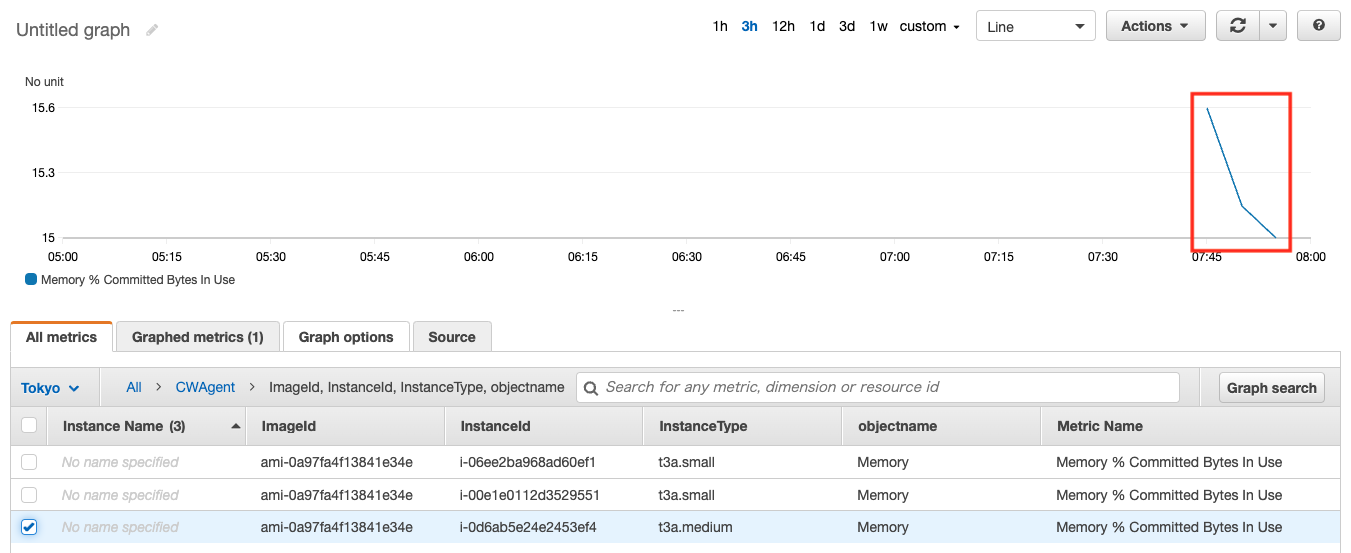
As shown above, the metrics have been delivered and the graph has been created.
Summary
We have reviewed the steps to install CloudWatch Agent on a Windows instance using SSM.
Verified that CloudWatch Agent can be used to deliver logs and metrics.