Configuration for Getting Started with FSx for Windows
This page is an introduction to FSx for Windows, and will cover accessing FSx for Windows storage from a Windows instance.
Environment
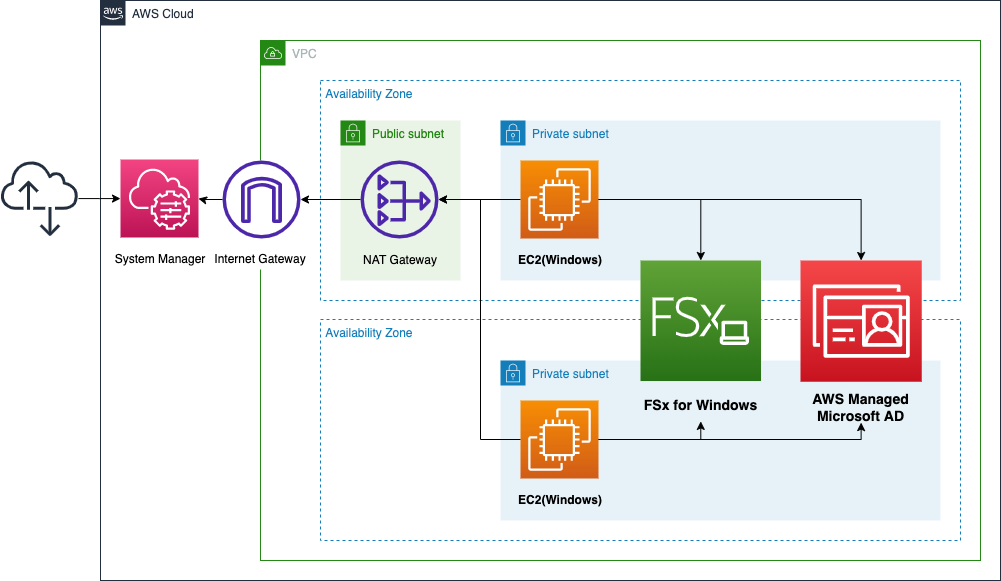
We will create private subnets in two AZs and place a Windows instance in each subnet. The OS of the instance will be the latest WindowsServer 2019.
Create FSx for Windows and associate both subnets.
Similarly, create AWS Managed Microsoft AD and associate the two subnets. This is because FSx for Windows is a service that works in conjunction with Active Directory (AD), as we will see later.
Use the SSM document AWS-JoinDirectoryServiceDomain to join the Windows instance to the AWS Managed Microsoft AD domain.
To verify the operation of FSx for Windows, follow the steps below.
- From one of the EC2 instances, write data to the shared folder that you created with FSx for Windows.
- Confirm that you can access the written file from the other EC2 instance.
CloudFormation template files
We will build the above configuration using CloudFormation.
We have placed the CloudFormation template at the following URL.
https://github.com/awstut-an-r/awstut-saa/tree/main/02/003
Explanation of key points of template file
We will cover the key points of each template file to configure this architecture.
Meet requirements for AWS Managed Microsoft AD and AWS-JoinDirectoryServiceDomain
In this configuration, we will use AWS Managed Microsoft AD. We will also use the SSM document AWS-JoinDirectoryServiceDomain to join the Windows instance to the AWS Managed Microsoft AD domain.
There are three main points to keep in mind when using the two services. 1.
- deploy AWS Managed Microsoft AD across subnets in 2AZ.
- Secure a route for Windows instances to access the Internet.
- Prepare the appropriate IAM roles (AmazonSSMManagedInstanceCore and AmazonSSMDirectoryServiceAccess) for the Windows instance.
For more details, please refer to the following page.

Security group for FSx for Windows allows SMB
The key resource is the security group. We will create two security groups, one for EC2 instances and one for FSx.
Resources:
  InstanceSecurityGroup:
    Type: AWS::EC2::SecurityGroup
    Properties:
      GroupName: !Sub ${Prefix}-InstanceSecurityGroup
      GroupDescription: Deny All.
      VpcId: !Ref VPC

  FSxSecurityGroup:
    Type: AWS::EC2::SecurityGroup
    Properties:
      GroupName: !Sub ${Prefix}-FSxSecurityGroup
      GroupDescription: Allow SMB from InstanceSecurityGroup.
      VpcId: !Ref VPC
      SecurityGroupIngress:
        - IpProtocol: tcp
          FromPort: !Ref SMBPort
          ToPort: !Ref SMBPort
          SourceSecurityGroupId: !Ref InstanceSecurityGroup
Code language: YAML (yaml)
FSx fow Windows-centric communication requirements are shown in File System Access Control with Amazon VPC.
If we focus on inbound communication in EC2 instances (SMB client in the above page) and FSx for Windows, it can be organized as follows
- EC2 instance: None
- FSx for Windows: SMB * from EC2 instance
Create the security groups according to the above.
The first one is the security group for EC2 instances. In this group, we do not specify the inbound communication to be allowed. This is because in this configuration, as described above, no inbound communication to the EC2 instance will occur.
The second is the security group for FSx for Windows. In this group, only inbound SMB communication is specified, as described above. By specifying the source as the security group for EC2 instances as described earlier, only SMB communication from EC2 instances is allowed.
Create Multi-AZ type FSx for Windows
Check the FSx for Windows.
Resources:
  FSxForWindows:
    Type: AWS::FSx::FileSystem
    Properties:
      FileSystemType: WINDOWS
      SecurityGroupIds:
        - !Ref FSxSecurityGroup
      StorageCapacity: !Ref StorageCapacity
      StorageType: SSD
      SubnetIds:
        - !Ref PrivateSubnet1
        - !Ref PrivateSubnet2
      WindowsConfiguration:
        ActiveDirectoryId: !Ref MSAD
        DeploymentType: MULTI_AZ_1
        PreferredSubnetId: !Ref PrivateSubnet1
        ThroughputCapacity: !Ref ThroughputCapacity
Code language: YAML (yaml)
Specify the type of FSx to be created in the FileSystemType property. In this case, we will create FSx for Windows, so specify “WINDOWS”.
Specify the storage to be provisioned in the StorageCapacity and StorageType properties. In this case, we will reserve 32GB for the SSD type.
Specify the subnet to which FSx will be connected in the SubnetIds property. Specify the two subnets mentioned above.
Specify the parameters related to FSx for Windows in the WindowsConfiguration property.
Specify the AD in the ActiveDirectoryId property. The reason for specifying the AD resource is that FSx for Windows is a service that works in conjunction with AD.
Amazon FSx works with Microsoft Active Directory (AD) to integrate with your existing Microsoft Windows environments… When you create a file system with Amazon FSx, you join it to your Active Directory domain to provide user authentication and file- and folder-level access control.
Working with Microsoft Active Directory in FSx for Windows File Server
Specify the type of deployment to AZ in the DeploymentType property. In this case, we are going to use a multi-AZ deployment, so we will specify “MULTI_AZ_1”. By using multi-AZ deployment, the availability will be increased and it will be able to withstand failures in units of AZ.
they are designed to provide continuous availability to data, even when an Availability Zone is unavailable. In a Multi-AZ deployment, Amazon FSx automatically provisions and maintains a standby file server in a different Availability Zone. Any changes written to disk in your file system are synchronously replicated across Availability Zones to the standby.
Availability and durability: Single-AZ and Multi-AZ file systems
In the PreferredSubnetId property, specify the subnet on which FSx for Windows normally runs. In this case, specify “PrivateSubnet1”. This will cause FSx for Windows to operate on the PrivateSubnet1 side under normal circumstances, and on the PrivateSubnet2 side in the event of a failure.
In the ThroughputCapacity property, specify the throughput of FSx for Windows.
Throughput capacity is one factor that determines the speed at which the file server hosting the file system can serve file data. Higher levels of throughput capacity also come with higher levels of I/O operations per second (IOPS) and more memory for caching of data on the file server.
Managing throughput capacity
The range is from 8 to 2048, but this time we will specify 8 (MB/s).
Architecting
Using CloudFormation, we will build this environment and check its actual behavior.
Create CloudFormation stacks and check resources in stacks
Create a CloudFormation stack.
For more information on creating stacks and how to check each stack, please refer to the following page.

After checking the resources for each stack, the information for the main resource created this time is as follows
- ID of instance 1: i-0cd9e7d57d0cc526f
- ID of Instance 2: i-089301f6bd45a53e2
- ID of AWS Managed Microsoft AD: d-956709edaf
- Domain name for AD: awstut.com
- Domain Admin password: P@ssw0rd
- ID of FSx for Windows: fs-0c4a95b9f68ba3dc3
Check the creation status of AWS Managed Microsoft AD from the AWS Management Console.
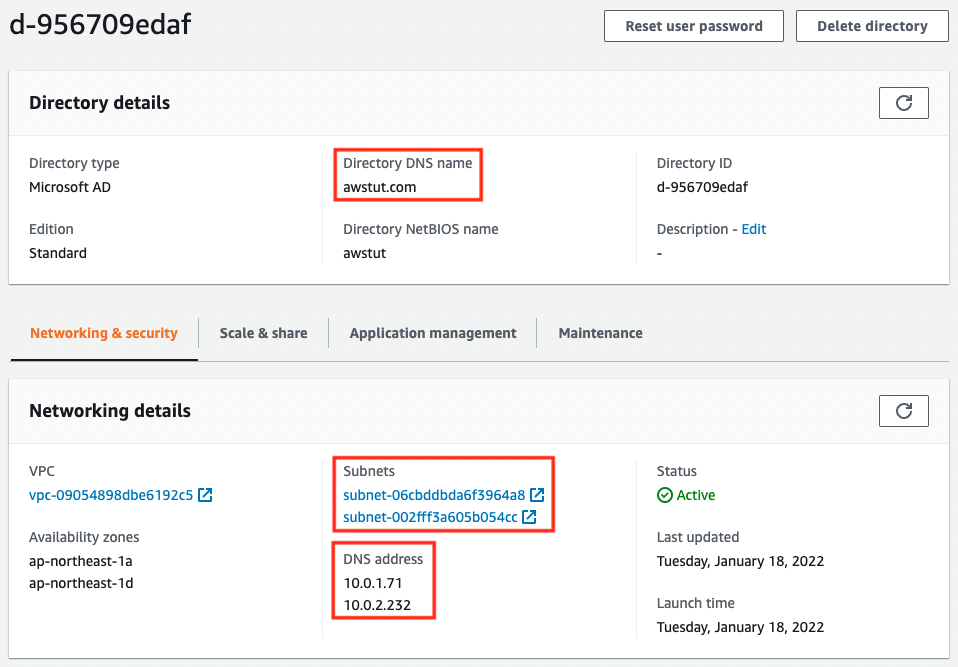
If you look at the value of Directory DNS name, you will see that the AD domain name is set as specified.
As specified in the CloudFormation template, two Subnets have been specified. Correspondingly, two DNS addresses have been assigned.
Next, let’s check FSx for Windows.
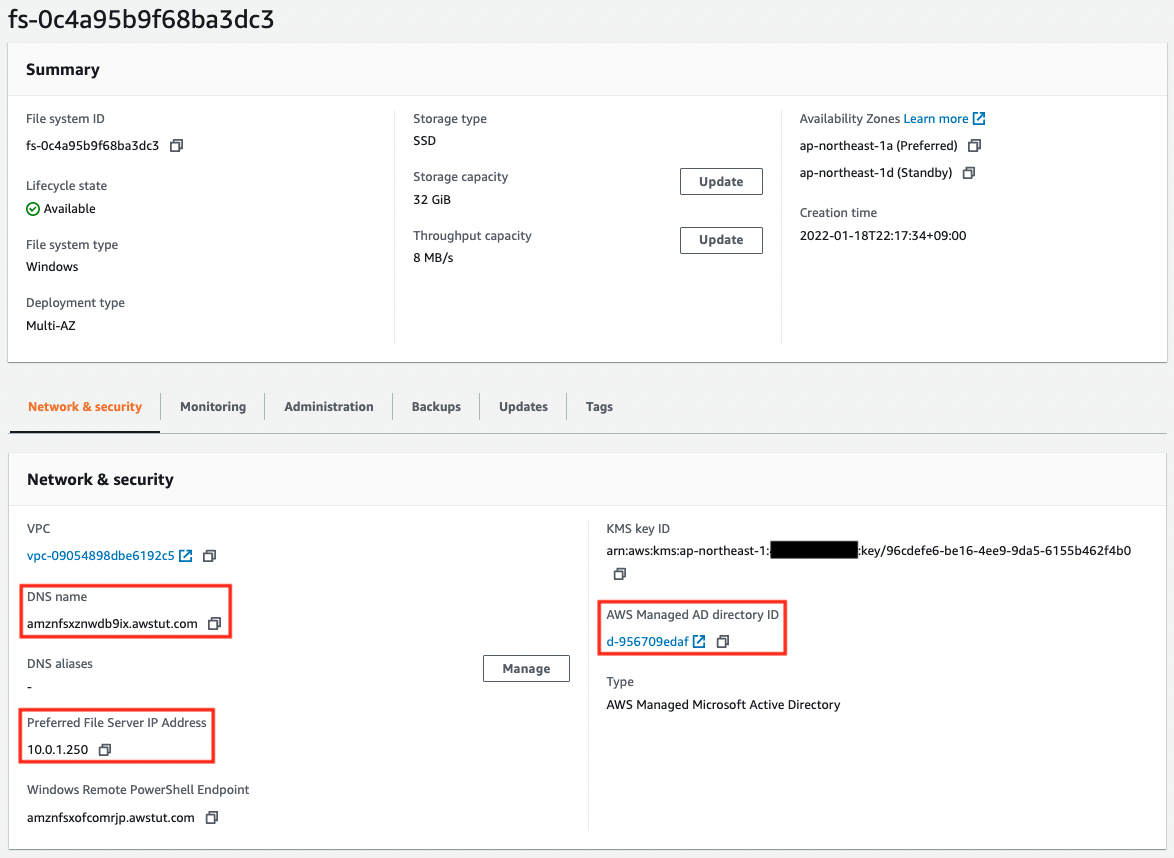
The value of DNS name is the DNS name assigned to the created FSx for Windows. We will use this value later.
The value of Preferred File Server IP Address is the IP address assigned to FSx for Windows. In this case, “amznfsxznwdb9ix.awstut.com” has been assigned.
The value of AWS Managed AD directory ID is specified as the ID of the AD resource that we checked earlier. In this case, “10.0.1.250” has been assigned.
Tunneling access via SSM Session Manager with remote desktop connection
Now that we are ready, we will access the first Windows instance.
This time, we will use tunneled access via SSM Session Manager and access it via a remote desktop connection.
For more information about SSM Session Manager, please refer to the following page.
First, get the password to access the instance.
$ aws ec2 get-password-data \
--instance-id i-0cd9e7d57d0cc526f \
--priv-launch-key MyKeyPair.pem
{
    "InstanceId": "i-0cd9e7d57d0cc526f",
    "PasswordData": "lX6K2p7K2vZ2pd$Vn7BVy6McSU;riCo;"
}
Code language: Bash (bash)
Next, run the following command on the client side to perform tunneling access to the instance.
% aws ssm start-session \
--target i-0cd9e7d57d0cc526f \
--document-name AWS-StartPortForwardingSession \
--parameters "portNumber=3389, localPortNumber=13389"
Code language: Bash (bash)
Next, start the Remote Desktop Client on the client side and make a remote desktop connection to localhost:13389.
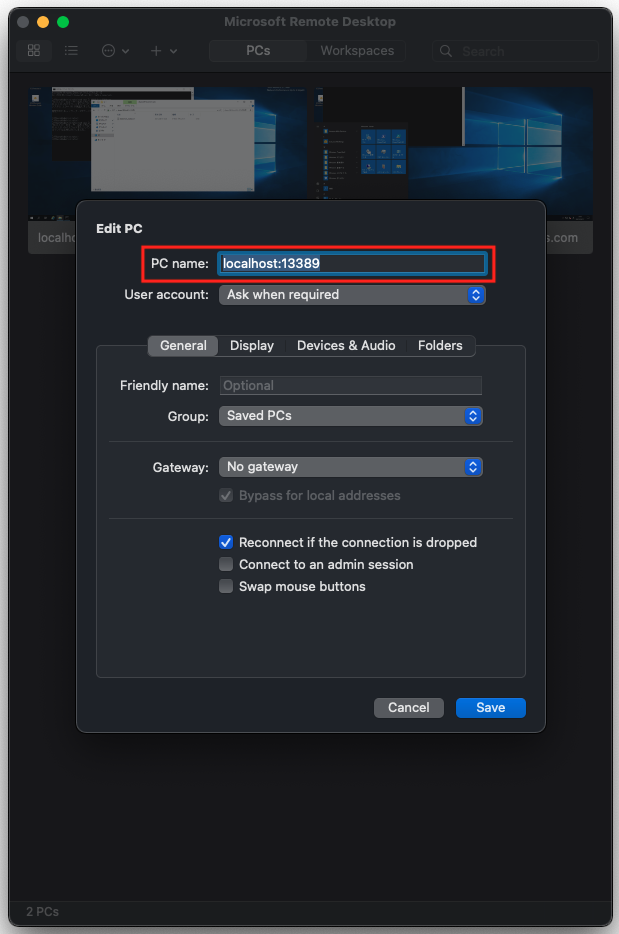
Connect to the remote desktop using your user name (Administrator) and the password you have just confirmed.
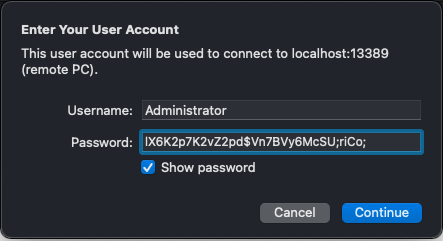
After a short wait, the desktop will appear and the remote desktop connection will be completed.
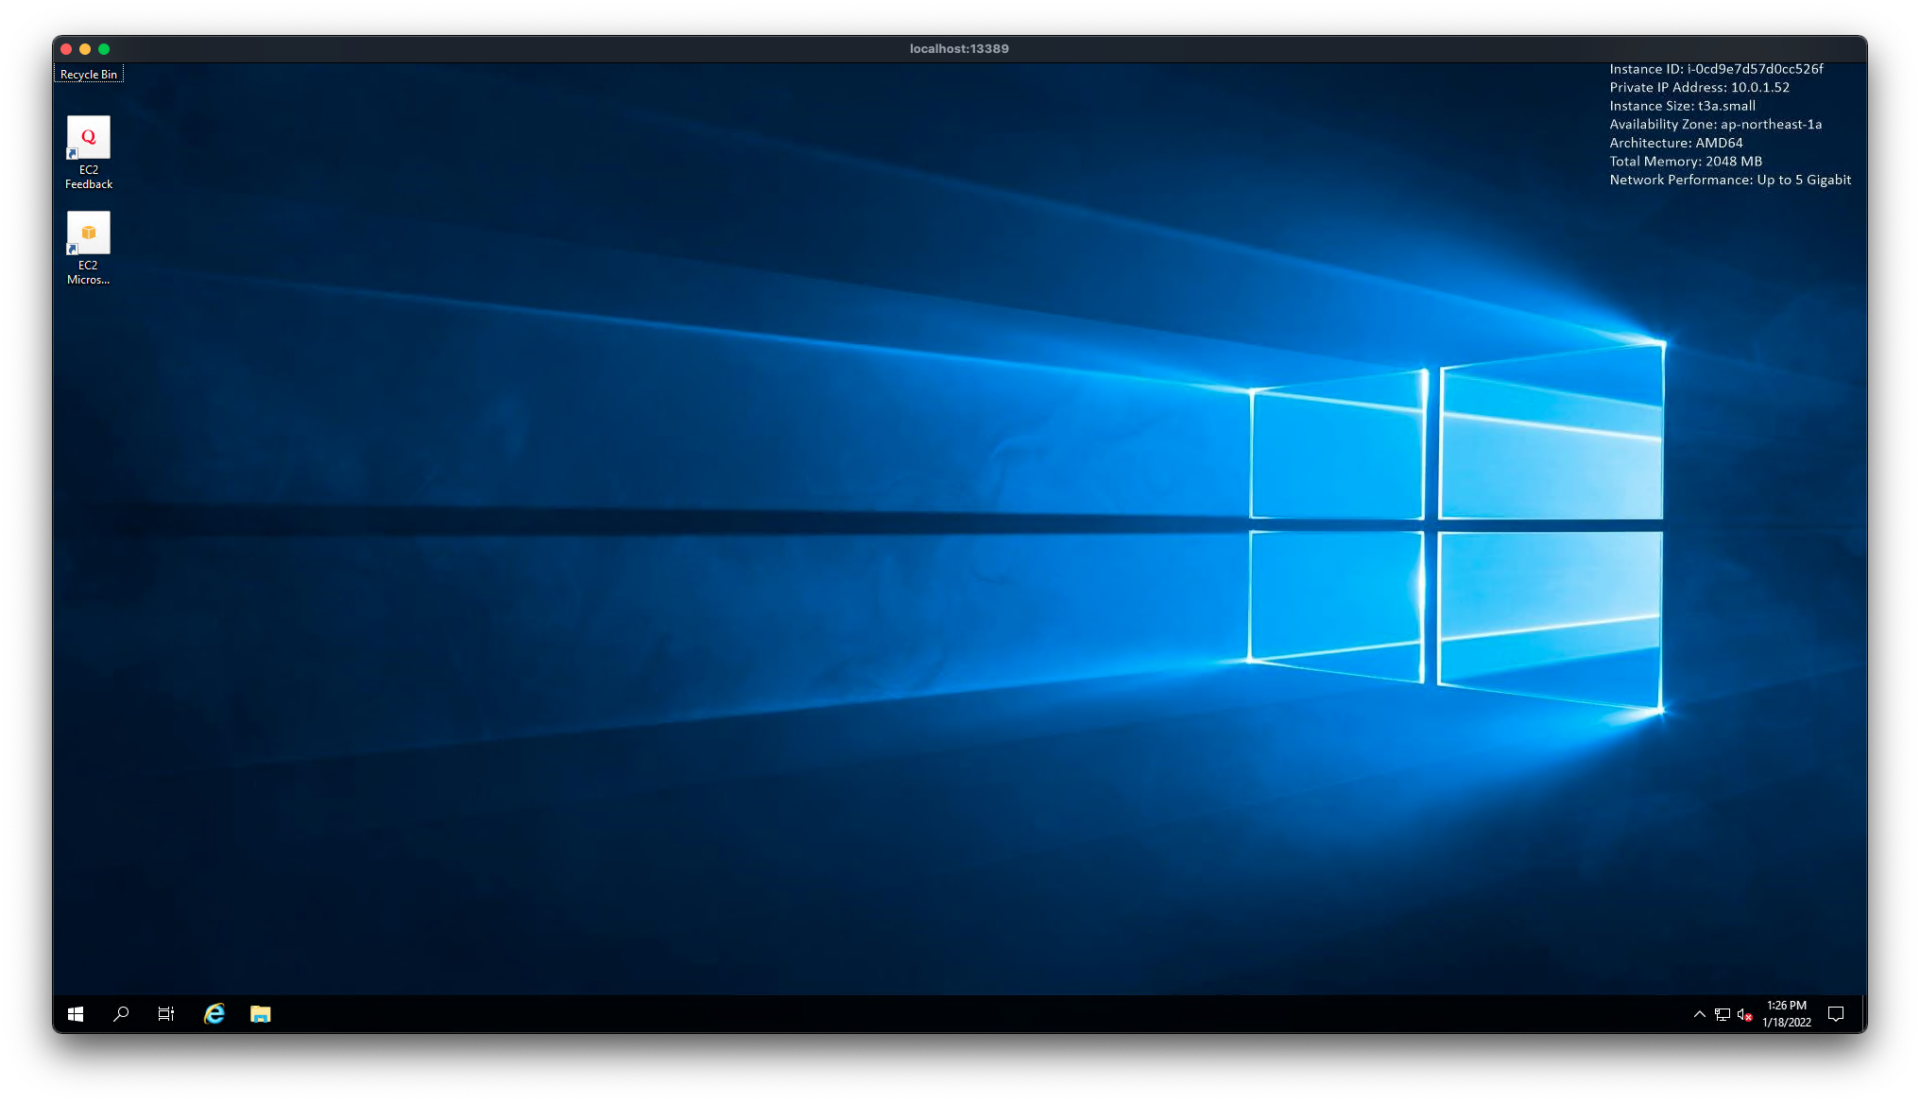
Mount FSx for Windows on Windows instance
After logging in, mount FSx for Windows.
To mount FSx for Windows, you can either specify the DNS name of the resource or its IP address. To mount FSx for Windows, specify either the DNS name or IP address of the resource, depending on the domain membership status of the instance. If it is not, it can only be accessed by IP address.
First, try to resolve the DNS name of FSx for Windows at the command prompt.
C:\Users\Administrator>nslookup amznfsxznwdb9ix.awstut.com
Server:  awstut.com
Address:  10.0.1.71

Name:    amznfsxznwdb9ix.awstut.com
Addresses:  10.0.1.250
          10.0.2.184
Code language: DOS .bat (dos)
The IP address of the DNS server is the address of AWS Managed Microsoft AD (10.0.1.71). We can now see that the instance is in the domain of the same AD.
Next, we see that the name resolution results are “10.0.1.250” and “10.0.2.184”. These are the addresses assigned to the FSx for Windows that we created this time.
The next step is to actually mount FSx for Windows on the instance.
C:\Users\Administrator>net use H: \\amznfsxznwdb9ix.awstut.com\share
Enter the user name for 'amznfsxznwdb9ix.awstut.com': Admin@awstut.com
Enter the password for amznfsxznwdb9ix.awstut.com:
The command completed successfully.
Code language: DOS .bat (dos)
Enter the user name and password when mounting. In our configuration, it will be as follows
- User name: Admin@awstut.com
- Password: P@ssw0rd
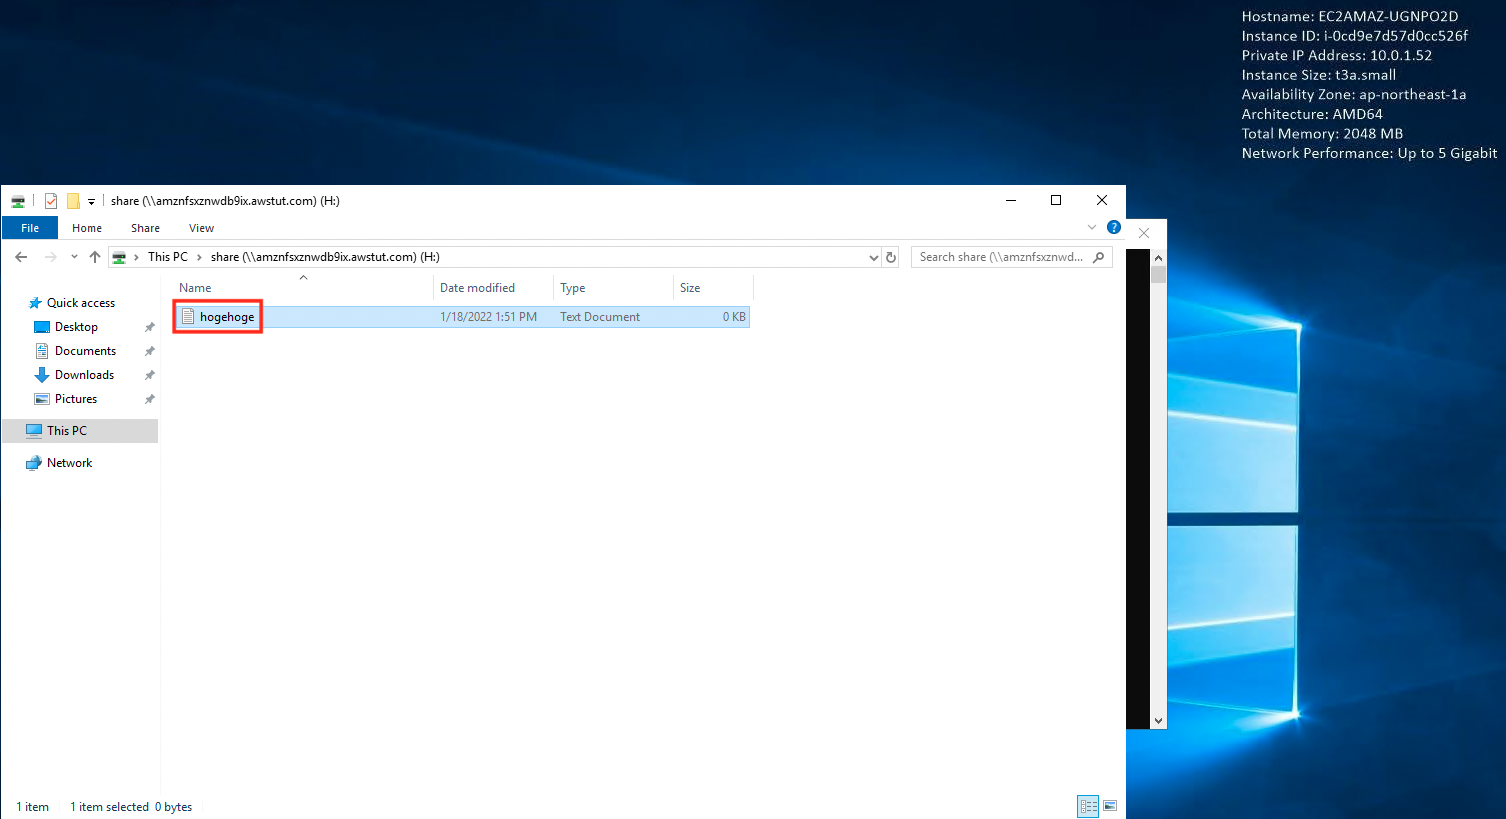
If the mount is successful, the storage area of FSx for Windows will be displayed as follows.
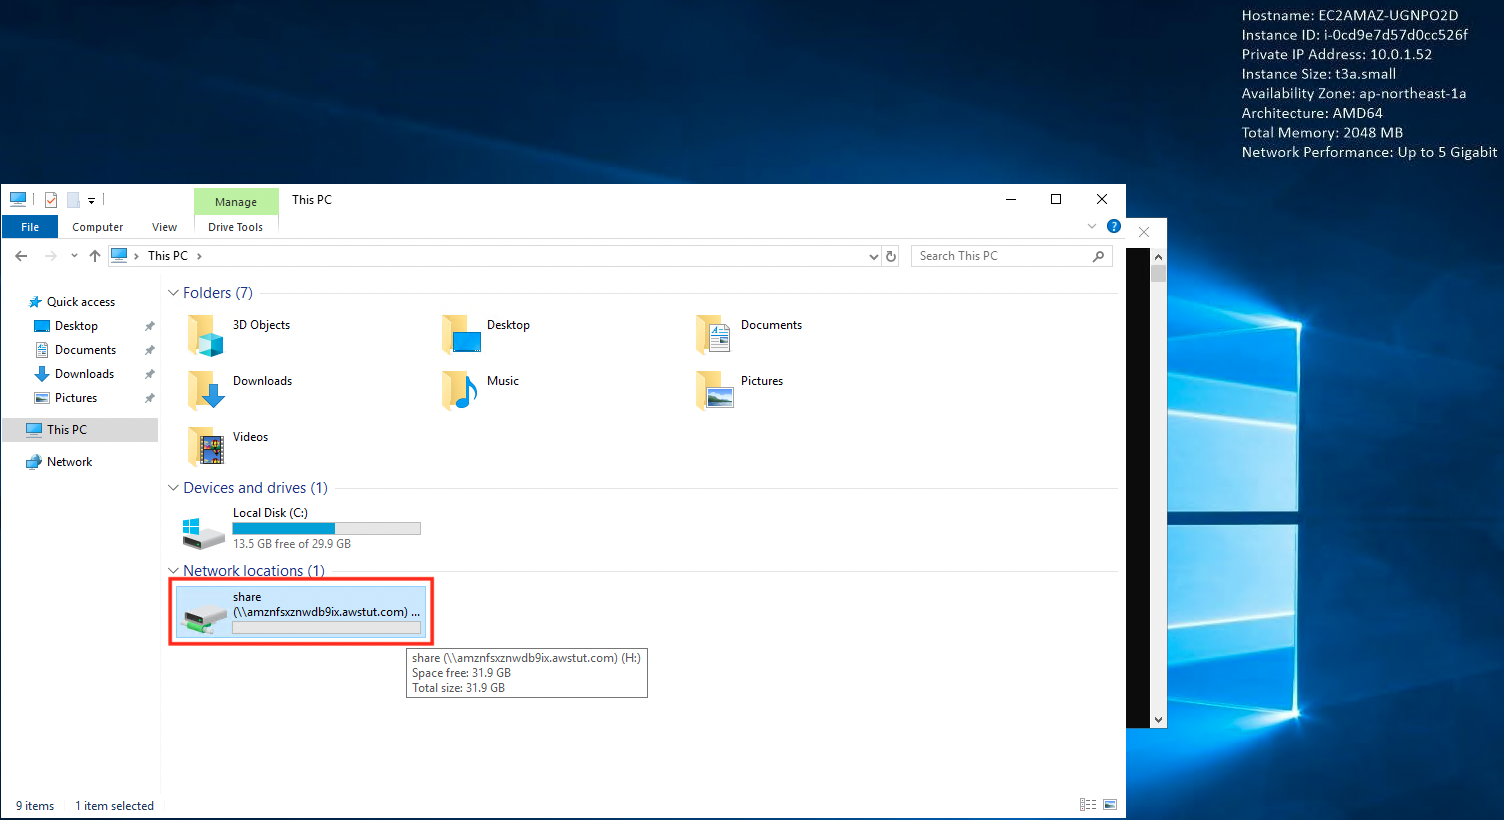
As a verification, create and install one file.
Next, connect to Instance2. Follow the same procedure to make the connection. Then mount FSx for Windows using the same procedure.
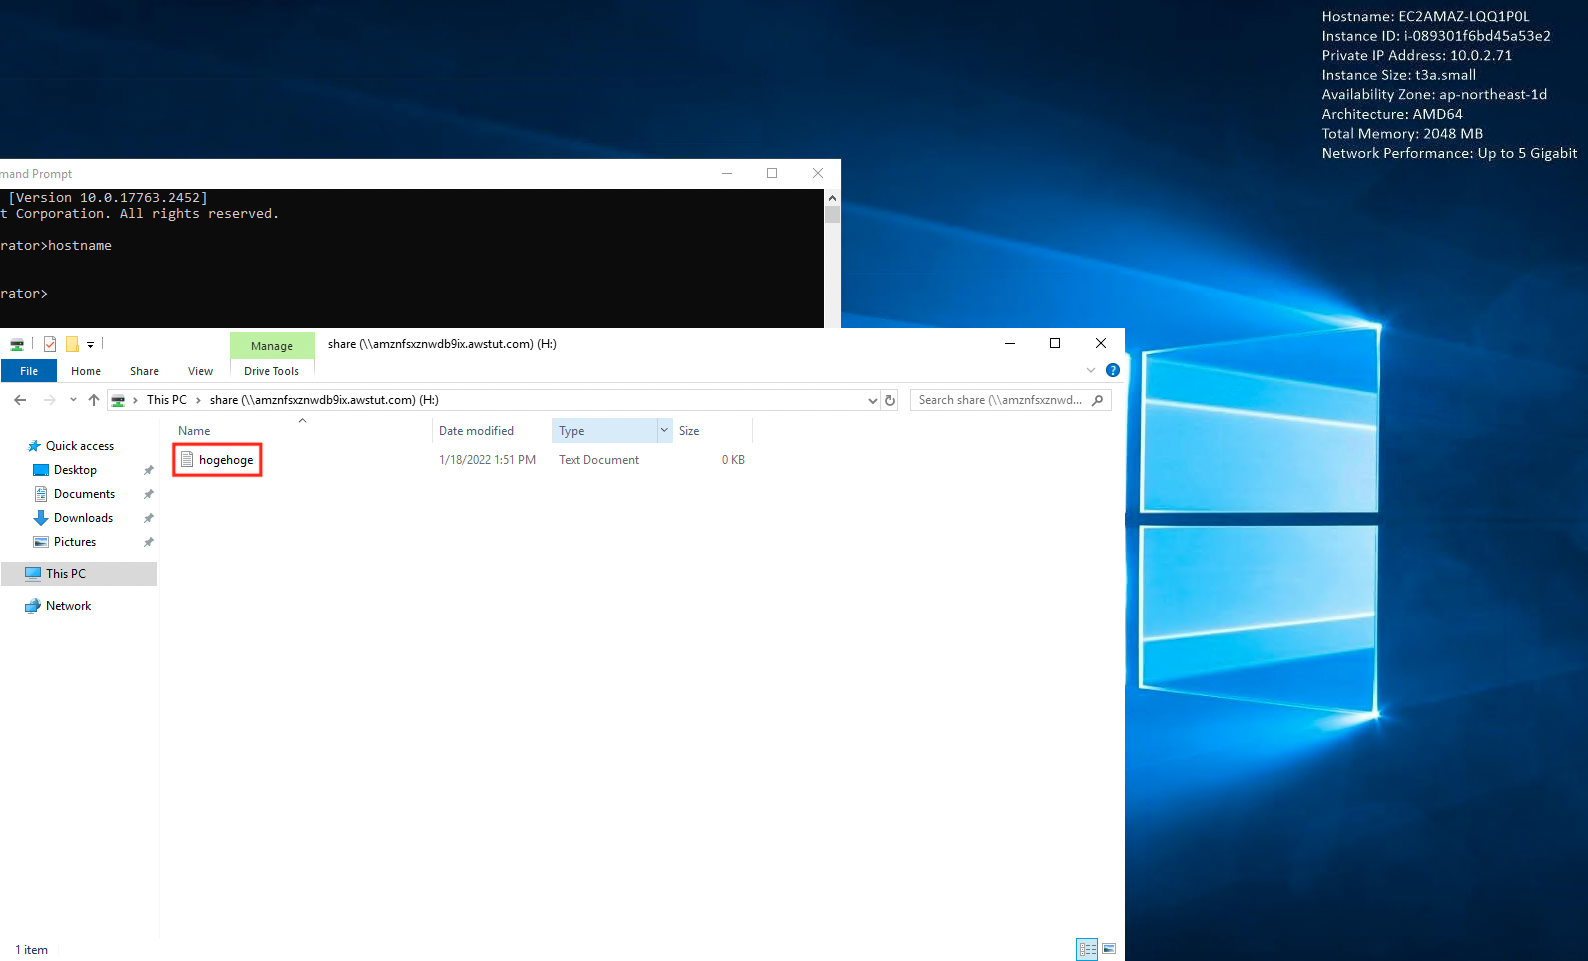
I was able to mount it successfully and access the files installed by Instance1.
Summary
We have created FSx for Windows, mounted it on a Windows instance, and confirmed how to share data between instances.
We confirmed that FSx and the instance must be in the same domain in order to access FSx for Windows by DNS name.