Configuration for Registering ALB to Route 53
In the following page, we have introduced how to attach an EC2 instance in a private subnet to ALB.
However, in the above configuration, you can only access the domain name (XXXX.[region-name].elb.amazonaws.com) that is automatically created when the ALB is created. This time, we will use Route 53 and configure it so that we can access ALB with our own domain.
Environment
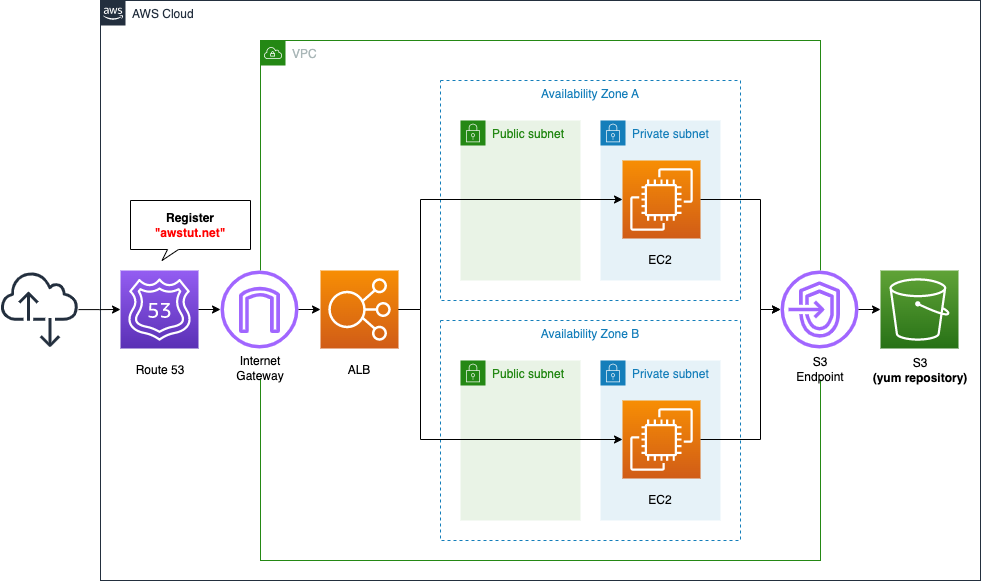
The basic configuration is identical to the one described in the previous page. This time, we will use Route 53 to acquire a domain and associate ALB with the domain.
For details on how to acquire a domain using Route 53, please refer to the AWS official website.
In this case, we will obtain a domain name “awstut.net” and aim to access the ALB with this domain name.
CloudFormation Template Files
We will build the above configuration using CloudFormation. We have placed the CloudFormation template at the following URL.
https://github.com/awstut-an-r/awstut-fa/tree/main/022
Explanation of key points of template files
In this page, we will only explain the Route 53 area. For information on how to attach EC2 in the private subnet to ALB and how to run yum on EC2 instances in the private subnet, please refer to the following page.

Registering ALB with Alias Record Type
Define Route 53 resources in fa-022-route53.yaml.
Resources:
  DnsRecord:
    Type: AWS::Route53::RecordSet
    Properties:
      HostedZoneId: !Ref HostedZoneId
      Name: !Ref DomainName
      Type: A
      AliasTarget:
        DNSName: !Ref ALBDnsName
        HostedZoneId: !Ref ALBHostedZoneId
Code language: YAML (yaml)
If you want to associate ALB with your own domain in Route 53, the key setting is the Type property, which needs to be registered as an alias record in order to register ALB.
Amazon Route 53 alias records provide a Route 53–specific extension to DNS functionality. Alias records let you route traffic to selected AWS resources, such as CloudFront distributions and Amazon S3 buckets. They also let you route traffic from one record in a hosted zone to another record.
Choosing between alias and non-alias records
In general, the value meaning an Alias Record is “A” or “AAAA”, but since we are using IPv4 type ALB, we will specify “A”.
Set the information of the associated domain in the HostedZoneId and Name properties. In this case, we will specify “awstut.net”, so specify the host zone ID and domain name of the domain.
Set the ALB information in the AliasTarget property, and specify the host zone ID and domain name of the ALB to be created in the HostedZoneId and DNSName properties. In the HostedZoneId and DNSName properties, specify the host zone ID and domain name of the ALB you want to create. The host zone ID of the ALB has a specific value that must be set. According to “Elastic Load Balancing endpoints and quotas“, the value for the Tokyo (ap-northeast-1) region is “Z14GRHDCWA56QT”.
Architecting
We will use CloudFormation to build this environment and check its actual behavior.
Create CloudFormation stacks and check resources in stacks
We will create a CloudFormation stack.
For information on how to create a stack and check each stack, please refer to the following page

After checking the resources in each stack, the information for the main resources created this time is as follows
- ID of Instance 1: i-0e0a2b4983bab36ae
- ID of instance 2: i-018fdeb22dc242be0
- ID of ALB: fa-022-ALB
- Route 53 record: awstut.net
We will also check the creation status of the resources from the AWS Management Console. First, we will check the creation status of the EC2 instances.

Two instances have been created successfully. Next, we will check the ALB.
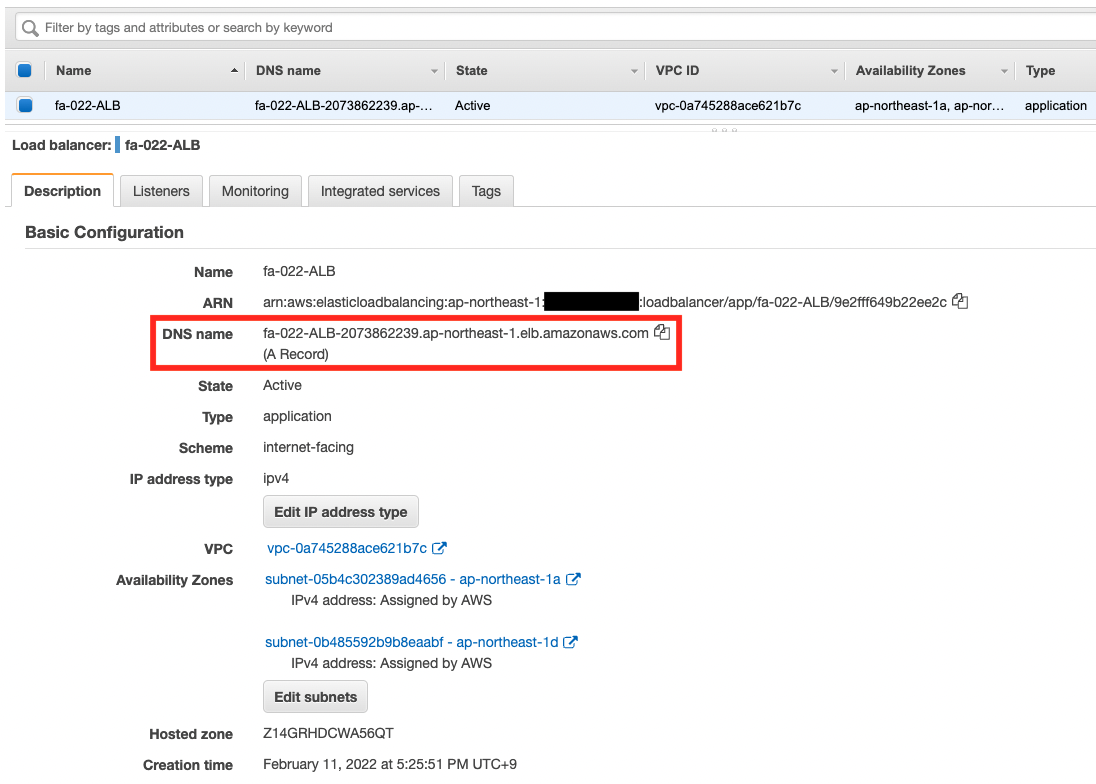
You can see that it has been created successfully as well. Check the target group of this ALB.
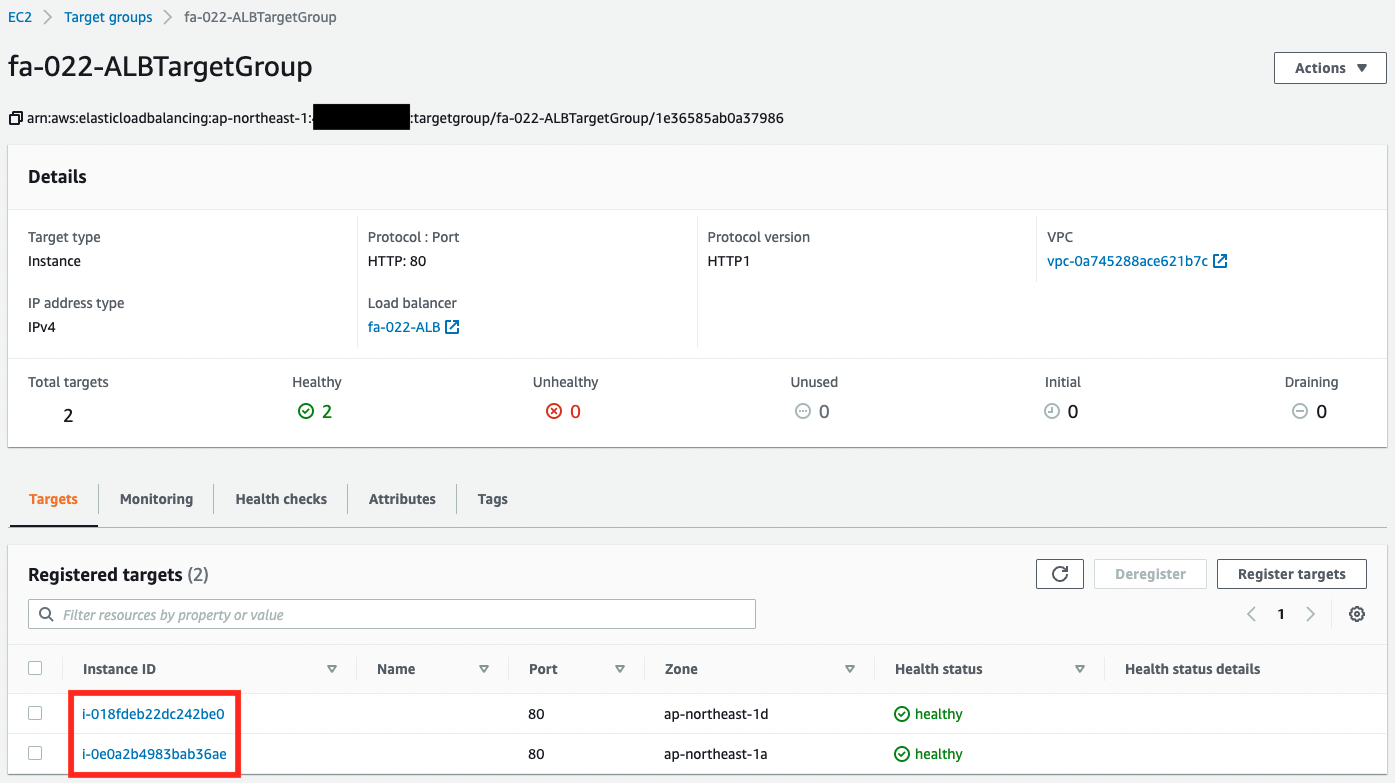
You can see that the two EC2 instances that we just checked are registered. This means that when you access this ALB, you will be able to access the two instances.
Finally, we will also check the status of the Route 53 configuration.
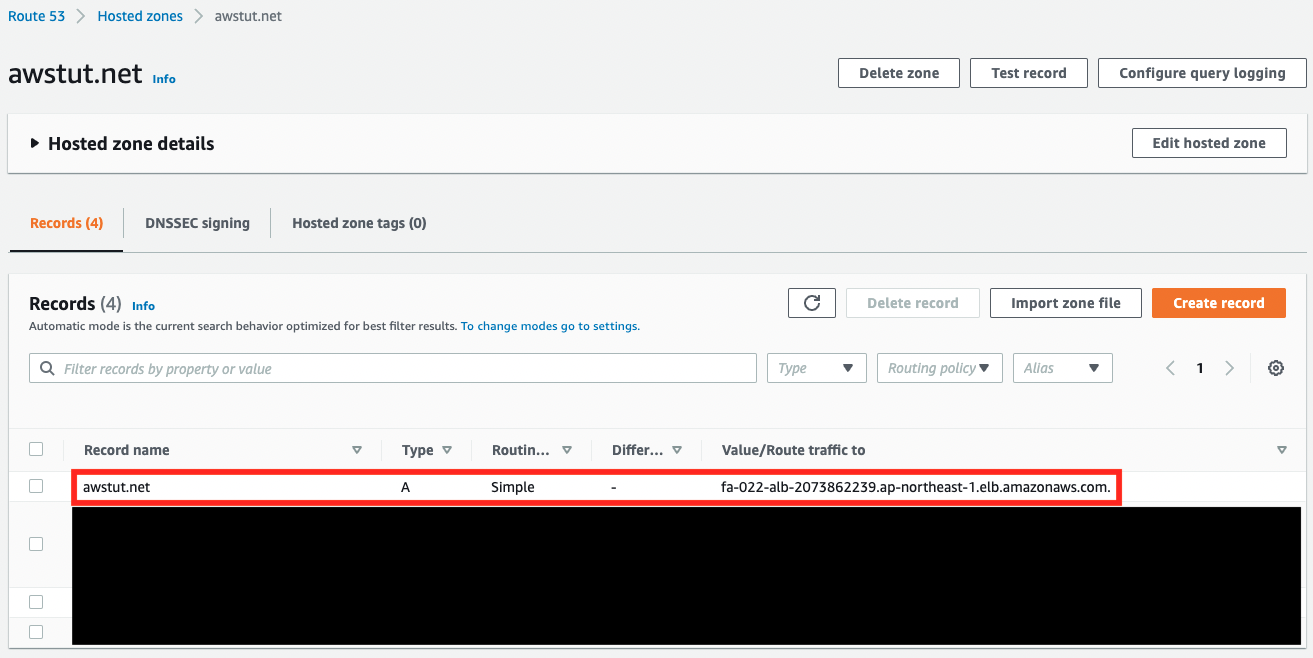
You can see that “awstut.net” is associated with the DNS name of the ALB that we just checked.
Accessing ALB with your own domain name
Now that everything is ready, access your domain name from your browser.


Two pages are now displayed for each access. This is because we configured the EC2 instance to display its own instance ID on the root page during initialization. As you can see above, you can access the ALB using your own domain, and access the two EC2 instances associated with the ALB.
Summary
We have now confirmed how to use Route 53 to access the ALB using your own domain.
We confirmed that you should use an alias record when registering an ALB with Route 53.