Using Image Builder to create an AMI for WordPress
The following pages discuss the Image Builder.
In this page, we will create an AMI for WordPress as a specific example of using Image Builder.
Environment
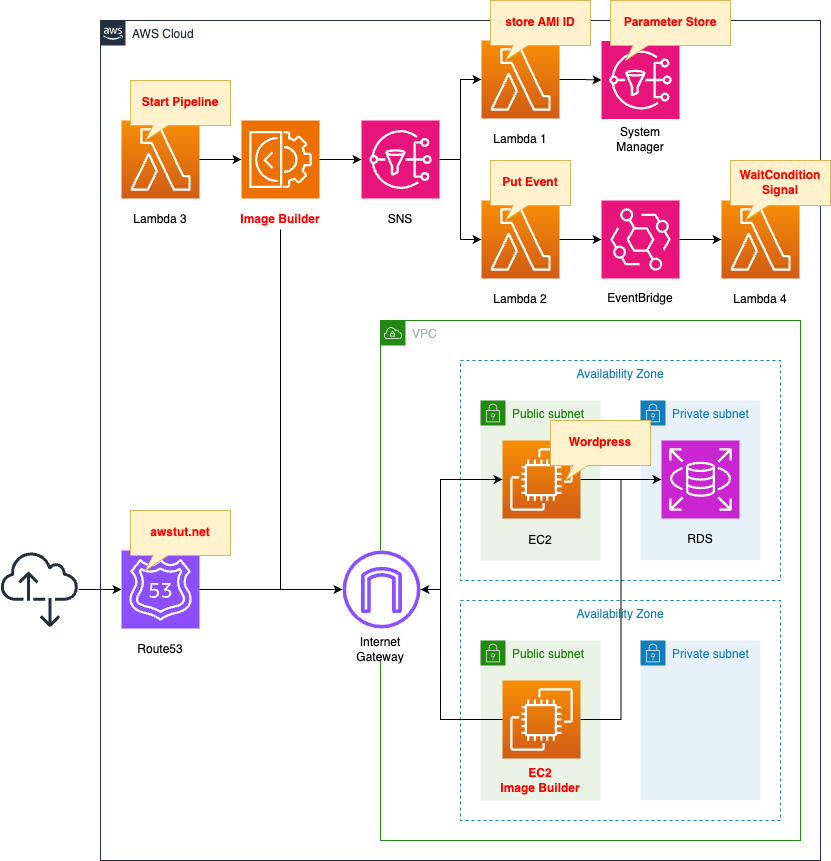
The basic structure is the same as the page introduced at the beginning of this document.
There are three changes.
The first point is to create a private creation and place the RDS DB instance there. This DB instance is of type MySQL. This DB instance will act as a WordPress DB server.
The second point is the location of the EC2 instance to be launched by Image Builder. The purpose of this instance is for AMI creation and is used temporarily. In the opening page, this instance was created in the default VPC. In this case, we will access the aforementioned DB instance when building the AMI, so we will place it in the same VPC as the instance.
The third point is to use Route53. This will allow you to access your WordPress site with your own domain. In this case, we will use the domain awstut.net, which we obtained with Route53. Create an A record in Route53. This record associates the domain with the Elastic IP of the WordPress server.
CloudFormation template files
The above configuration is built with CloudFormation. The CloudFormation templates are placed at the following URL
https://github.com/awstut-an-r/awstut-fa/tree/main/144
Explanation of key points of template files
This page focuses on how to create an AMI for WordPress using Image Builder.
For basic information about Image Builder, please review the following pages.
Image Builder
Resources:
  Component:
    Type: AWS::ImageBuilder::Component
    Properties:
      Data: !Sub |
        schemaVersion: 1.0
        phases:
          - name: build
            steps:
              - name: InstallWordPress
                action: ExecuteBash
                inputs:
                  commands:
                    - yum update -y
                    - yum install -y httpd
                    - amazon-linux-extras enable -y php7.4

                    - yum install -y php php-gd php-mysqlnd php-xmlrpc -y
                    - yum install -y mariadb

                    - systemctl start httpd
                    - systemctl enable httpd

                    - cd /var/www/html

                    - curl -O https://raw.githubusercontent.com/wp-cli/builds/gh-pages/phar/wp-cli.phar
                    - chmod +x wp-cli.phar
                    - mv wp-cli.phar /usr/local/bin/wp
                    - wp core download --locale=ja
                    - wp core config --dbname="${DBName}" --dbuser="${DBMasterUsername}" --dbpass="${DBMasterUserPassword}" --dbhost="${DBInstanceEndpointAddress}"
                    - wp core install --url="http://${DomainName}" --title="${WordPressTitle}" --admin_user="${WordPressAdminUser}" --admin_password="${WordPressAdminPassword}" --admin_email="${WordPressAdminEmail}"
      Name: !Sub "${Prefix}-Component"
      Platform: !Ref ImageBuilderPlatform
      SupportedOsVersions:
        - !Ref ImageBuilderSupportedOsVersion
      Version: !Ref ImageBuilderVersion

  ImageRecipe:
    Type: AWS::ImageBuilder::ImageRecipe
    Properties:
      Components:
        - ComponentArn: !Ref Component
      Name: !Sub "${Prefix}-ImageRecipe"
      ParentImage: !Ref ImageBuilderParentImage
      Version: !Ref ImageBuilderVersion

  InfrastructureConfiguration:
    Type: AWS::ImageBuilder::InfrastructureConfiguration
    Properties:
      InstanceProfileName: !Ref ImageBuilderRoleProfile
      InstanceTypes:
        - !Ref InstanceType
      Name: !Sub "${Prefix}-InfrastructureConfiguration"
      SecurityGroupIds:
        - !Ref InstanceSecurityGroup
      SnsTopicArn: !Ref Topic
      SubnetId: !Ref PublicSubnet2

  DistributionConfiguration:
    Type: AWS::ImageBuilder::DistributionConfiguration
    Properties:
      Distributions:
        - Region: !Ref AWS::Region
          AmiDistributionConfiguration: {}
      Name: !Sub "${Prefix}-DistributionConfiguration"

  ImagePipeline:
    Type: AWS::ImageBuilder::ImagePipeline
    Properties:
      DistributionConfigurationArn: !Ref DistributionConfiguration
      ImageRecipeArn: !Ref ImageRecipe
      InfrastructureConfigurationArn: !Ref InfrastructureConfiguration
      Name: !Sub "${Prefix}-ImagePipeline"
      Status: ENABLED

  ImageBuilderRoleProfile:
    Type: AWS::IAM::InstanceProfile
    Properties:
      Path: /
      Roles:
        - !Ref ImageBuilderRole

  ImageBuilderRole:
    Type: AWS::IAM::Role
    DeletionPolicy: Delete
    Properties:
      AssumeRolePolicyDocument:
        Version: 2012-10-17
        Statement:
          - Effect: Allow
            Action: sts:AssumeRole
            Principal:
              Service:
                - ec2.amazonaws.com
      ManagedPolicyArns:
        - arn:aws:iam::aws:policy/AmazonSSMManagedInstanceCore
        - arn:aws:iam::aws:policy/EC2InstanceProfileForImageBuilder
Code language: YAML (yaml)
There are two key resources for creating an AMI for WordPress.
The first is a component. This resource defines the WordPress installation and initial configuration procedures. Specifically, we first install and activate the packages for running WordPress (Apache, PHP).
Then use WP-CLI to configure WordPress.
Specifically, the following will be implemented
- Installing WP-CLI
- Download WordPress itself
- Setup of wp-config.php
- WordPress Installation
The second is the infrastructure configuration. The SubnetId property is important. The component states that during the AMI build, WordPress is to be installed as well. This means that the RDS instance, the DB server, must be accessible. This means that the EC2 instance for Image Builder must be placed on the subnet within the VPC where the DB instance is running.
In addition, this EC2 instance must have access to the Internet. This instance will download the WP-CLI and WordPress itself, as well as access SSM and S3 for the Image Builder to work properly.
Place the instance on a public subnet (PublicSubnet2) for the instance to communicate to the Internet.
Check the details of this subnet.
Resources:
  VPC:
    Type: AWS::EC2::VPC
    Properties:
      CidrBlock: !Ref VPCCidrBlock

  IGW:
    Type: AWS::EC2::InternetGateway

  IGWAttachment:
    Type: AWS::EC2::VPCGatewayAttachment
    Properties:
      VpcId: !Ref VPC
      InternetGatewayId: !Ref IGW

  PublicSubnet2:
    Type: AWS::EC2::Subnet
    Properties:
      AvailabilityZone: !Sub "${AWS::Region}${AvailabilityZone2}"
      CidrBlock: !Ref CidrIp2
      MapPublicIpOnLaunch: true
      VpcId: !Ref VPC

  PublicRouteTable:
    Type: AWS::EC2::RouteTable
    Properties:
      VpcId: !Ref VPC

  RouteToInternet:
    Type: AWS::EC2::Route
    Properties:
      RouteTableId: !Ref PublicRouteTable
      DestinationCidrBlock: 0.0.0.0/0
      GatewayId: !Ref IGW

  PublicSubnetRouteTableAssociation2:
    Type: AWS::EC2::SubnetRouteTableAssociation
    Properties:
      SubnetId: !Ref PublicSubnet2
      RouteTableId: !Ref PublicRouteTable
Code language: YAML (yaml)
This subnet has a default route to the Internet Gateway. And by enabling the MapPublicIpOnLaunch property, you can have the public address automatically granted when the instance is launched.
EC2 Instance
Resources:
  Instance:
    Type: AWS::EC2::Instance
    Properties:
      ImageId: !Sub "{{resolve:ssm:${ParameterAmi}}}"
      InstanceType: !Ref InstanceType
      NetworkInterfaces:
        - AssociatePublicIpAddress: true
          DeviceIndex: 0
          GroupSet:
            - !Ref InstanceSecurityGroup
          SubnetId: !Ref PublicSubnet1

  EIP:
    Type: AWS::EC2::EIP
    Properties:
      Domain: vpc

  EIPAssociation:
    Type: AWS::EC2::EIPAssociation
    Properties:
      AllocationId: !GetAtt EIP.AllocationId
      InstanceId: !Ref Instance
Code language: YAML (yaml)
There are two points.
The first is the ImageId property. Stores the ID of the AMI built by the Image Builder in the SSM Parameter Store. Specify this value to this property using a dynamic reference in CloudFormation. For more information, see the page mentioned at the beginning of this article.
The second is the Elastic IP. This instance can be accessed with a custom domain using Route53 as described below. So the global address to be assigned to this instance is fixed using Elastic IP.
(Reference) RDS
Resources:
  DBInstance:
    Type: AWS::RDS::DBInstance
    DeletionPolicy: Delete
    Properties:
      AllocatedStorage: !Ref DBAllocatedStorage
      DBInstanceClass: !Ref DBInstanceClass
      DBInstanceIdentifier: dbinstance
      DBName: !Ref DBName
      DBSubnetGroupName: !Ref DBSubnetGroup
      Engine: !Ref DBEngine
      EngineVersion: !Ref DBEngineVersion
      MasterUsername: !Ref DBMasterUsername
      MasterUserPassword: !Ref DBMasterUserPassword
      VPCSecurityGroups:
        - !Ref DBSecurityGroup

  DBSubnetGroup:
    Type: AWS::RDS::DBSubnetGroup
    Properties:
      DBSubnetGroupName: dbsubnetgroup
      DBSubnetGroupDescription: dbsubnetgroup.
      SubnetIds:
        - !Ref PrivateSubnet1
        - !Ref PrivateSubnet2
Code language: YAML (yaml)
Create one RDS DB instance. No special configuration is performed.
Set up as follows
- User name: testuser
- Password: Passw0rd
- DB name: wordpress
(Reference) Route53
Resources:
  DnsRecord:
    Type: AWS::Route53::RecordSet
    Properties:
      HostedZoneId: !Ref HostedZoneId
      Name: !Ref DomainName
      ResourceRecords:
        - !Ref EIP
      TTL: !Ref TTL
      Type: A
Code language: YAML (yaml)
Create an A record in Route53. Associate the custom domain with the EIP of the EC2 instance.
Architecting
Use CloudFormation to build this environment and check its actual behavior.
Create CloudFormation stacks and check the resources in the stacks
Create CloudFormation stacks. For information on how to create stacks and check each stack, please see the following page.

After reviewing the resources in each stack, information on the main resources created in this case is as follows
- Component: fa-144-Component
- Pipeline: fa-144-ImagePipeline
- EC2 instance: i-01c377157641d532d
- RDS instance endpoint: dbinstance.cl50iikpthxs.ap-northeast-1.rds.amazonaws.com
Check the created resource from the AWS Management Console.
Components.
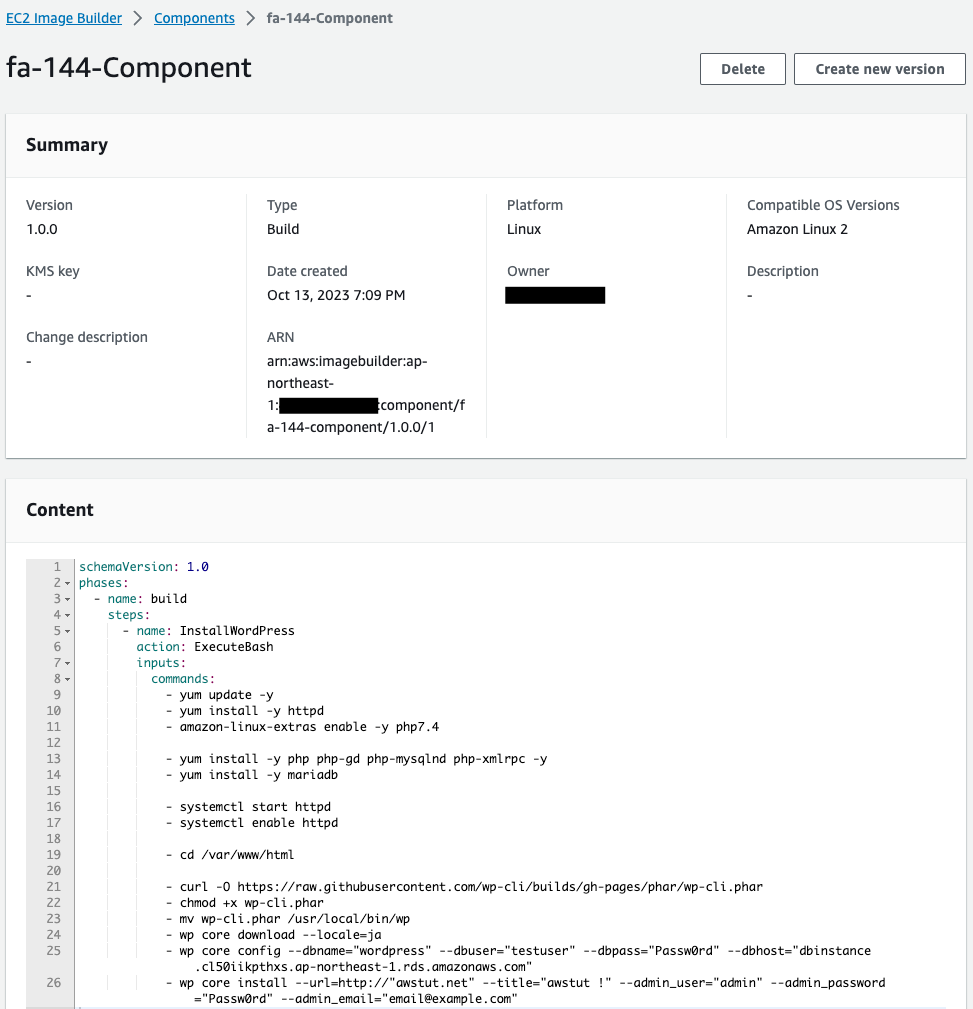
The component is created as specified in CloudFormation. Various parameters are passed to the WP CLI. Various DB information (user name, password, etc.) and site information (domain name, title, etc.) are specified.
Check the pipeline.
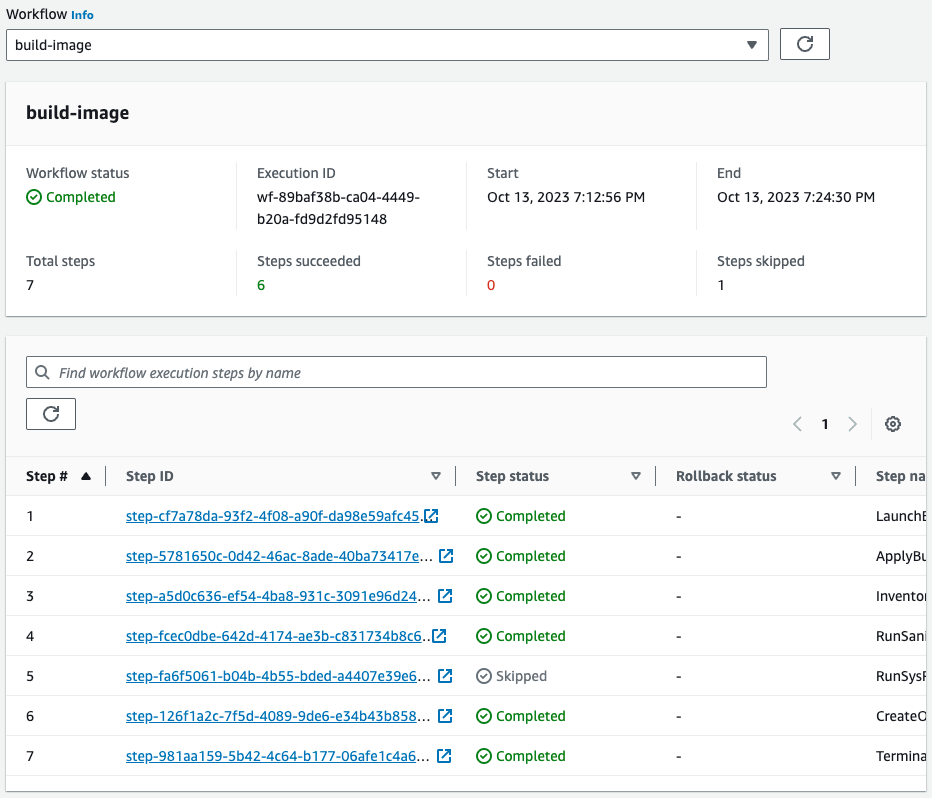
Looking at the Workflow, the pipeline has been executed and completed successfully. This means that this pipeline was automatically started by a Lambda function tied to a CloudFormation custom resource.
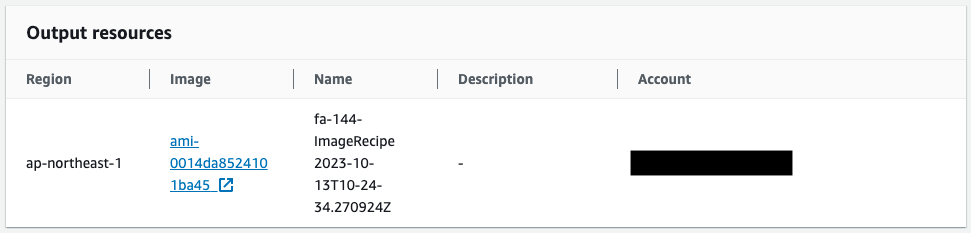
Looking at the Output, an AMI has been created. The ID of the AMI generated this time was “ami-0014da8524101ba45”.
Check the EC2 instance.
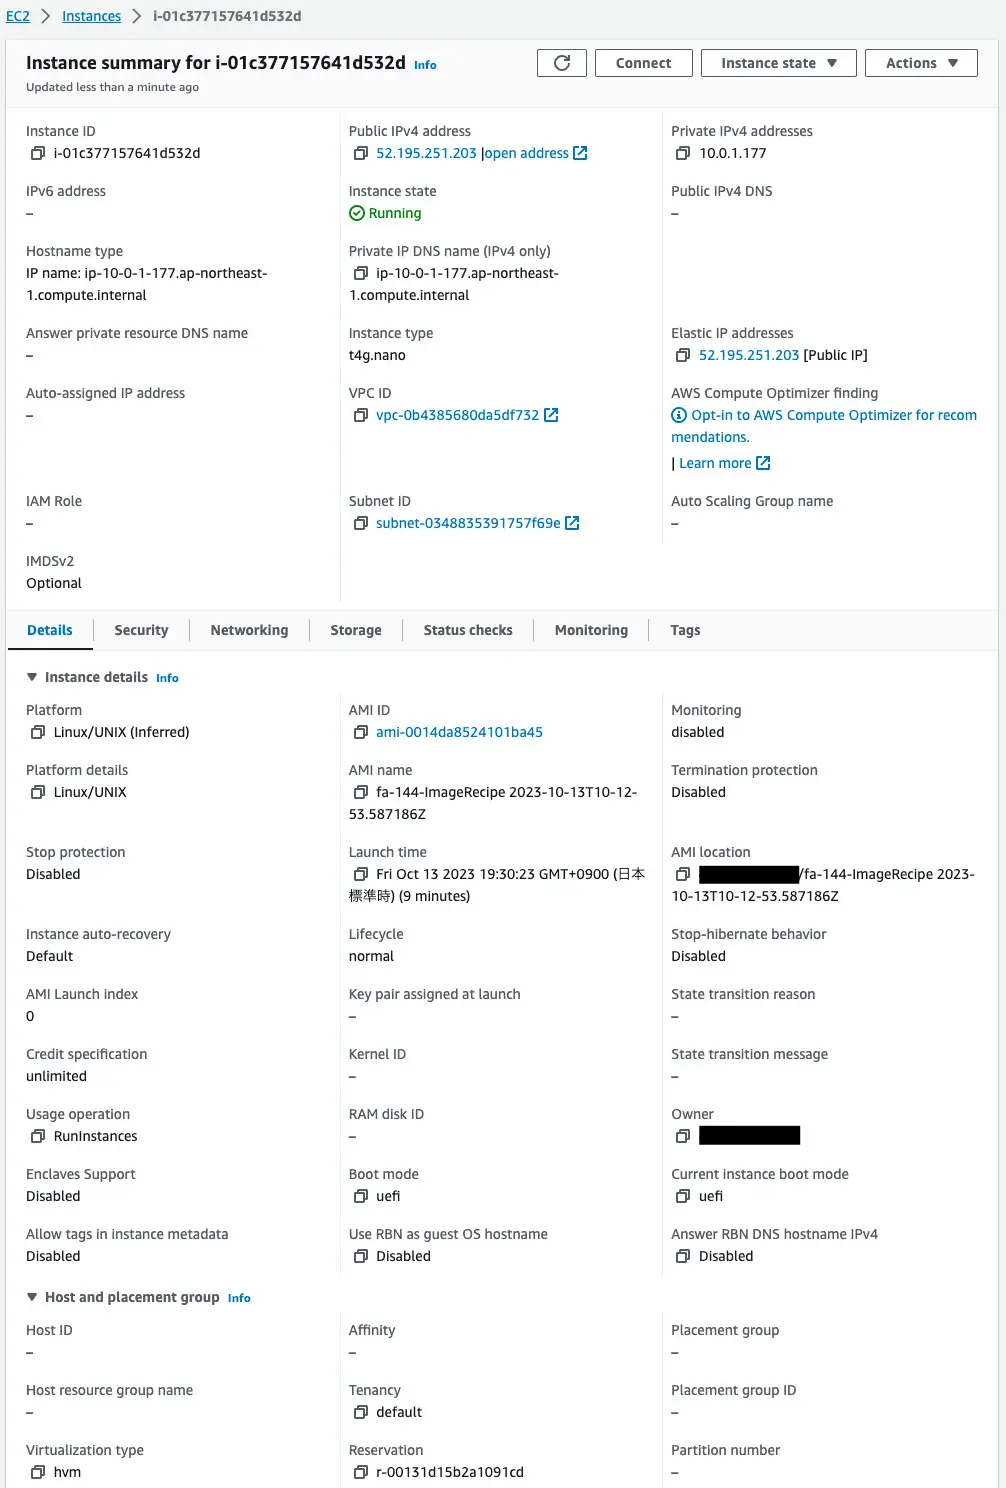
The instance is successfully created. I see the AMI “ami-0014da8524101ba45”. That is, an AMI built by Image Builder is specified.
Looking at the Elastic IP Address, “52.195.251.203” is set.
Check Route53.
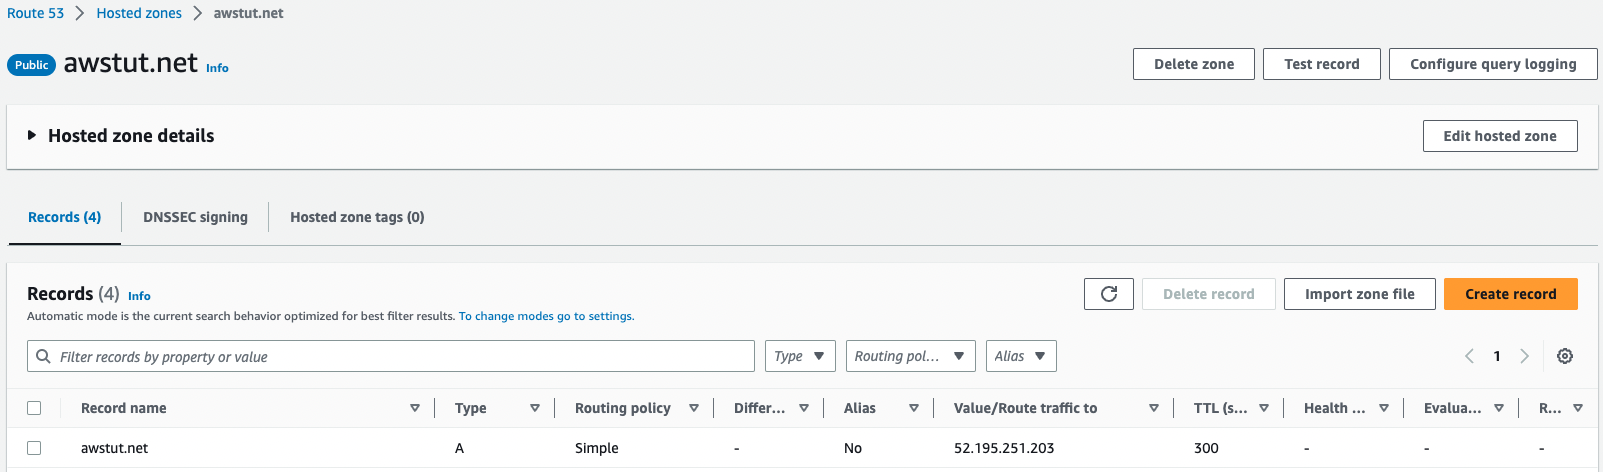
The domain awstut.net is associated with the Elastic IP mentioned earlier.
Operation Check
Now that you are ready, access your WordPress site.
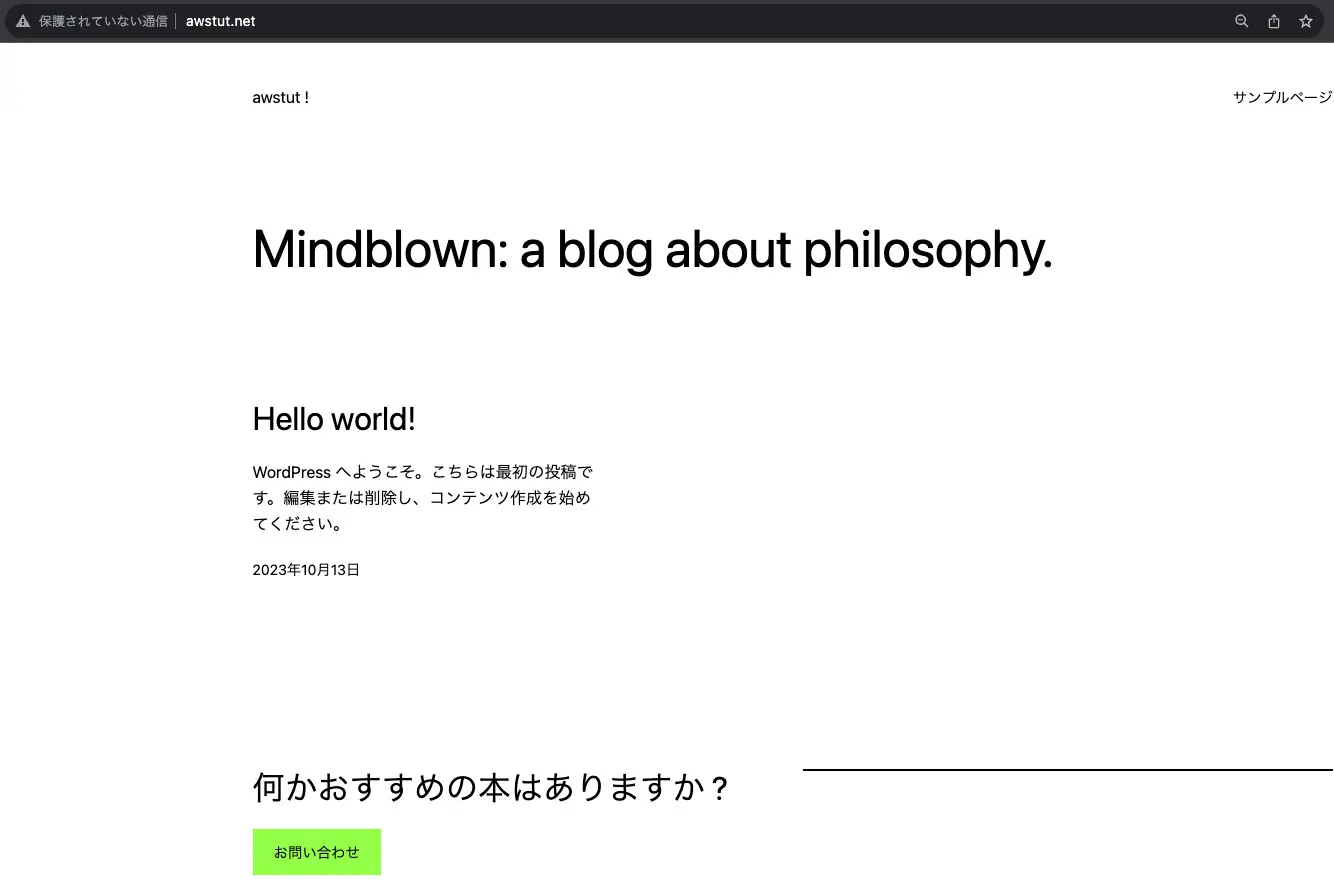
The WordPress page is now displayed. This shows that the EC2 instance is up and running successfully using the AMI built by Image Builder.
Log in to the administration page.
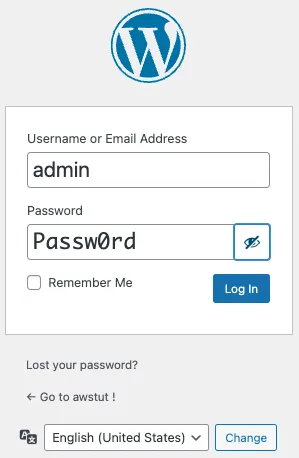
Enter the user name and password specified in the Image Builder.
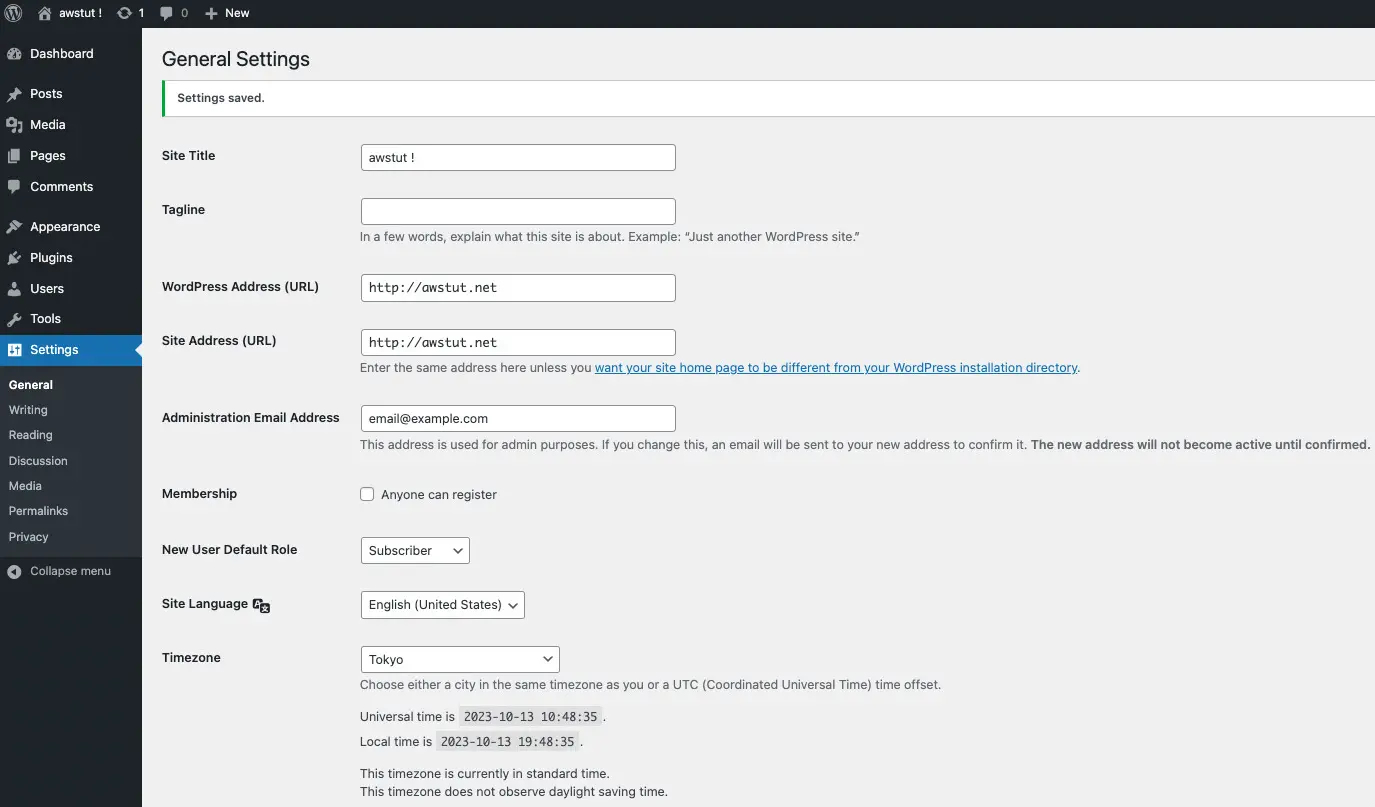
You have successfully logged in. If you look at the settings page, you will see that the site title, URL, and email address are set. These are also the values specified in the Image Builder.
Summary
As a specific example of using Image Builder, we created an AMI for WordPress. We launched an EC2 instance from this AMI and confirmed that the WordPress site works.