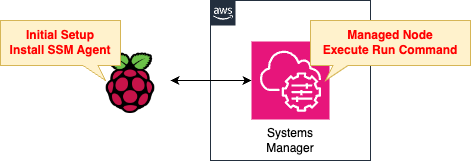
After setting up the Raspberry Pi, register it in Systems Manager and run commands from AWS
AWS Systems Manager can manage not only EC2 instances, but also servers in hybrid and multi-cloud environments.
https://docs.aws.amazon.com/systems-manager/latest/userguide/systems-manager-managedinstances.html
In this page, the Raspberry Pi 5 is registered with Systems Manager as if it were an on-premise server.
After registration, use the Systems Manager feature to run commands on the Raspberry Pi 5 from the AWS side.
Environment
Initial setup of the Raspberry Pi 5.
Specifically
- Procurement of necessary supplies
- OS Installation
- Assembly and initial start-up
The OS to be installed on the Raspberry Pi will be the Raspberry Pi OS.
In addition, Macbook Air (M1, 2020) Sonoma 14.3.1 will be used for OS installation and other tasks.
Create an SSM Hybrid Activation to manage the Raspberry Pi with Systems Manager.
Install the SSM Agent on the Raspberry Pi while using the activation ID and code you prepared.
Once the Raspberry Pi can be managed by Systems Manager, we will use the functions of Systems Manager to execute commands on the Raspberry Pi.
In this case, for verification purposes, we will run the command to create a test file.
CloudFormation template files
In the above configuration, CloudFormation is used to build the AWS-side configuration.
The CloudFormation template is placed at the following URL
https://github.com/awstut-an-r/awstut-fa/tree/main/152
Raspberry Pi 5 first time setup
Procurement of necessary supplies
I have purchased the following items from Amazon.
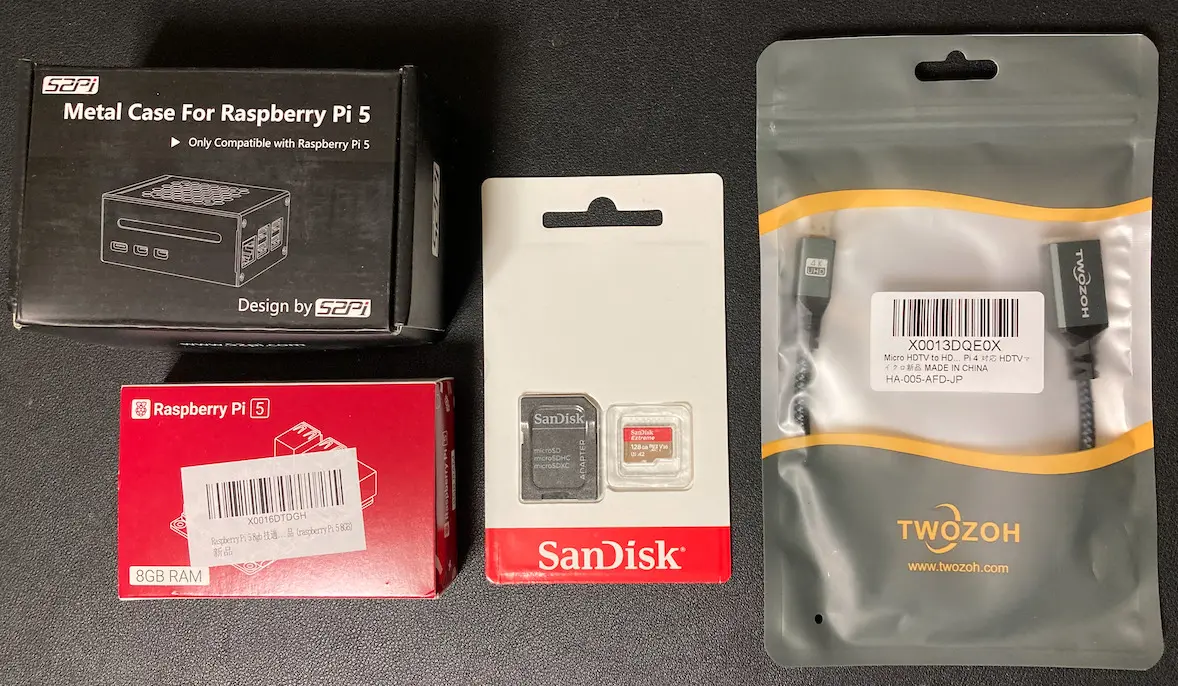
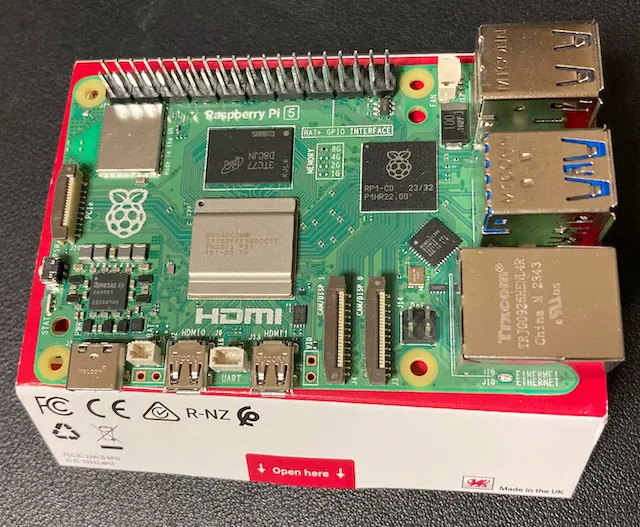
Raspberry Pi 5
The first is the Raspberry Pi 5 itself.
This time, I purchased an 8GB type of memory.
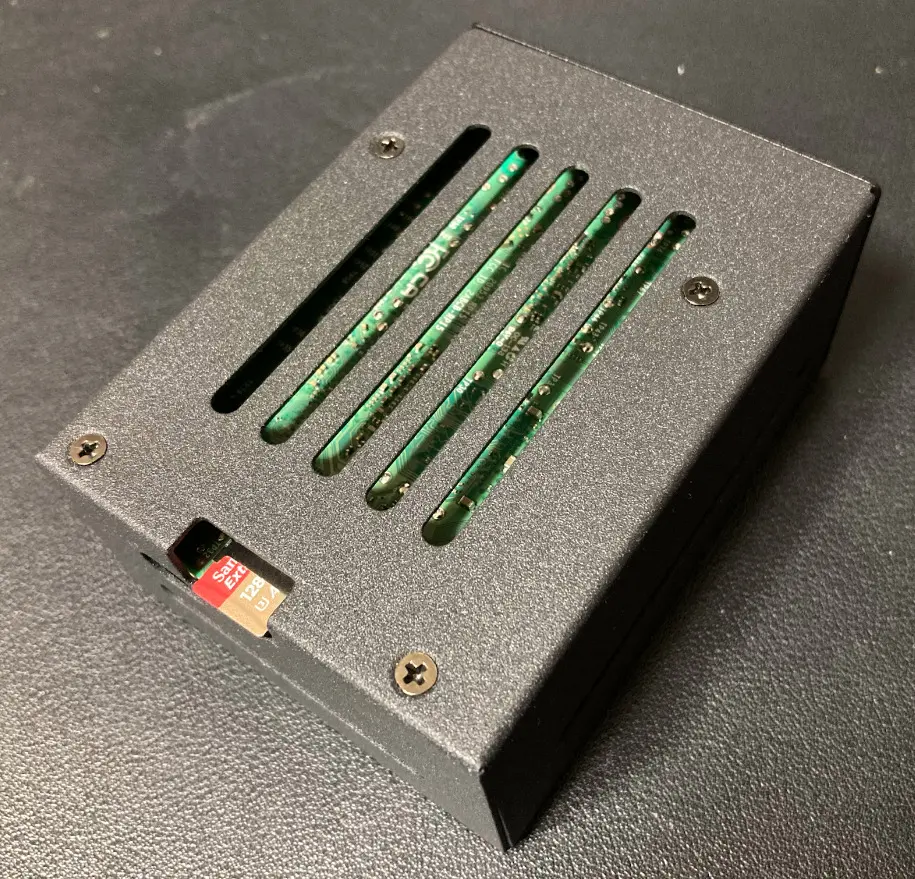
SD card
The second is the SD card.
We chose a 128GB capacity.
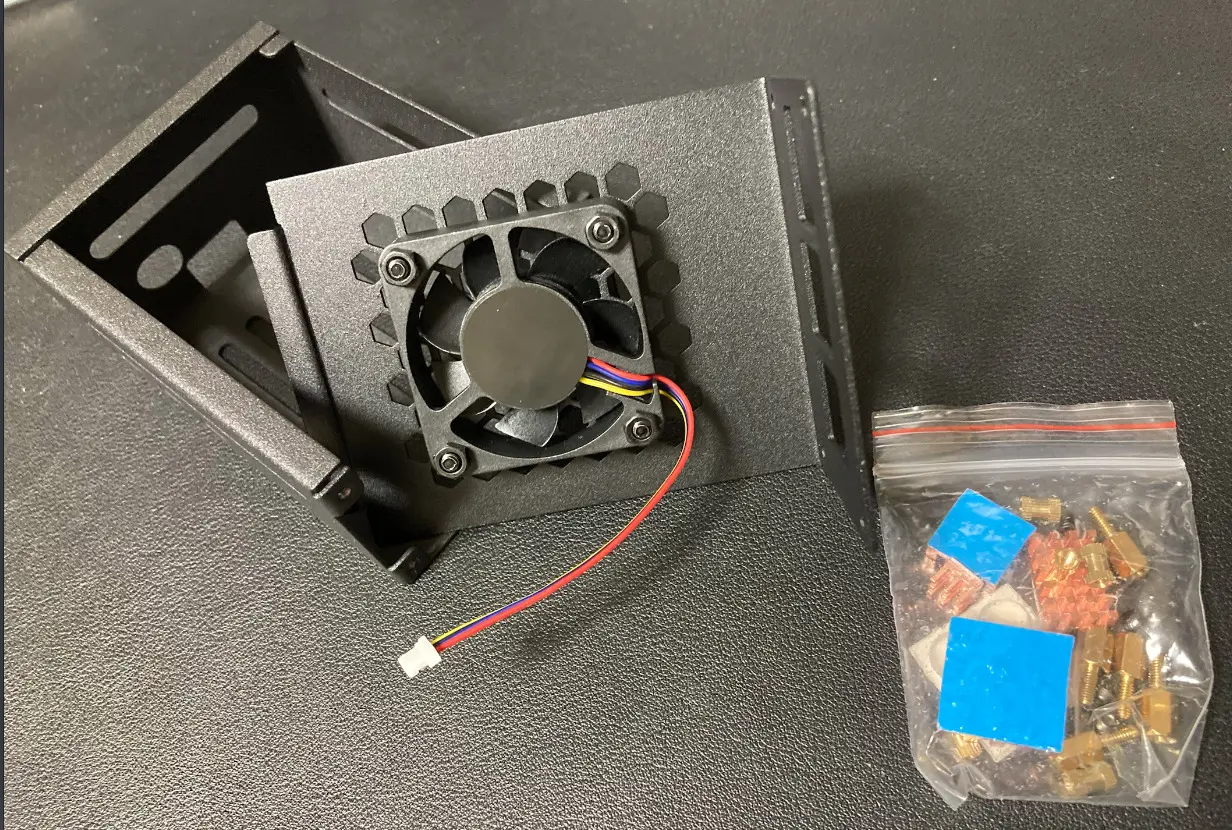
Case
The third is a Raspberry Pi case.
Since it is undesirable to operate with the base exposed, and since we had heard that Raspberry Pi 5 generates a lot of heat, we prepared a case with a cooling fan.
Micro HDMI to HDMI Conversion Adapter
The fourth is a Micro HDMI to HDMI conversion adapter.
The port for video that the Raspberry Pi 5 has is Micro HDMI.
Since I did not have a cable for this port on hand, I purchased an adapter to convert it to a regular HDMI cable.
OS Installation
SD Card Preparation
The Raspberry Pi uses the SD card as storage.
So install the OS on the SD card.
First, remove the SD card from the packaging.
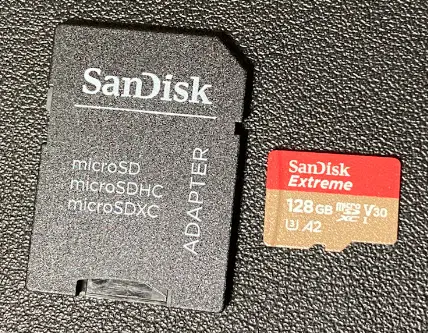
Attach the adapter to the micro SD card.
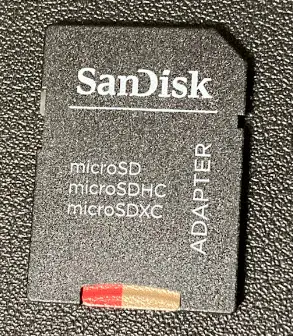
Recent Macbook Airs do not have a slot for an SD card, so a dock for a Macbook is used.
Connect the Macbook and SD card as follows

OS installation to SD card using Raspberry Pi Imager
Using a Macbook, install the OS on the SD card.
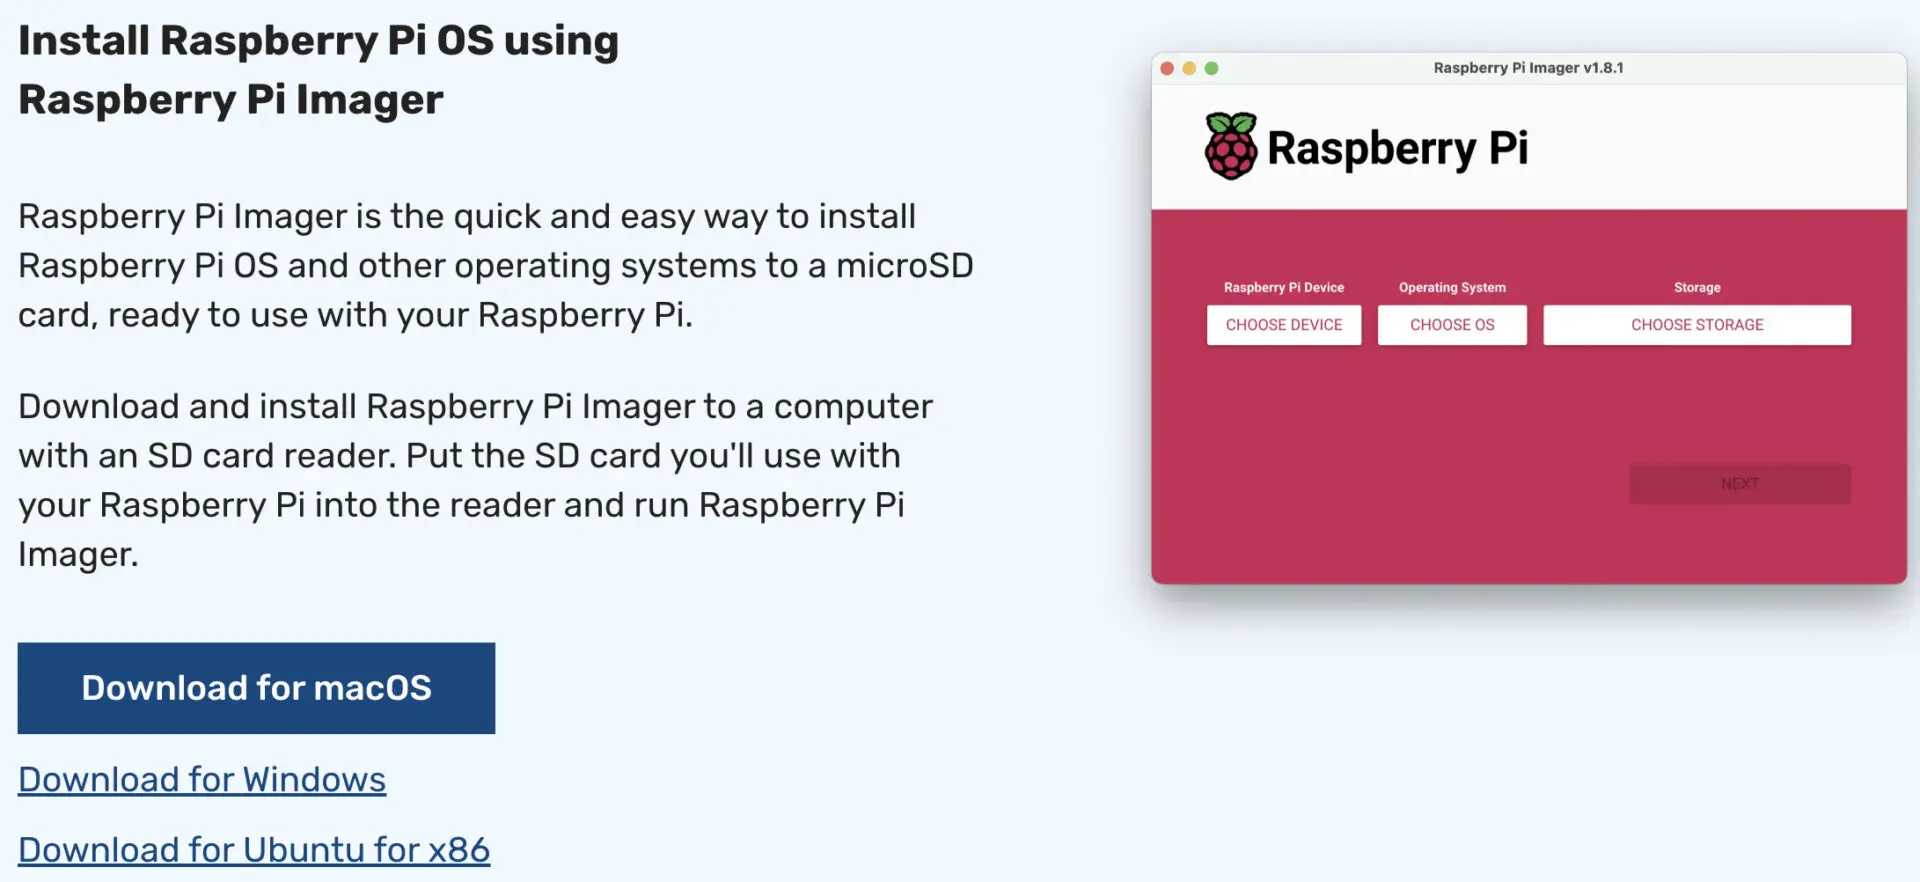
Use Raspberry Pi Imager for OS installation.
https://www.raspberrypi.com/software/
In order to use the Raspberry Pi Imager, the software must be installed on your Macbook.
Download the installer from the above page.
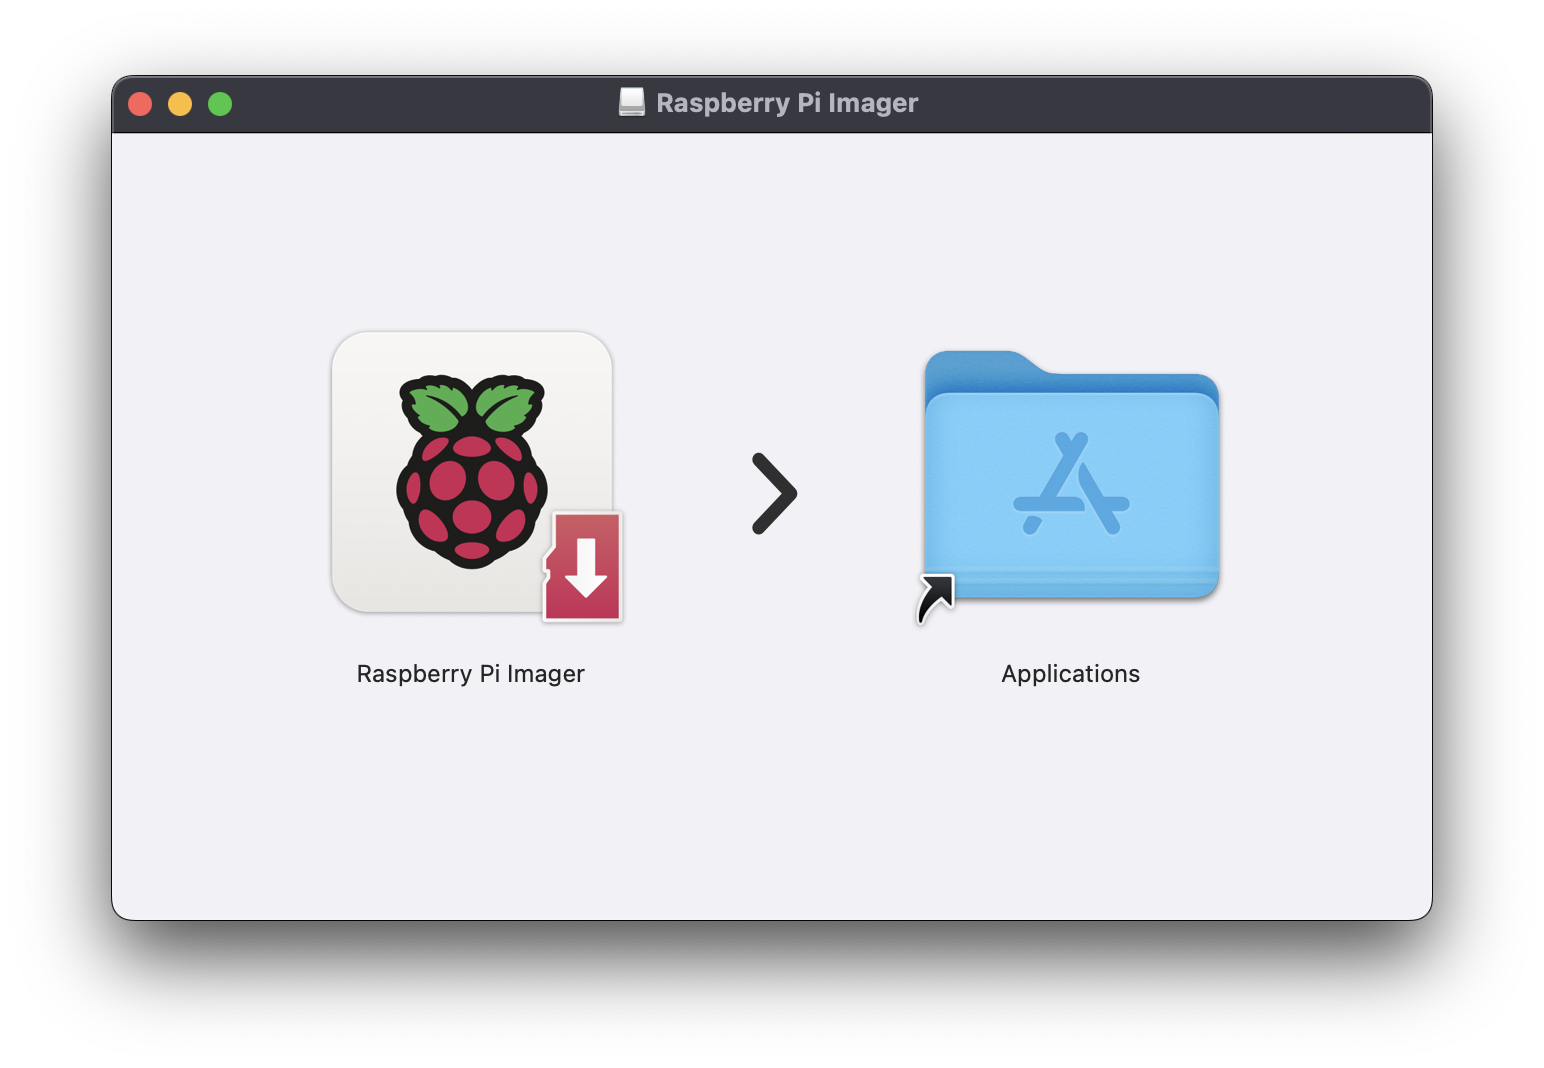
Double-click the downloaded installer and drag and drop the Raspberry Pi Imager into Applications.
This will install the Raspberry Pi Imager.
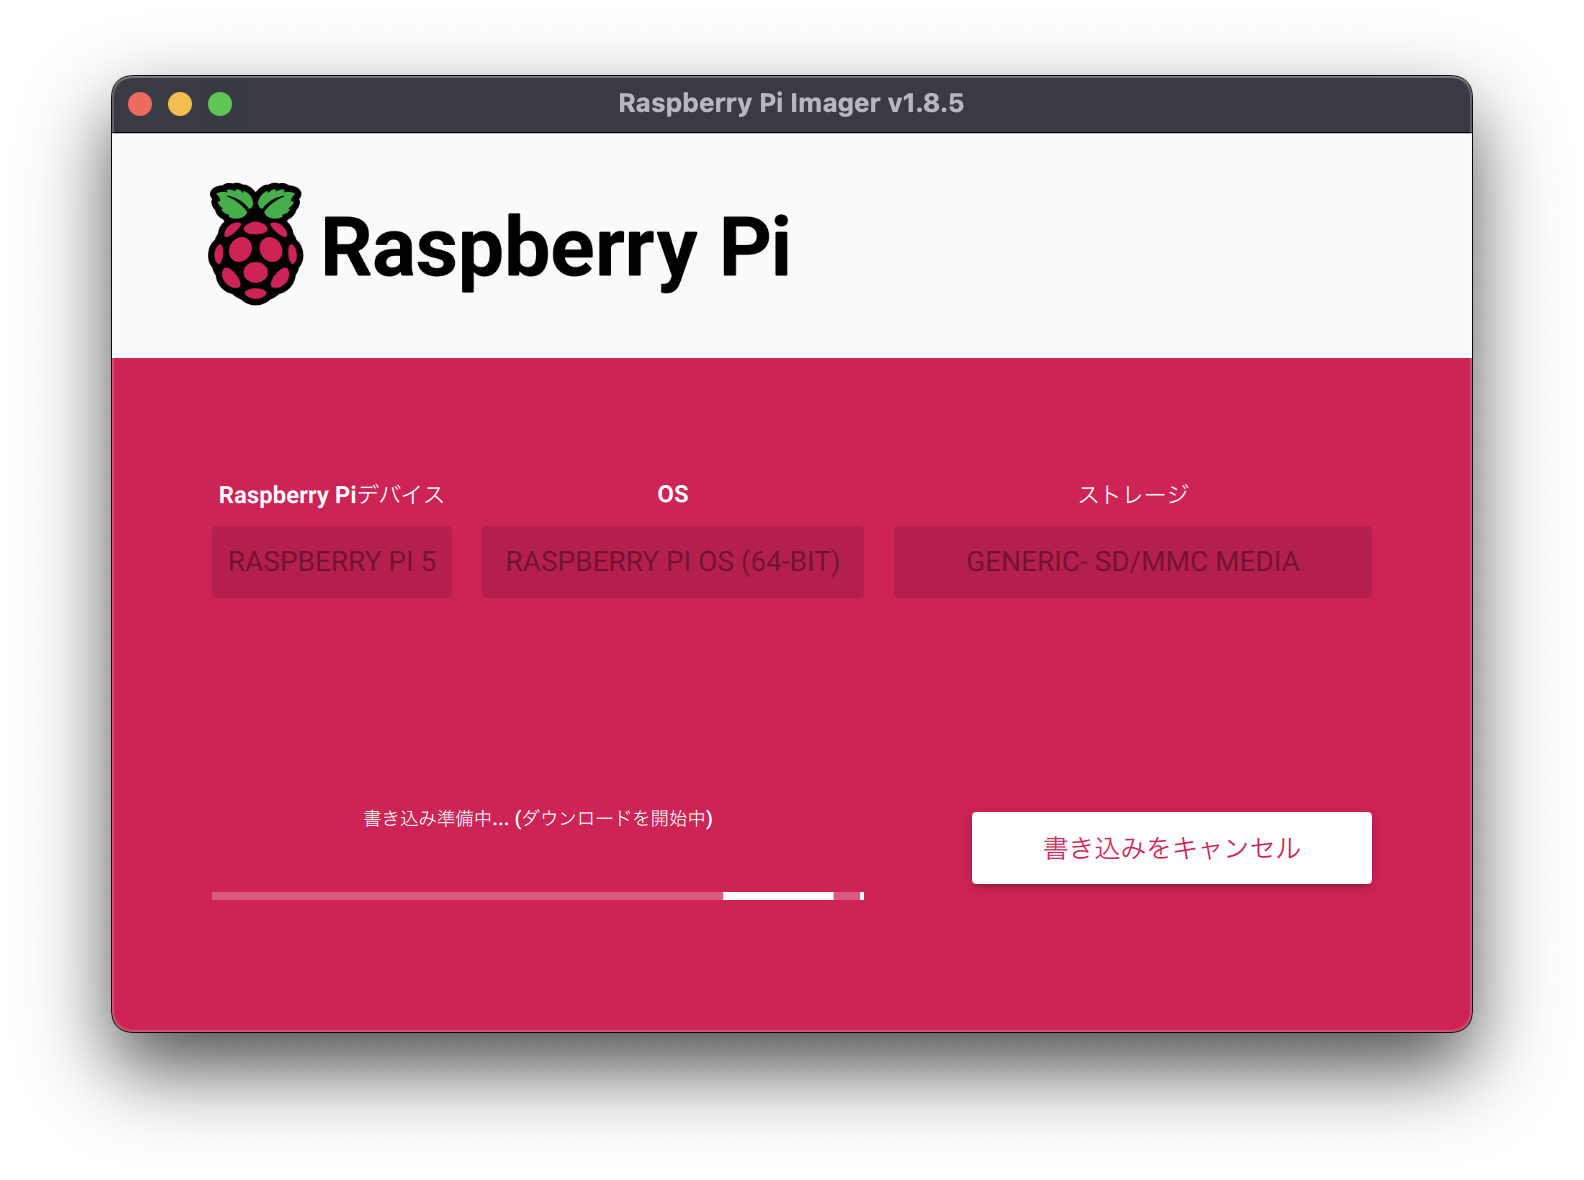
Launch the installed Raspberry Pi Imager.

Specify three items.
The items on the left relate to devices that boot the OS.
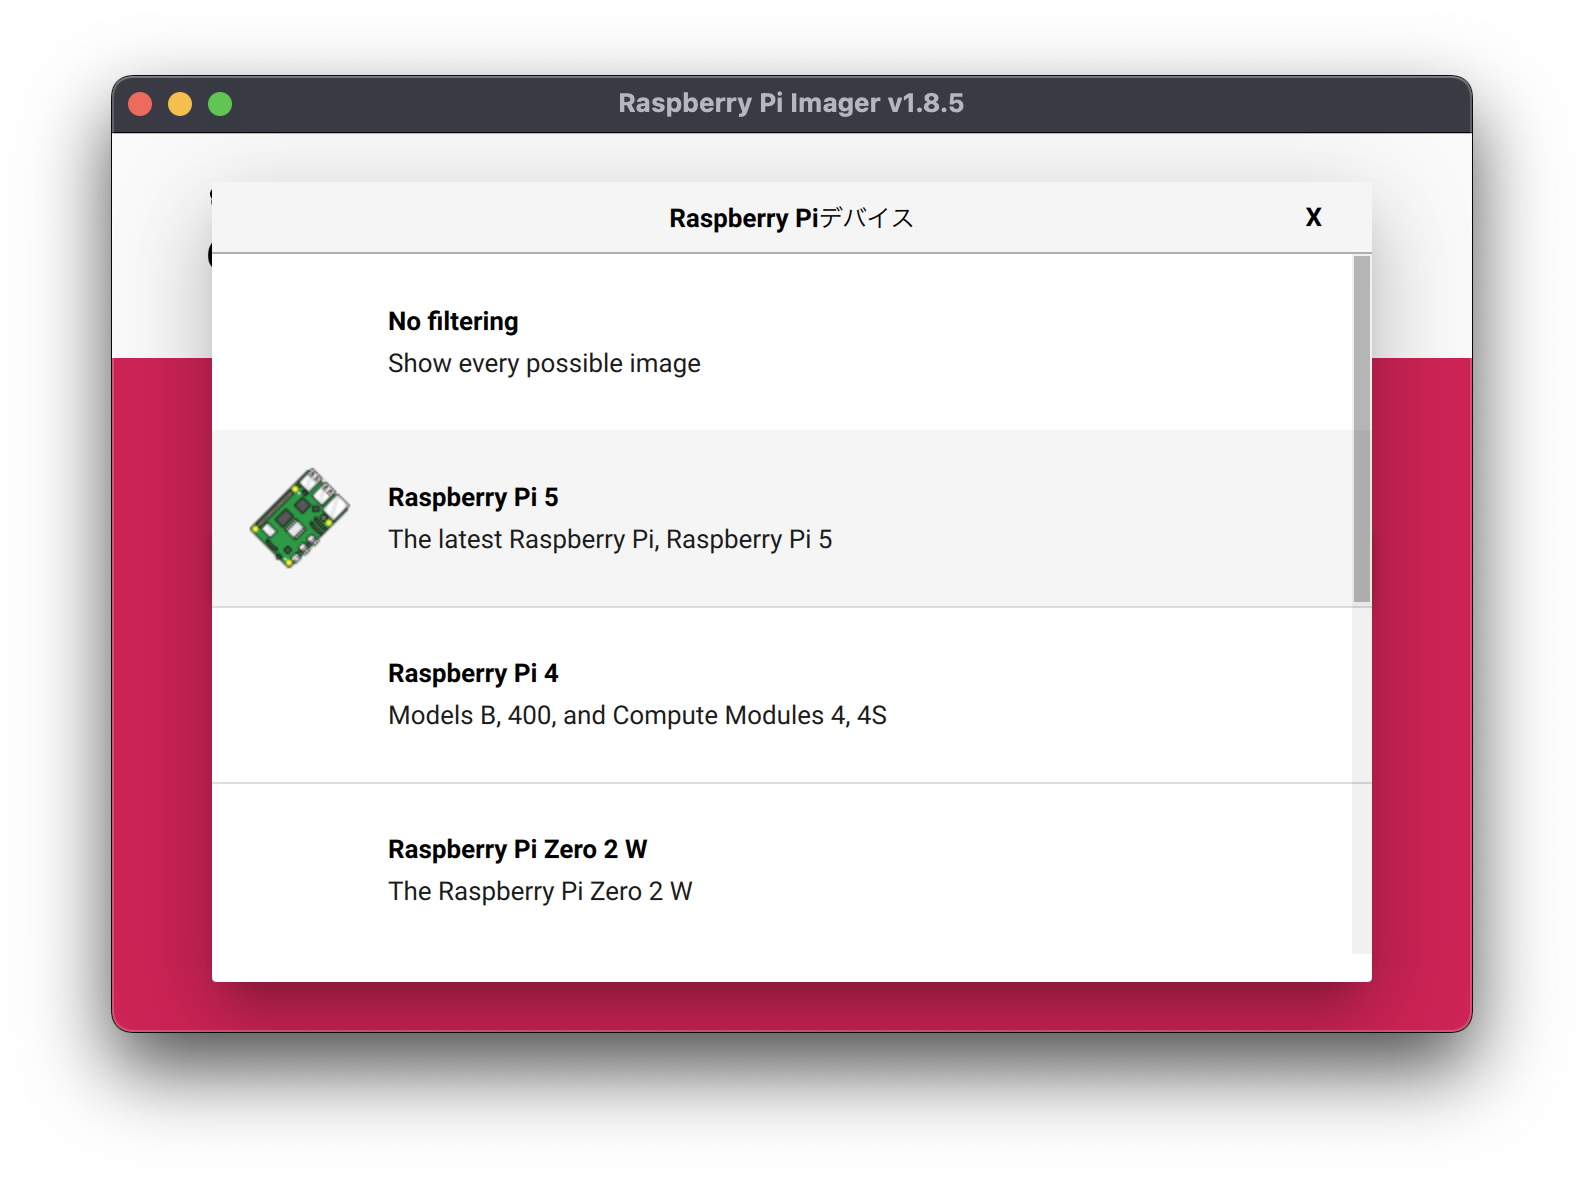
Select “Rasberry Pi 5.”
The middle item relates to the type of OS and the number of OS bits.
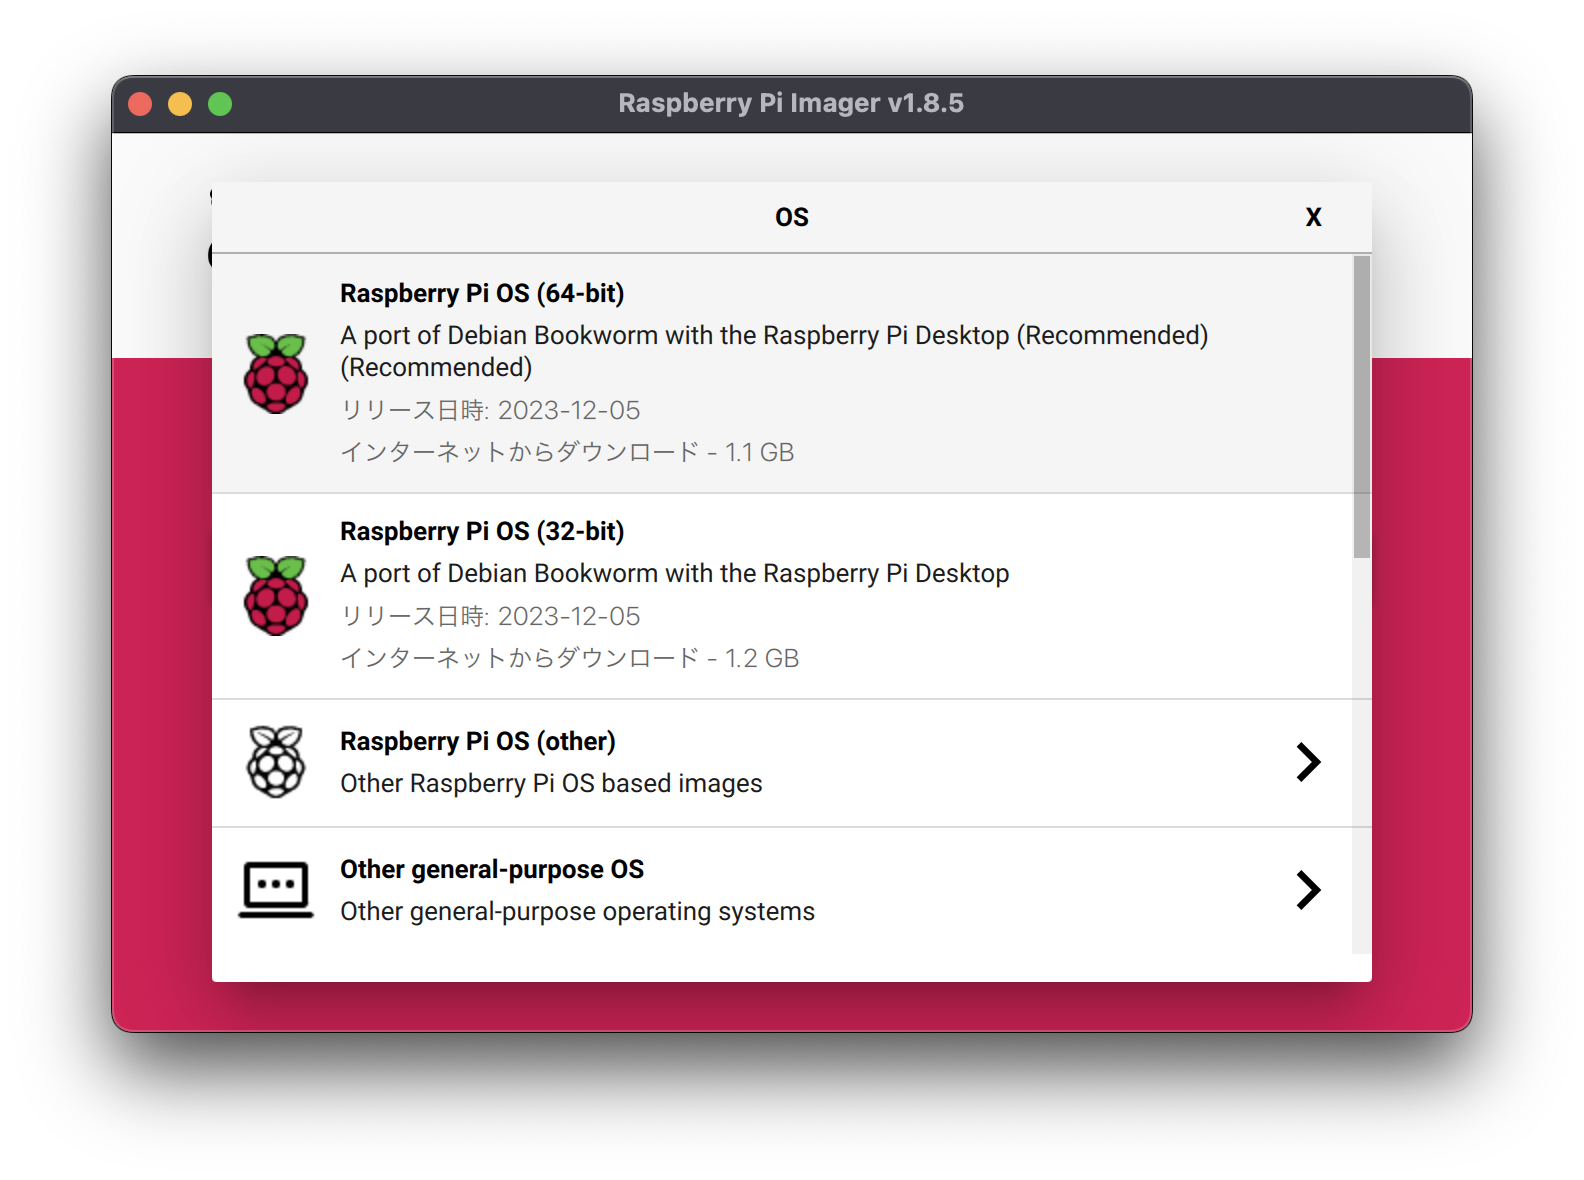
Select “Raspberry Pi OS (64-bit)”.
The items on the right relate to the SD card on which the OS is installed.
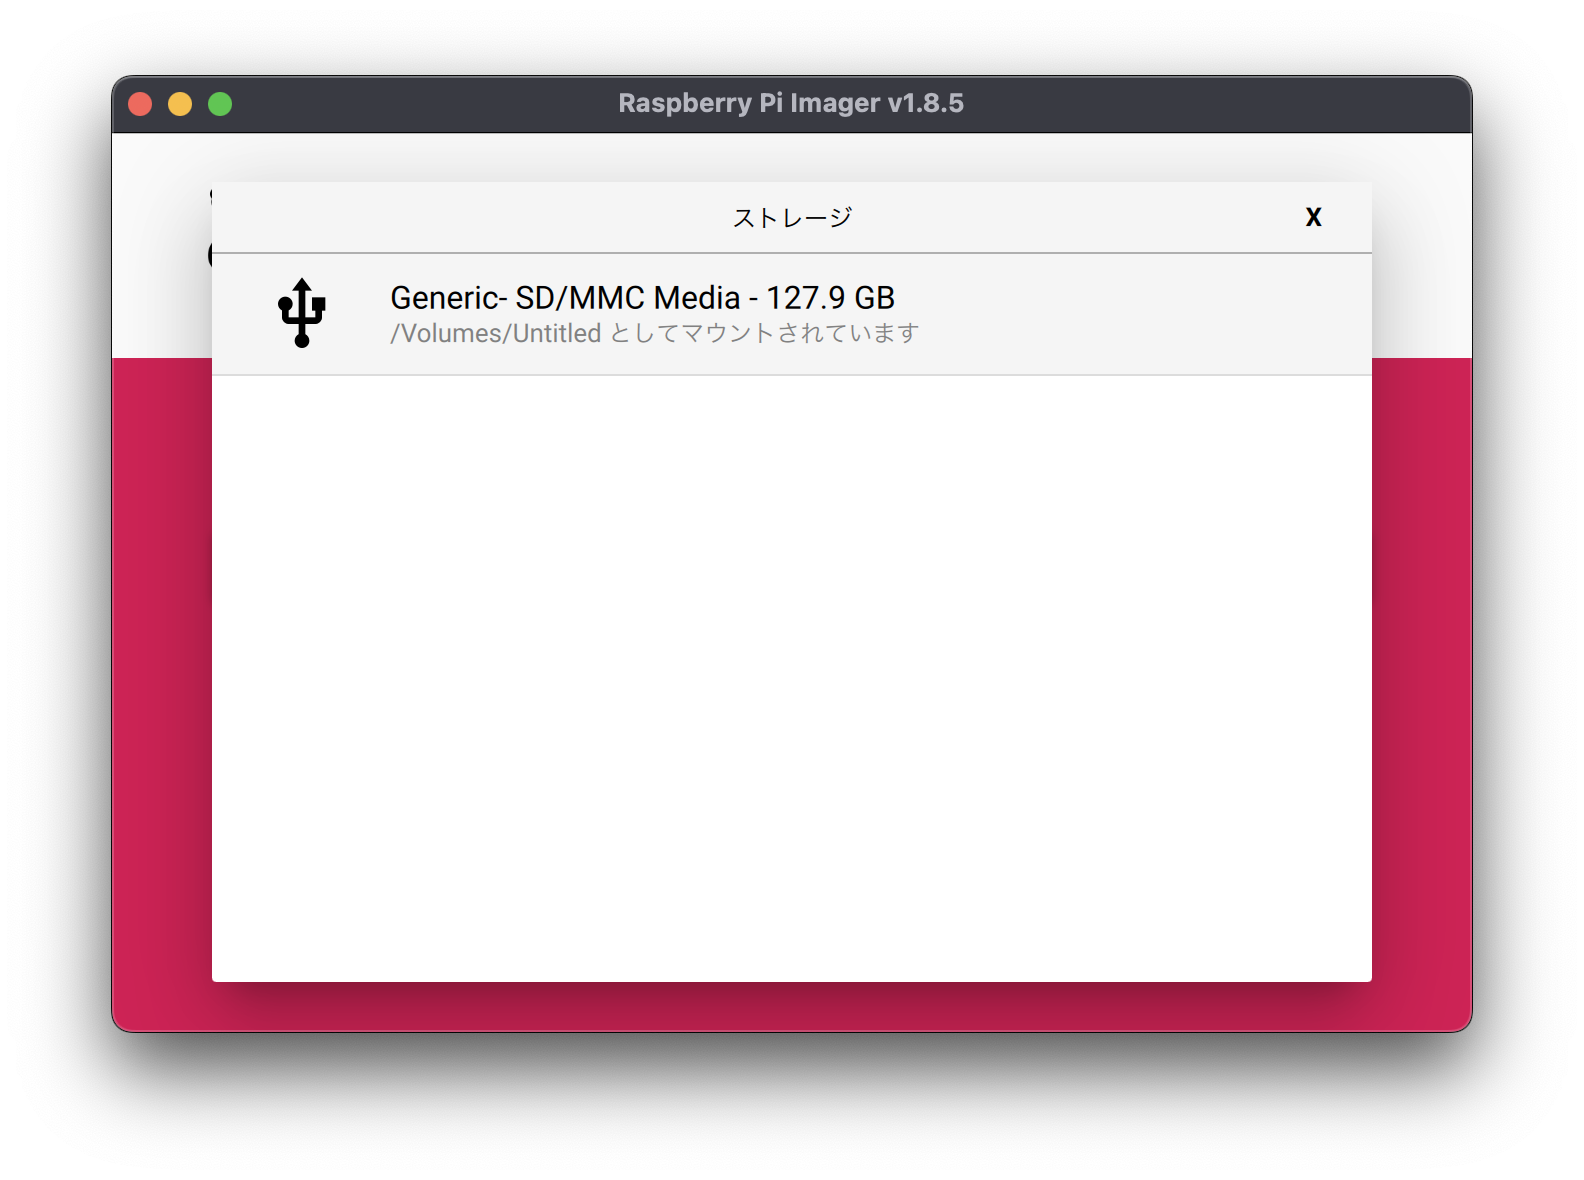
Select the SD card you just connected.
After completing the three selections, press “Next” and a page regarding additional configuration changes (Use OS customization?) will appear.
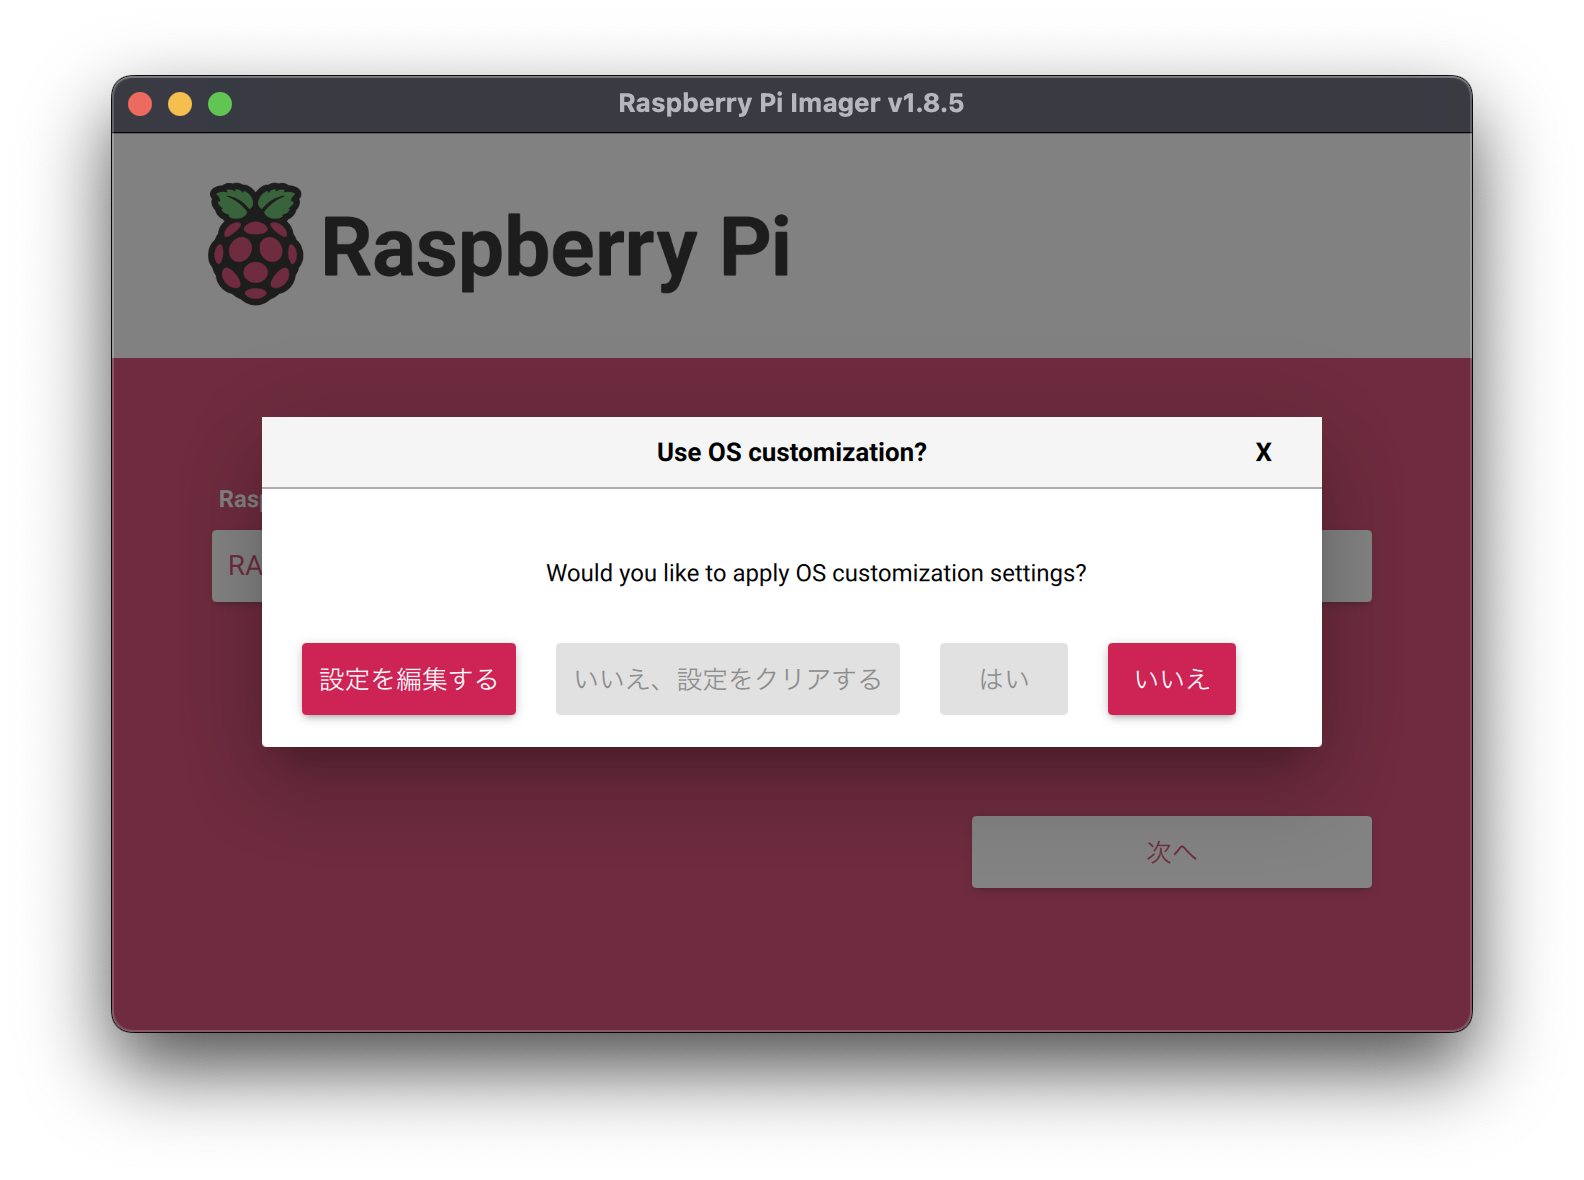
Press “Edit Settings.”
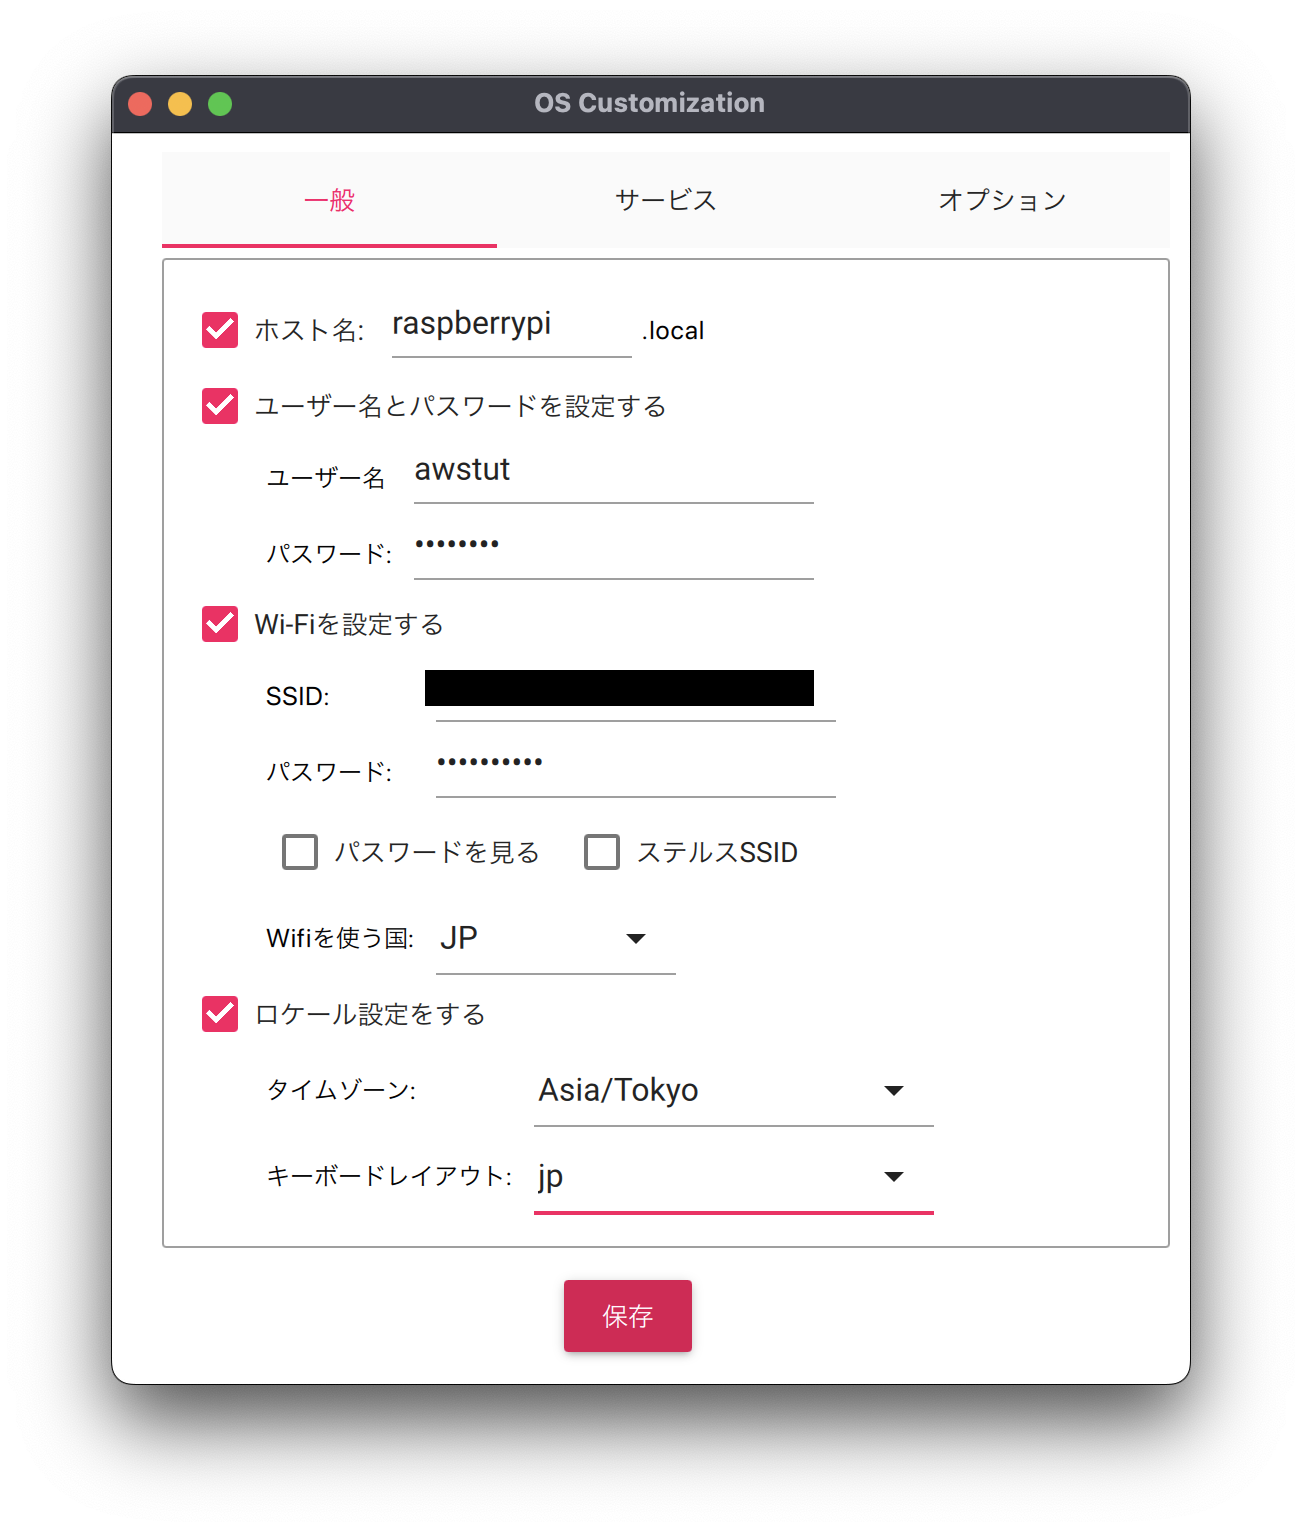
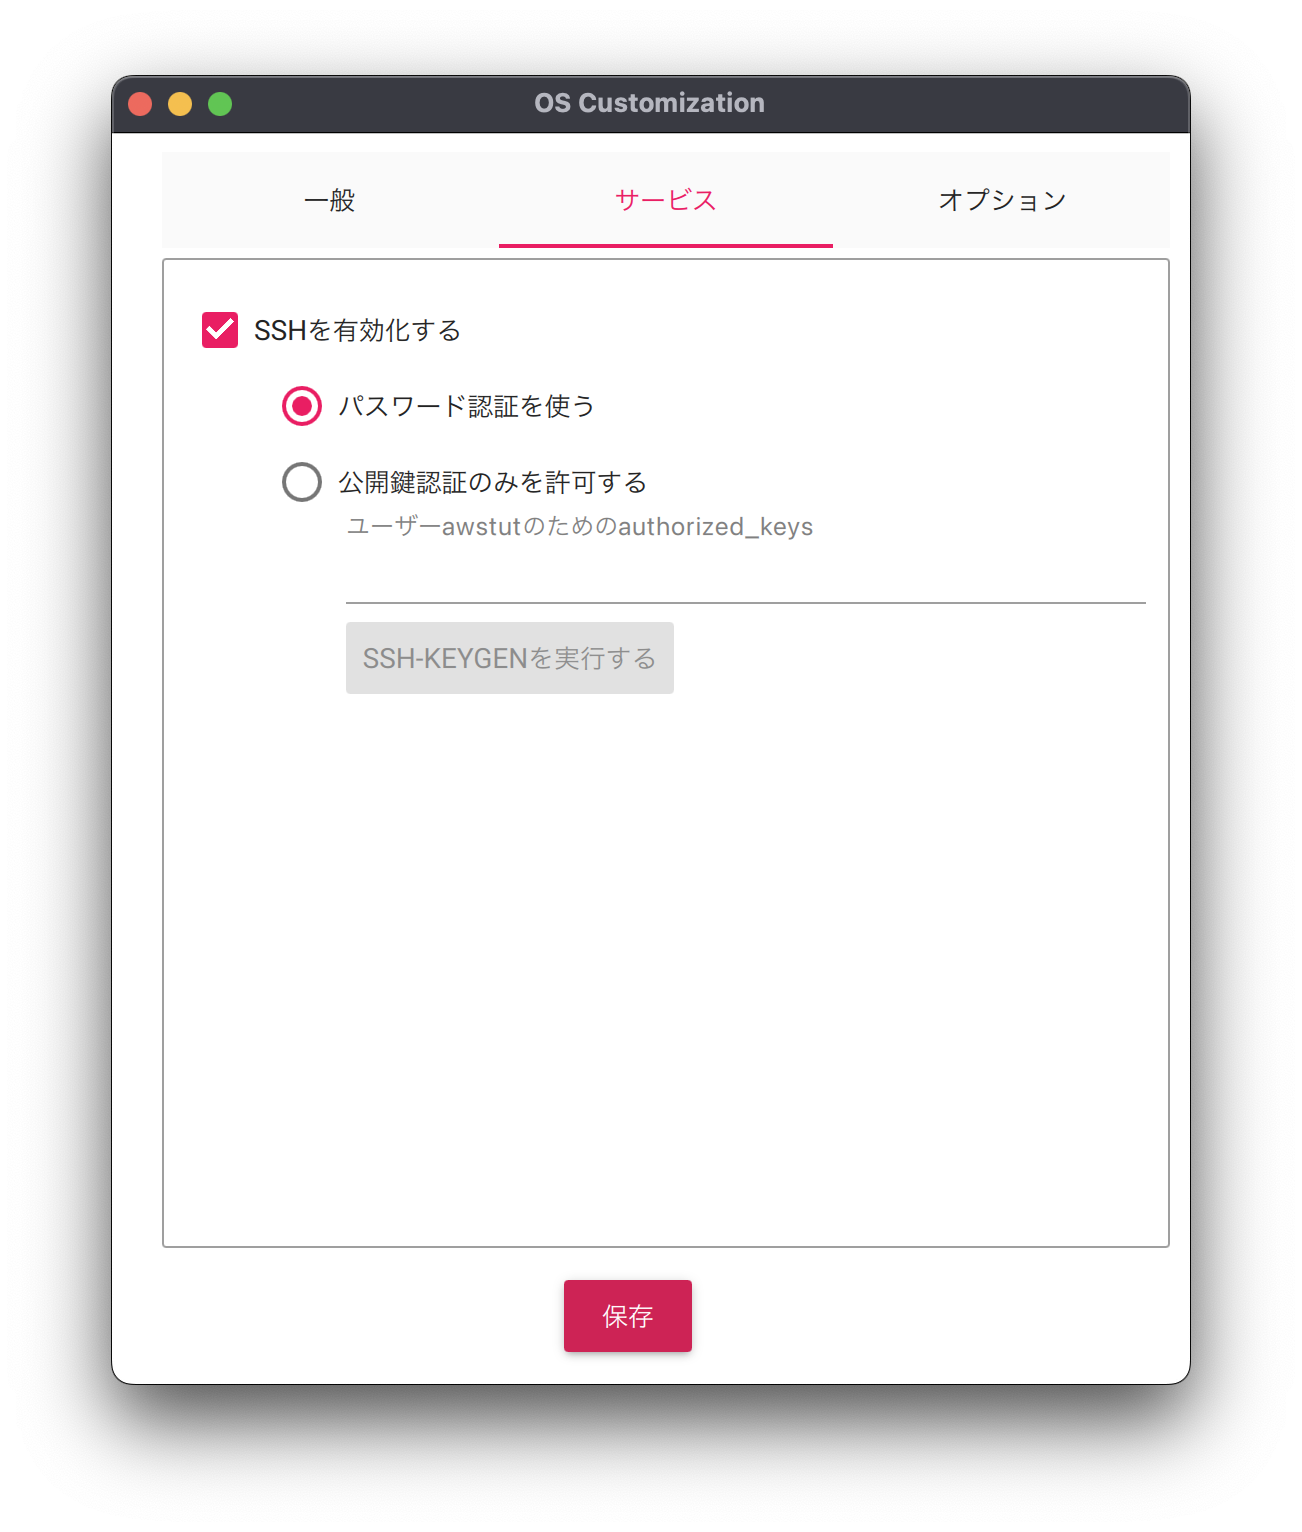
Three tabs will be displayed.
Each set as follows.
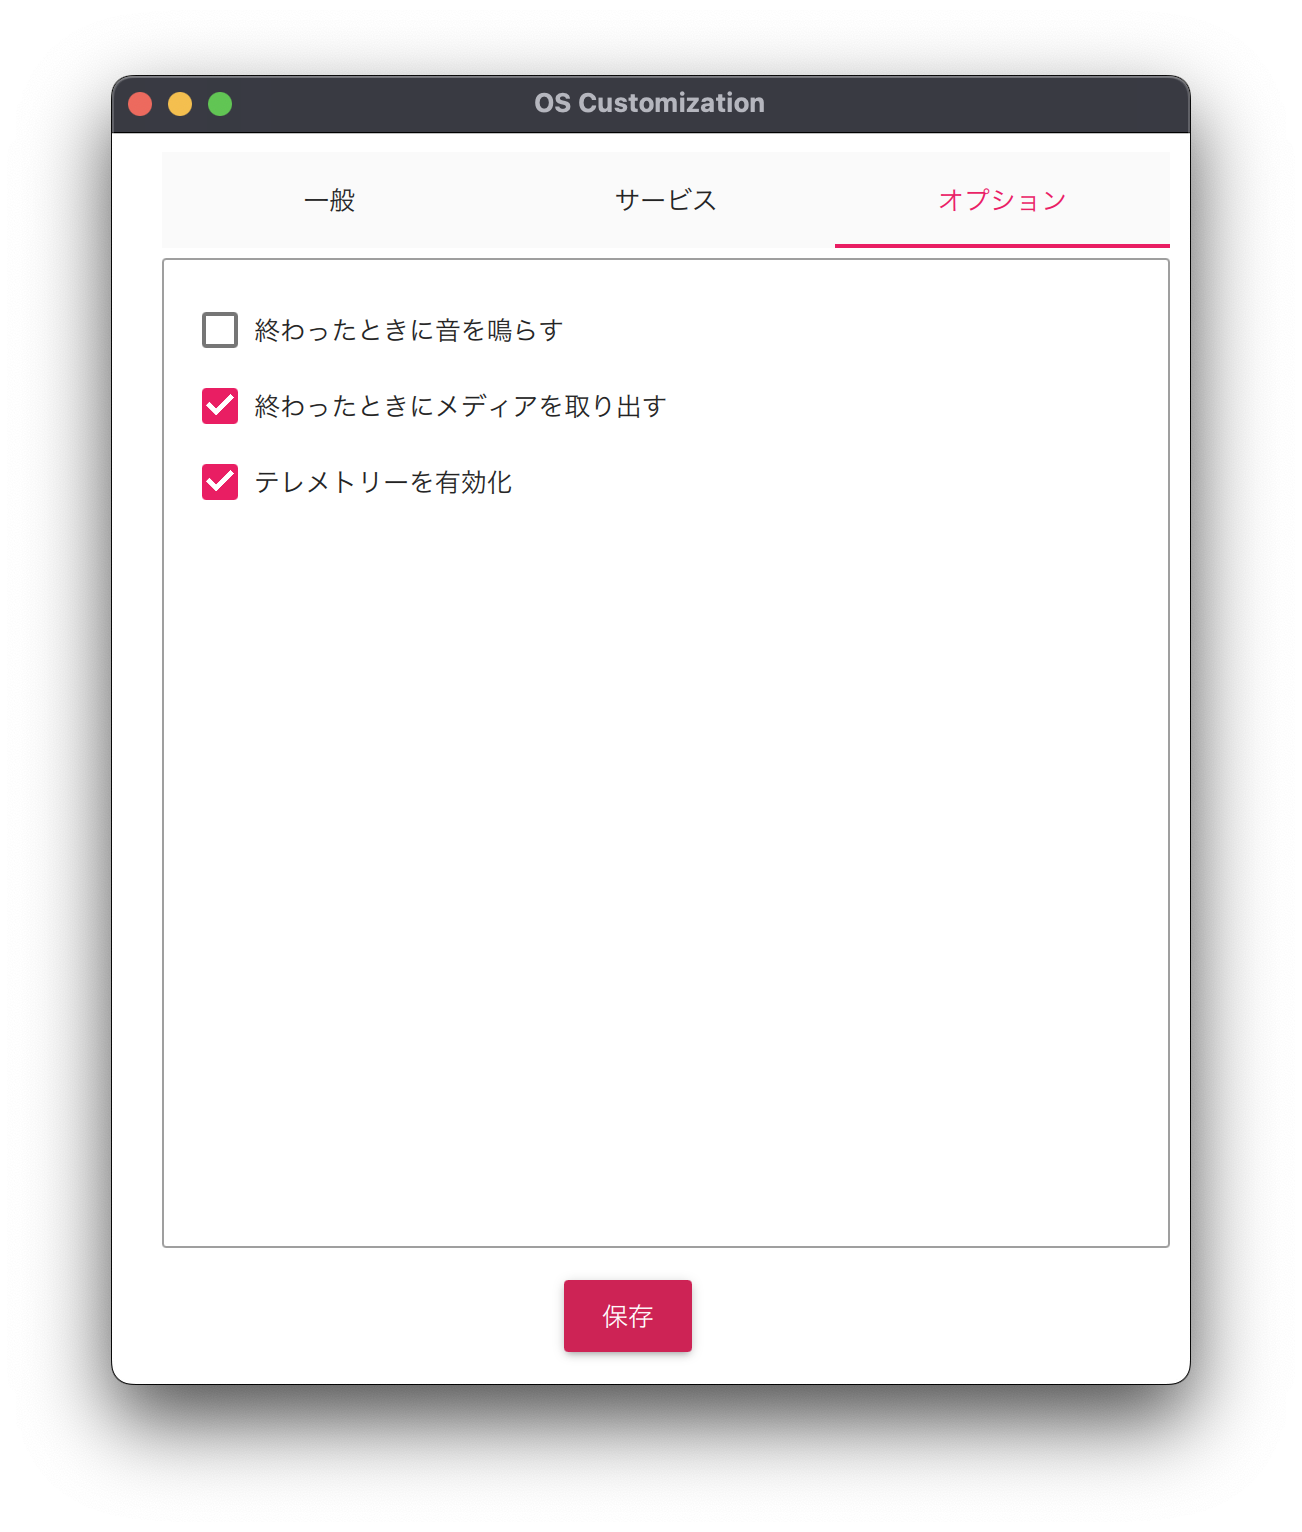
After clicking “Save,” the “Use OS customization?” page will appear again, so click “Yes” to confirm the setting.
The OS installation will then begin on the SD card.
After a short wait, the OS installation is complete.
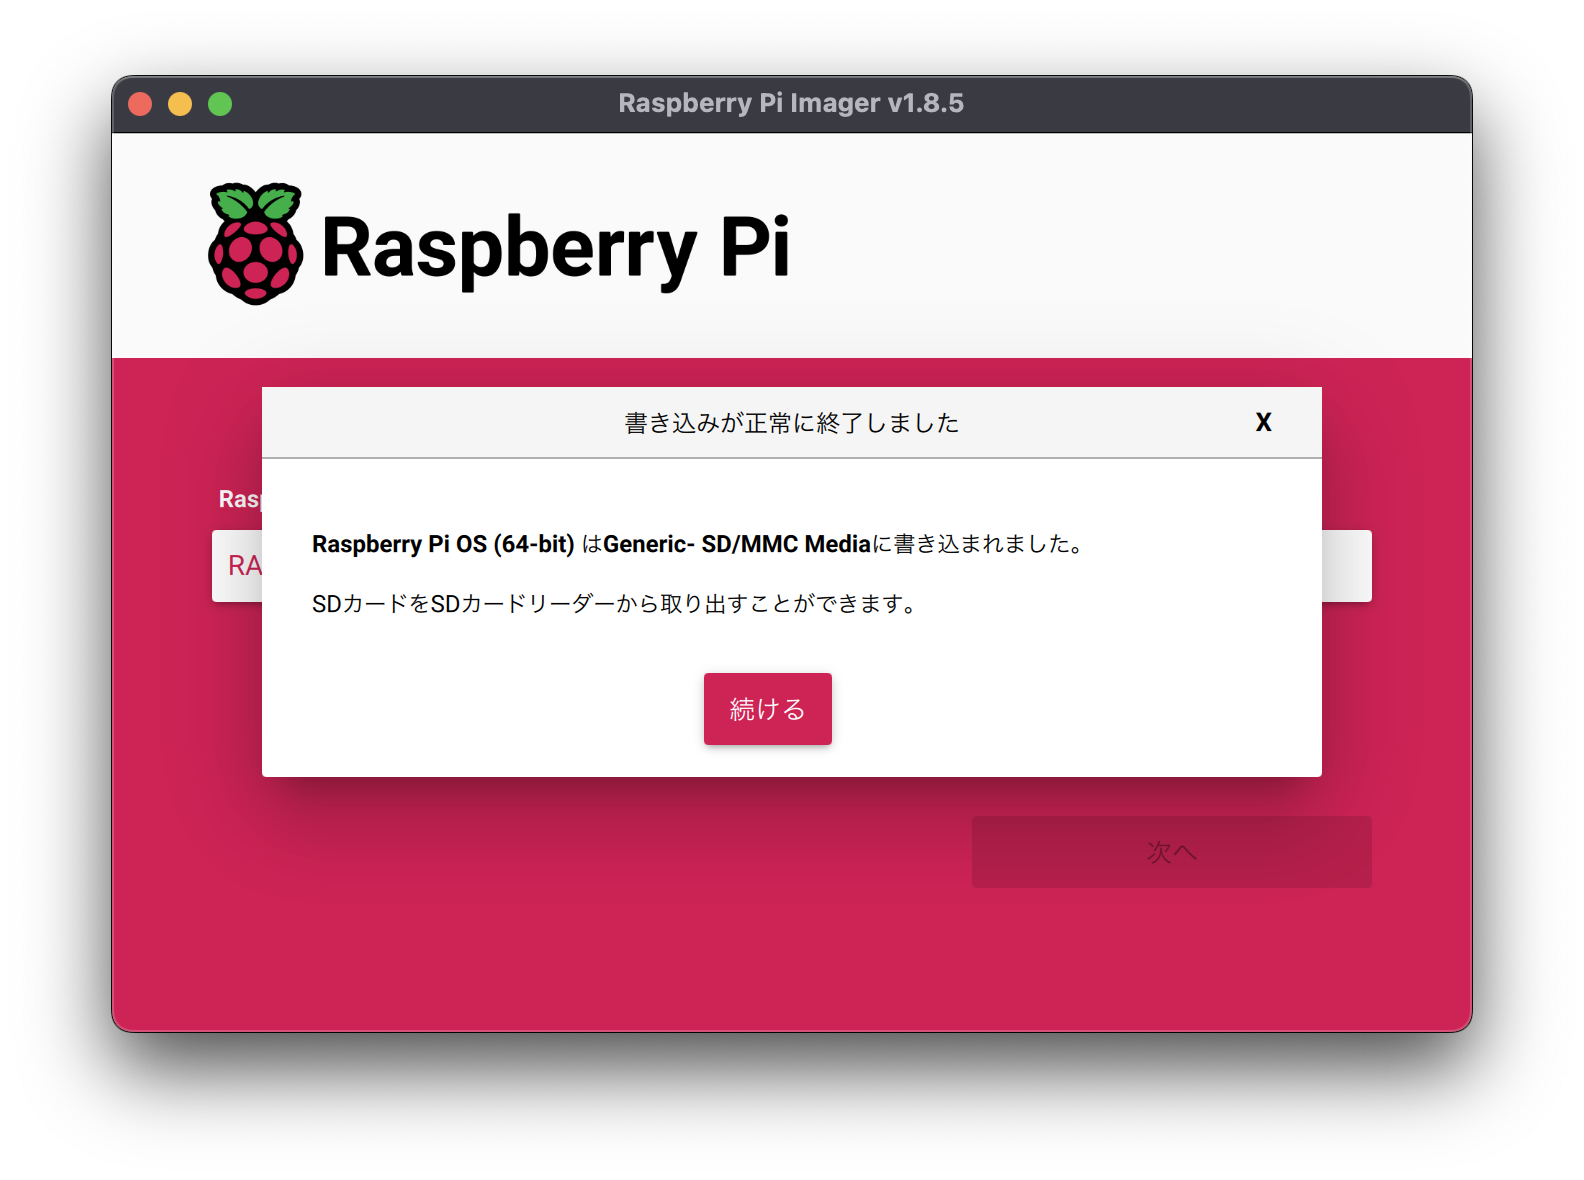
Remove the SD card after this is displayed.
Case assembly
Remove the Raspberry Pi from the box.
Next, remove the case from the box.
The case is held in place by screws, but can be disassembled into two pieces when removed.
Screws and heat sinks are packaged inside the case.
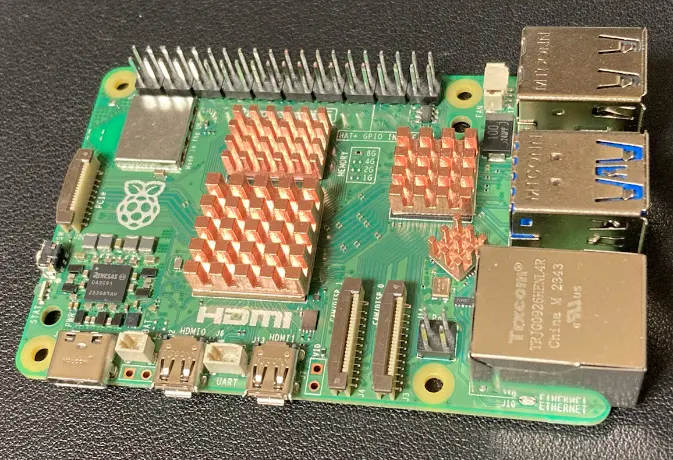
Attach the four heat sinks to the Raspberry Pi.
The heat sinks are held in place with double-sided tape.
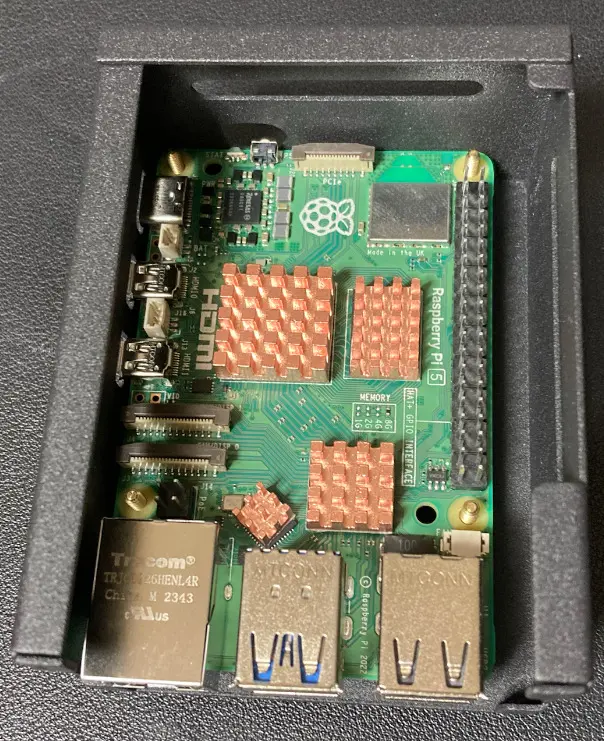
Attach the screws to the lower case.

These screws are used to secure the Raspberry Pi base to the case.
Thread this screw through the hole in the Raspberry Pi.
Further, screws are installed on top of the base to secure the case and base.
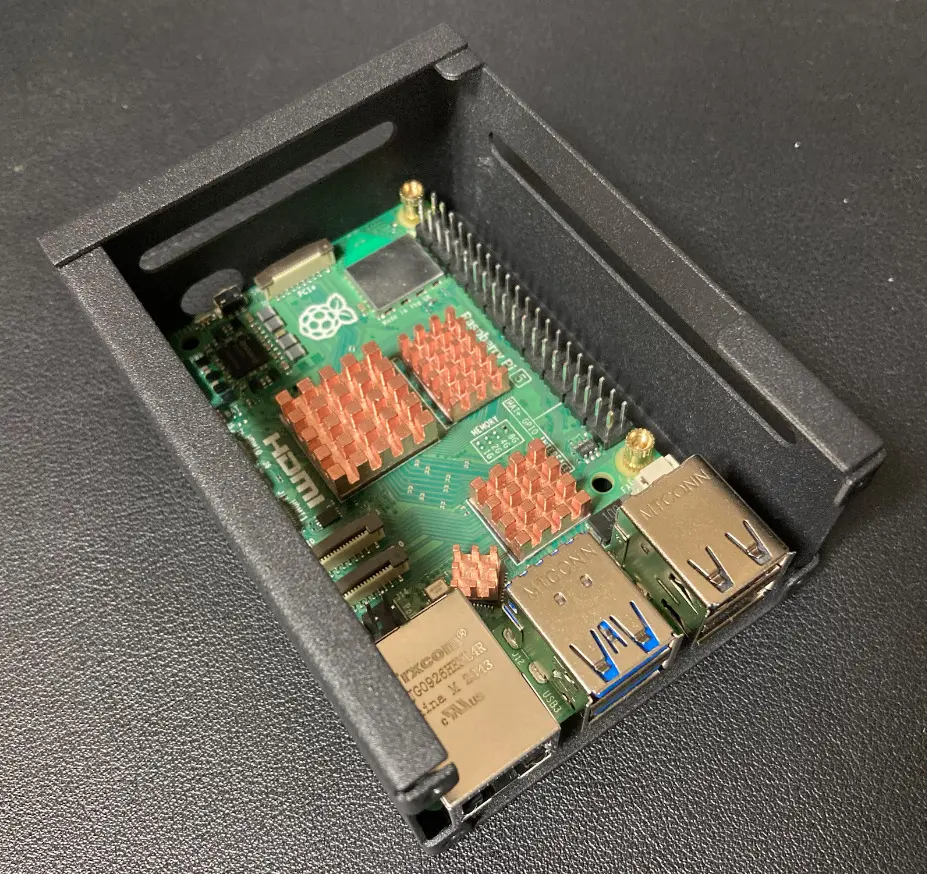
Connect the cable for the fan in the upper case to the base.

Note that the connection port is covered and must be removed.
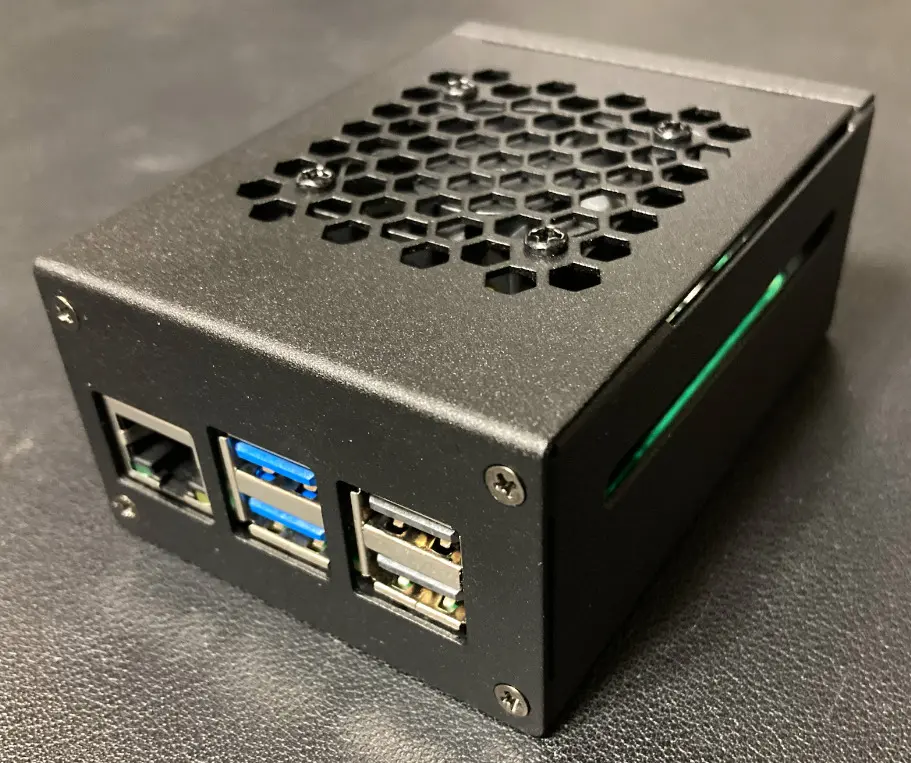
Screw the case in place to complete the case assembly.
Initialization
Connect the SD card on which you just installed the OS to the Raspberry Pi.
In addition, connect cables.

Connect mouse/keyboard to USB port.
Connect the HDMI cable using the Micro HDMI conversion adapter.
Connect the power cable to the Type-C port.
Connect the power cable and the Rasberry Pi will automatically start up.
If it does not start, press the button on the side.
Register the Raspberry Pi with Systems Manager
To register your Raspberry Pi with Systems Manager, follow these steps
- Create a hybrid activation.
- Install SSM Agent on the Raspberry Pi while using the activation ID and code you have prepared.
Create a hybrid activation
Instructions on how to create a hybrid activation can be found on the following official AWS page
https://docs.aws.amazon.com/systems-manager/latest/userguide/systems-manager-managedinstances.html
Here are some pointers on creating a hybrid activation using CloudFormation.
Create IAM service role for SSM
As shown below, it is stated that an IAM role for SSM must be created in order to create a hybrid activation.
Non-EC2 (Amazon Elastic Compute Cloud) machines in a hybrid and multicloud environment require an AWS Identity and Access Management (IAM) service role to communicate with the AWS Systems Manager service. The role grants AWS Security Token Service (AWS STS) AssumeRole trust to the Systems Manager service.
Step 1: Create an IAM service role for a hybrid and multicloud environment
Resources:
  SSMServiceRole:
    Type: AWS::IAM::Role
    DeletionPolicy: Delete
    Properties:
      AssumeRolePolicyDocument:
        Version: 2012-10-17
        Statement:
          - Effect: Allow
            Action: sts:AssumeRole
            Principal:
              Service:
                - ssm.amazonaws.com
            Condition:
              StringEquals:
                aws:SourceAccount: !Ref AWS::AccountId
              ArnEquals:
                aws:SourceArn: !Sub "arn:aws:ssm:${AWS::Region}:${AWS::AccountId}:*"
      ManagedPolicyArns:
        - arn:aws:iam::aws:policy/AmazonSSMManagedInstanceCore
Code language: YAML (yaml)
IAM roles were created based on the above page.
The key point is that the AWS management policy AmazonSSMMManagedInstanceCore is attached to this role.
Create/delete activations using CloudFormation custom resources
When you create a hybrid activation, an activation ID and activation code will be returned.
These are used to install the SSM Agent on the Raspberry Pi.
It is possible to create/delete hybrid activations using the Management Console, AWS CLI, etc.
But CloudFormation does not provide the corresponding resource, so you cannot create activations directly.
So we can use a CloudFormation custom resource to call a Lambda function to create/delete activations when creating/deleting stacks.
Resources:
  CustomResource:
    Type: Custom::CustomResource
    Properties:
      ServiceToken: !GetAtt Function.Arn

  Function:
    Type: AWS::Lambda::Function
    Properties:
      Architectures:
        - !Ref Architecture
      Environment:
        Variables:
          PREFIX: !Ref Prefix
          REGION: !Ref AWS::Region
          SSM_SERVICE_ROLE: !Ref SSMServiceRole
      Code:
        ZipFile: |
          import boto3
          import cfnresponse
          import os

          prefix = os.environ['PREFIX']
          region = os.environ['REGION']
          ssm_service_role = os.environ['SSM_SERVICE_ROLE']

          CREATE = 'Create'
          DELETE = 'Delete'
          response_data = {}
          physical_resource_id = ''

          key_name_id = 'ActivationId'
          key_name_code = 'ActivationCode'

          ssm_client = boto3.client('ssm', region_name=region)

          def lambda_handler(event, context):
            print(event)

            try:
              if event['RequestType'] == CREATE:
                ssm_response = ssm_client.create_activation(
                  DefaultInstanceName=prefix,
                  IamRole=ssm_service_role
                )

                physical_resource_id = ssm_response[key_name_id]
                response_data[key_name_id] = ssm_response[key_name_id]
                response_data[key_name_code] = ssm_response[key_name_code]

              elif event['RequestType'] == DELETE:
                physical_resource_id = event['PhysicalResourceId']
                ssm_response = ssm_client.delete_activation(
                  ActivationId=physical_resource_id
                )

              cfnresponse.send(
                event=event,
                context=context,
                responseStatus=cfnresponse.SUCCESS,
                responseData=response_data,
                physicalResourceId=physical_resource_id
                )

            except Exception as e:
              print(e)
              cfnresponse.send(event, context, cfnresponse.FAILED, response_data)
      FunctionName: !Sub "${Prefix}-function"
      Handler: !Ref Handler
      Runtime: !Ref Runtime
      Role: !GetAtt FunctionRole.Arn
      Timeout: !Ref Timeout

  FunctionRole:
    Type: AWS::IAM::Role
    DeletionPolicy: Delete
    Properties:
      AssumeRolePolicyDocument:
        Version: 2012-10-17
        Statement:
          - Effect: Allow
            Action: sts:AssumeRole
            Principal:
              Service:
                - lambda.amazonaws.com
      ManagedPolicyArns:
        - arn:aws:iam::aws:policy/service-role/AWSLambdaBasicExecutionRole
      Policies:
        - PolicyName: LambdaFunctionPolicy
          PolicyDocument:
            Version: 2012-10-17
            Statement:
              - Effect: Allow
                Action:
                  - iam:PassRole
                  - ssm:CreateActivation
                  - ssm:DeleteActivation
                Resource: "*"
Code language: YAML (yaml)
For basic information on CloudFormation custom resources, please see the following pages.

This time, we will execute a Lambda function in Python 3.12 runtime environment.
Check the contents of the code to be executed.
After creating the client object for boto3 SSM, execute create_activation method for stack creation and delete_activation method for stack deletion.
Create/delete hybrid activation respectively.
During stack creation, i.e. activation creation, the activation ID and activation code can be obtained.
Pass these as part of the responseData argument when executing the cfnresponse.send function.
This way you can set them to the Outputs of the CloudFormation stack and check the values after the stack is created.
In addition, the activation ID is specified in the physicalResourceId argument when executing the same function.
This is so that the activation ID can be referenced when deleting the stack, that is, when deleting an activation.
This idea was greatly inspired by the following pages.
https://dev.classmethod.jp/articles/on-premise-ubuntu-cloudfomation-aws-systems-manager-activation/
The beauty of this setting is that this value can be referenced even when deleting stacks.
The aforementioned responseData value is accessible from the CloudFormation template file side, but not from the custom resource side when deleting stacks.
The value of physicalResourceId, however, can be set during stack creation and referenced during stack deletion.
So by storing the activation ID in the physicalResourceId, this ID can be referenced when deleting the stack to delete the activation.
CloudFormation Stack Creation
Create a CloudFormation stack using the AWS CLI.
Place the above template file in any S3 bucket and then execute the following command
aws cloudformation create-stack \
--stack-name fa-152-01 \
--template-url https://[bucket-name].s3.[region].amazonaws.com/fa-152/fa-152-01.yaml \
--capabilities CAPABILITY_IAM
Code language: Bash (bash)
For more information on creating stacks, please see the following page.

Check the resources created.
Check the IAM role.
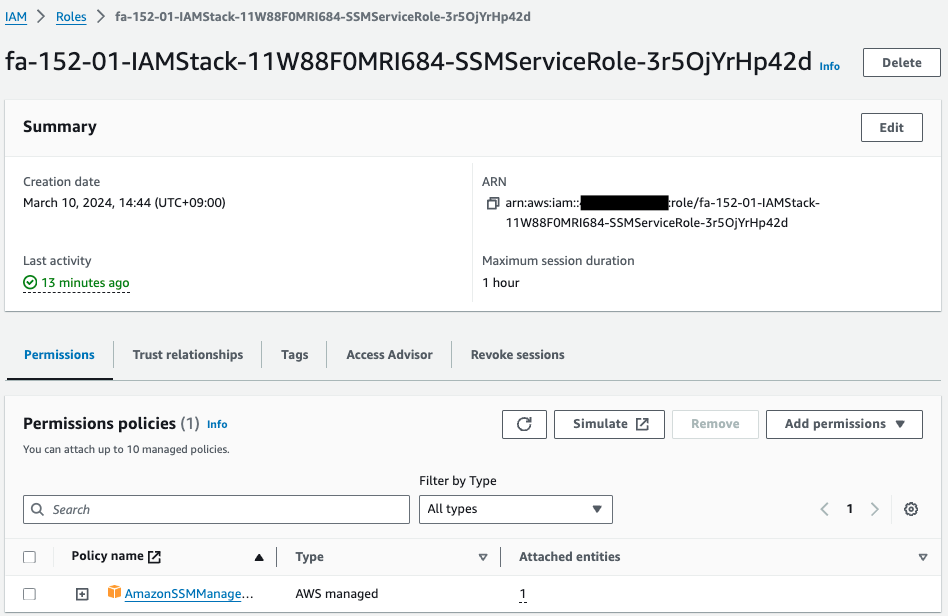
Indeed, an IAM role has been created.
This IAM role is a service role for SSM.
Check the Lambda function.
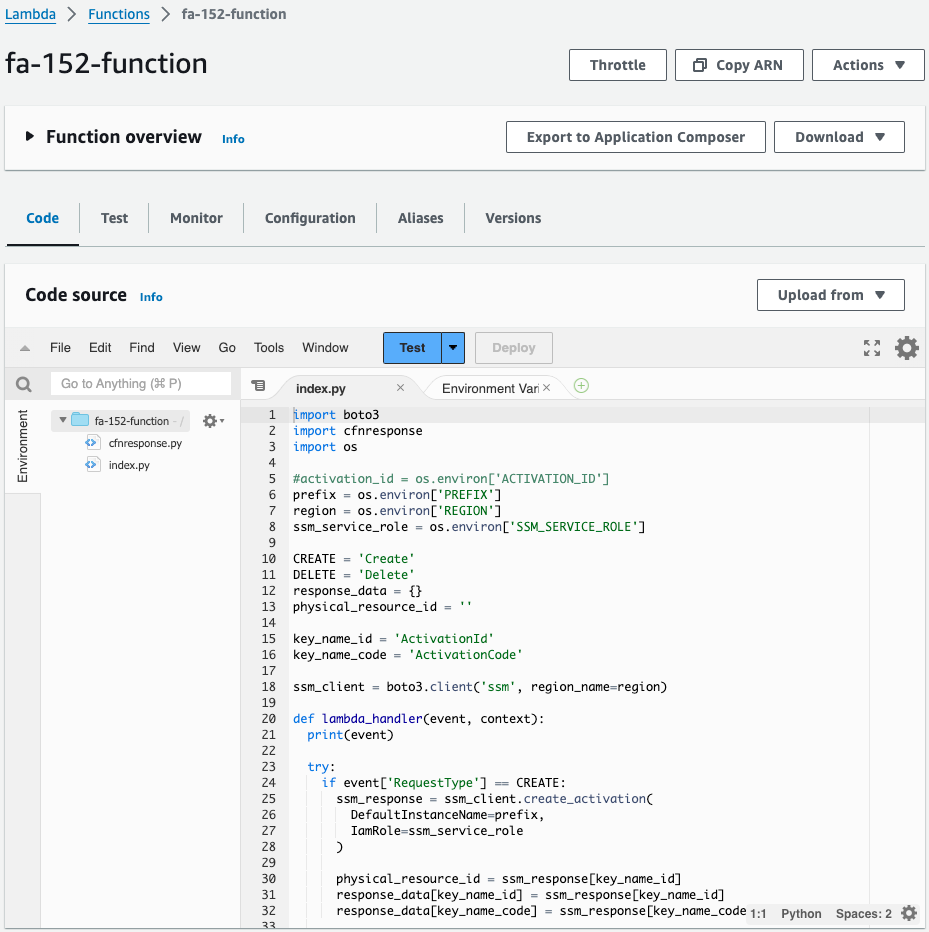
The function is successfully created.
Check the execution log of this function.
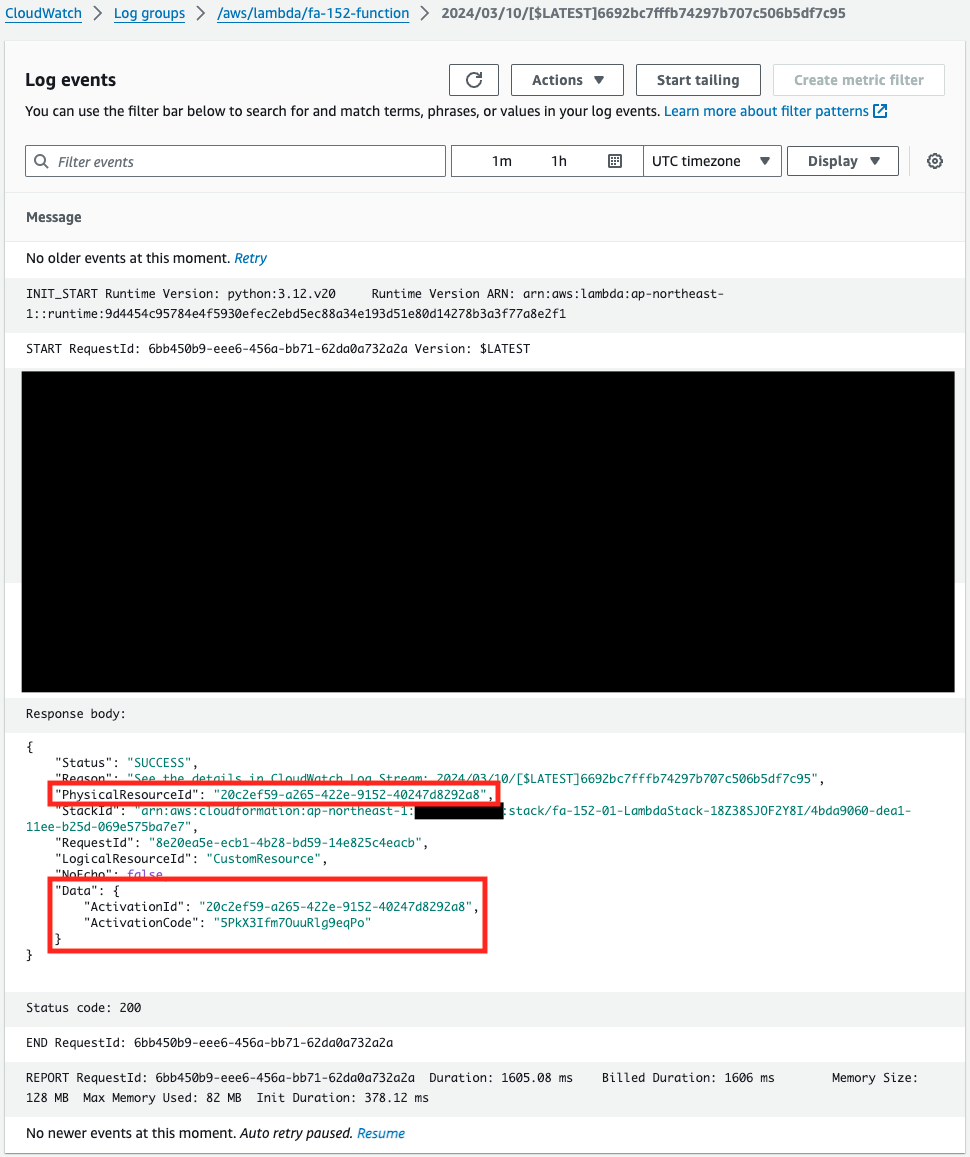
The function is indeed executed.
This means that this function was automatically called by the CloudFormation custom resource when the stack was created.
If you look at the contents of the response in the log, you can see that Data is set to a hybrid activation ID and code.
In addition, we can see that the PhysicalResourceId value is the activation ID.
Since both data are set in Data, they can also be viewed in CloudFormation Outputs.
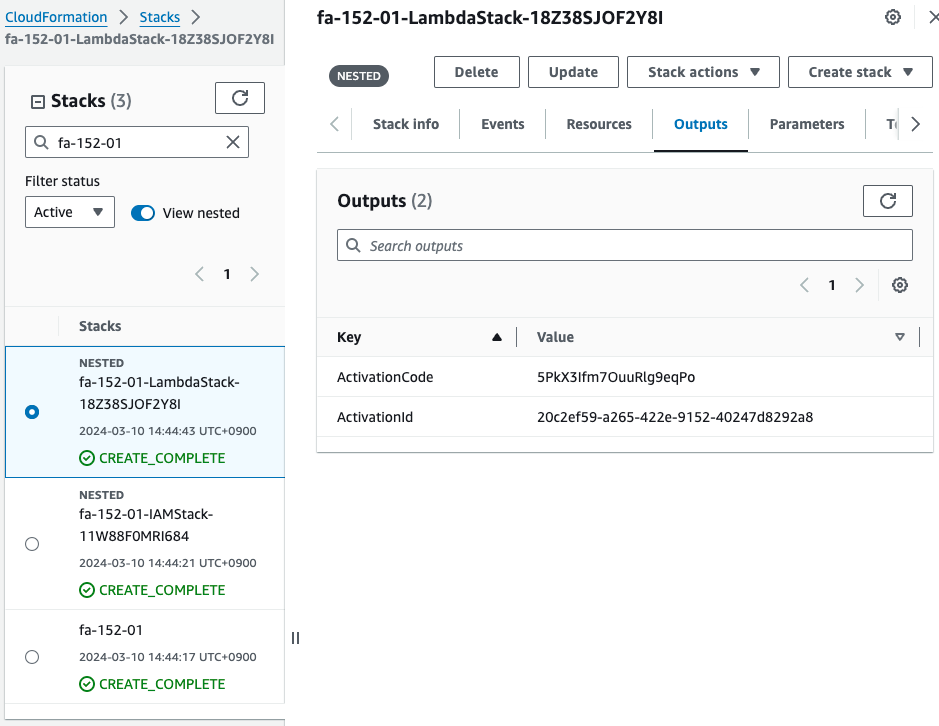
It does indeed show an activation ID and code.
Check Systems Manager.
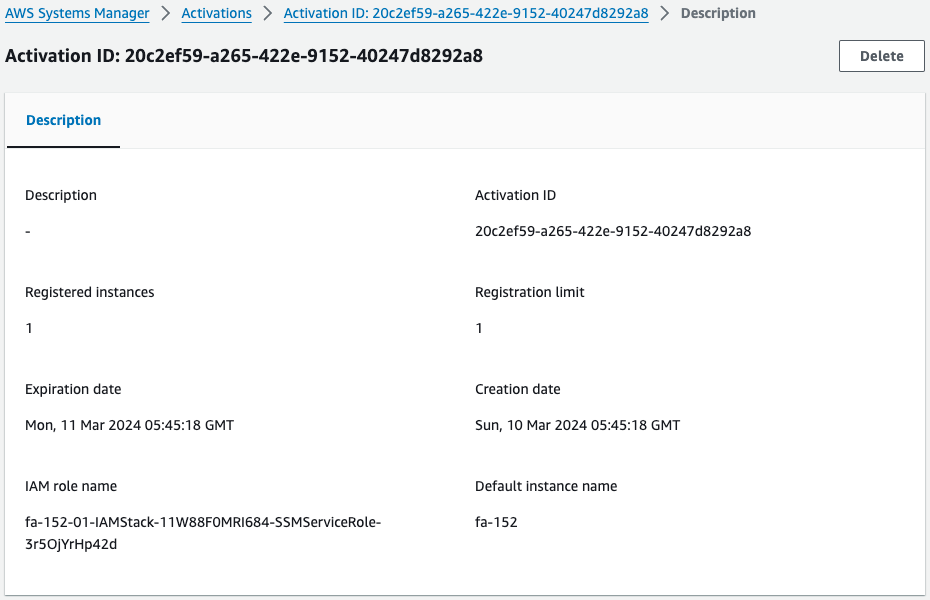
Indeed, a hybrid activation is created.
Thus, CloudFormation custom resources can be used to automatically create hybrid activations.
Install SSM Agent on Raspberry Pi
The following page shows how to install SSM Agent on a Raspberry Pi.
https://docs.aws.amazon.com/systems-manager/latest/userguide/sysman-install-managed-linux.html
This time, the following commands were executed on the Raspberry Pi.
sudo apt-get -y update
sudo apt-get -y upgrade
sudo apt-get -y install libc6:armhf
mkdir /tmp/ssm
curl https://amazon-ssm-ap-northeast-1.s3.ap-northeast-1.amazonaws.com/latest/debian_arm/ssm-setup-cli -o /tmp/ssm/ssm-setup-cli
sudo chmod +x /tmp/ssm/ssm-setup-cli
sudo /tmp/ssm/ssm-setup-cli -register -activation-code "[activation-code]" -activation-id "[activation-id]" -region "ap-northeast-1"
Code language: Bash (bash)
The bottom 4 lines are the commands from the above page and the top 4 lines are the commands I added.
This is because on my environment, a dependency error occurred and SSM Agent could not be installed successfully.
As the argument to the last command, specify the hybrid activation ID and code that you have just verified.
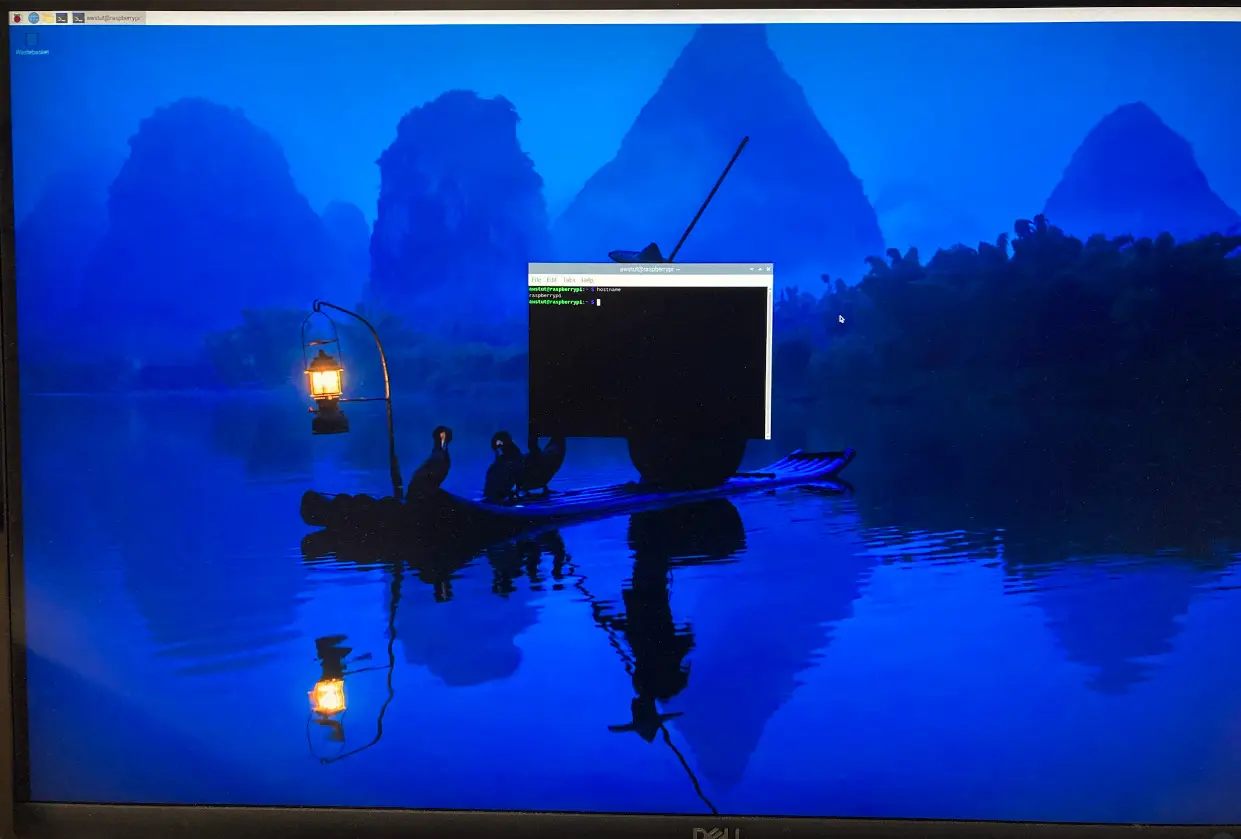
As for how to execute the above command, I did so by SSH into the Raspberry Pi.
If you have a mouse/keyboard directly connected to the Raspberry Pi, you can also execute the above command, but you will have to type the command manually.
So after checking the IP address set on the wireless LAN side of the Raspberry Pi (e.g. nmcli device show command), SSH to the same address and copy and paste the above command to execute. I decided to copy and paste the above command into SSH to the same address and execute it.
After the SSM Agent installation is successfully completed, the Agent will automatically start.
awstut@raspberrypi:~ $ sudo systemctl status amazon-ssm-agent
● amazon-ssm-agent.service - amazon-ssm-agent
      Loaded: loaded (/lib/systemd/system/amazon-ssm-agent.service; enabled; preset: enabled)
      Active: active (running) since Sun 2024-03-10 14:20:20 JST; 28s ago
    Main PID: 3709 (amazon-ssm-agen)
      Tasks: 19 (limit: 9250)
        CPU: 309ms
      CGroup: /system.slice/amazon-ssm-agent.service
              ├─3709 /usr/bin/amazon-ssm-agent
              └─3725 /usr/bin/ssm-agent-worker

Mar 10 14:20:20 raspberrypi amazon-ssm-agent[3709]: 2024-03-10 14:20:20 INFO [amazon-ssm-agent] amazon-ssm-agent - v3.2.2303.0
Mar 10 14:20:20 raspberrypi amazon-ssm-agent[3709]: 2024-03-10 14:20:20 INFO [amazon-ssm-agent] OS: linux, Arch: arm
Mar 10 14:20:20 raspberrypi amazon-ssm-agent[3709]: 2024-03-10 14:20:20 INFO [amazon-ssm-agent] Starting Core Agent
Mar 10 14:20:20 raspberrypi amazon-ssm-agent[3709]: 2024-03-10 14:20:20 INFO [CredentialRefresher] credentialRefresher has started
Mar 10 14:20:20 raspberrypi amazon-ssm-agent[3709]: 2024-03-10 14:20:20 INFO [CredentialRefresher] Starting credentials refresher loop
Mar 10 14:20:20 raspberrypi amazon-ssm-agent[3709]: 2024-03-10 14:20:20 INFO [CredentialRefresher] Credentials ready
Mar 10 14:20:20 raspberrypi amazon-ssm-agent[3709]: 2024-03-10 14:20:20 INFO [CredentialRefresher] Next credential rotation will be in 29.9927887592 mi>
Mar 10 14:20:21 raspberrypi amazon-ssm-agent[3709]: 2024-03-10 14:20:21 INFO [amazon-ssm-agent] [LongRunningWorkerContainer] [WorkerProvider] Worker ss>
Mar 10 14:20:21 raspberrypi amazon-ssm-agent[3709]: 2024-03-10 14:20:21 INFO [amazon-ssm-agent] [LongRunningWorkerContainer] [WorkerProvider] Worker ss>
Mar 10 14:20:22 raspberrypi amazon-ssm-agent[3709]: 2024-03-10 14:20:21 INFO [amazon-ssm-agent] [LongRunningWorkerContainer] Monitor long running worke>
Code language: Bash (bash)
Check the AWS side again.
Check the Managed Node page in SSM Feet Manager.
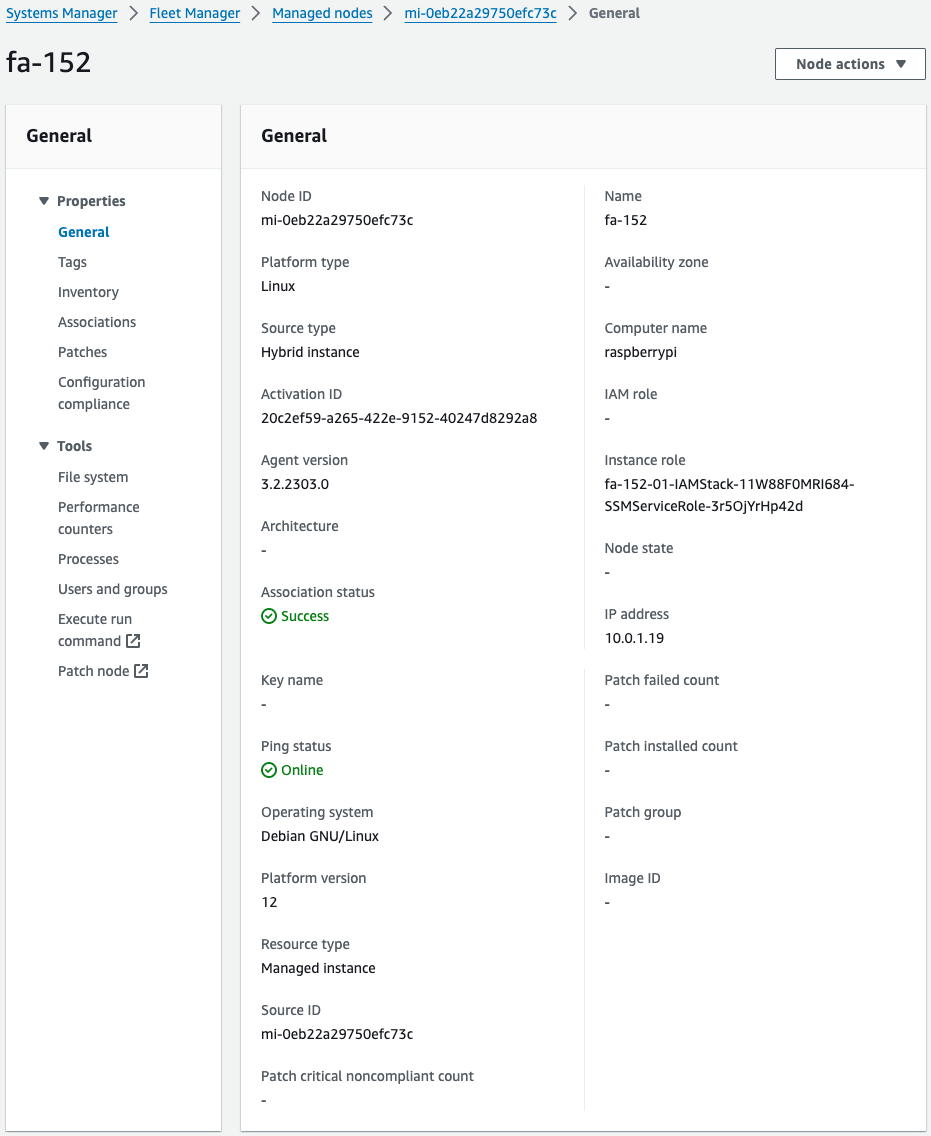
One Managed Node has indeed been added.
The Activation ID shows that it was indeed created by a CloudFormation custom resource earlier.
By installing the SSM Agent while using hybrid activation in this way, the Raspberry Pi can be registered with Systems Manager.
Using AWS Systems Manager to execute commands on the Raspberry Pi
Create SSM association
Up to the previous section, the Raspberry Pi is now ready to be managed by Systems Manager.
In this page, we will execute commands on the Raspberry Pi using the Systems Manager functions as an example of management.
Again, use CloudFormation to create SSM associations and execute them with Run Command.
Resources:
  RunShellScriptAssociation:
    Type: AWS::SSM::Association
    Properties:
      AssociationName: !Sub "${Prefix}-shellscript-association"
      Name: AWS-RunShellScript
      Parameters:
        commands:
          - "touch /tmp/test.txt"
      Targets:
        - Key: InstanceIds
          Values:
            - !Ref NodeId
      WaitForSuccessTimeoutSeconds: !Ref WaitForSuccessTimeoutSeconds
Code language: YAML (yaml)
The contents of the SSM document AWS-RunShellScript to be executed against the target.
There are two points.
The first point is the script to run.
In this case, verification, we will use the touch command to create test.txt in the /tmp directory.
The second point is how to specify instances.
Specify the target instance with the Targets property.
Normally, the ID of the EC2 instance is specified in this property, but in this case we will specify the ID of the Managed Node assigned to the Raspberry Pi with hybrid activation enabled
In this case, it is “mi-0eb22a29750efc73c”.
CloudFormation Stack Creation
Again, we will use the AWS CLI to create the CloudFormation stack.
Place the above template file in any S3 bucket and then execute the following command
aws cloudformation create-stack \
--stack-name fa-152-02 \
--template-url https://[bucket-name].s3.[region].amazonaws.com/fa-152/fa-152-02.yaml
Code language: Bash (bash)
Check the resources created.
Check SSM State Manager.
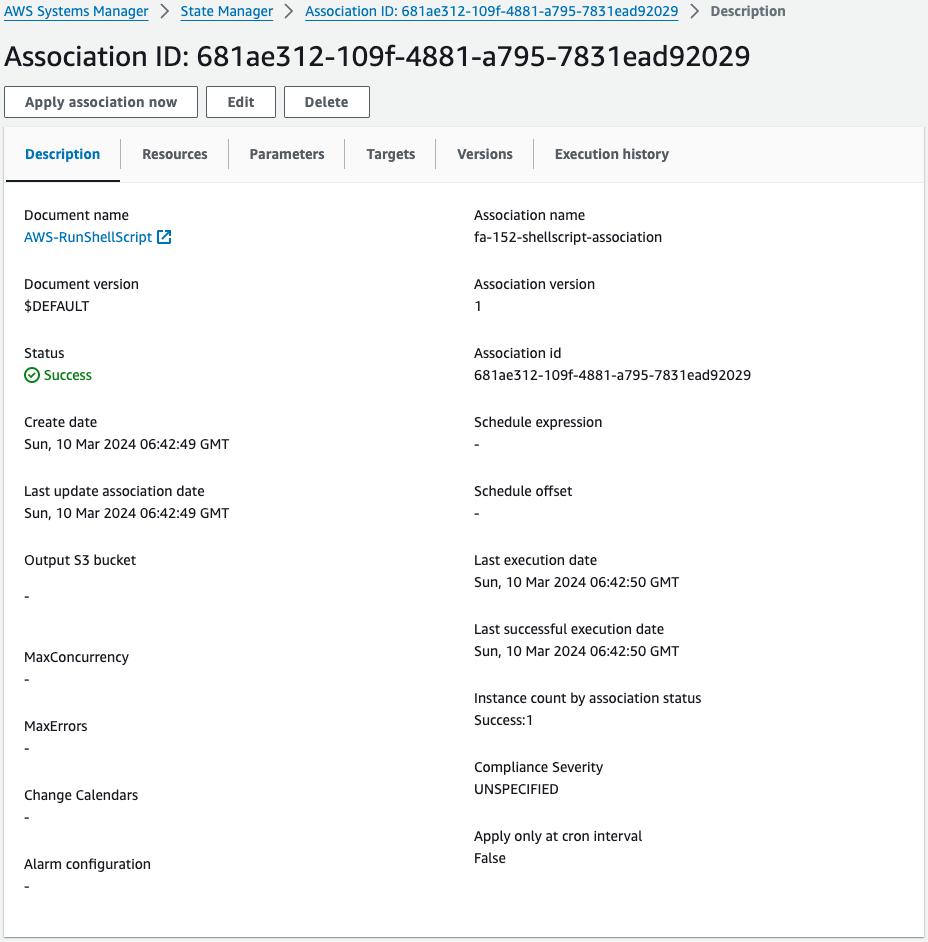
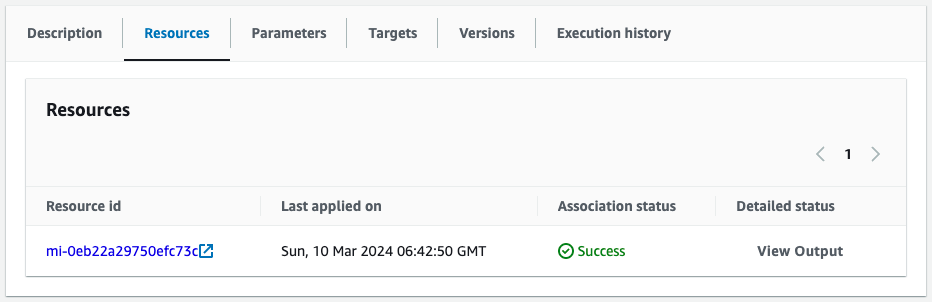
Indeed, an association is created between the Managed Node, Raspberry Pi, and the SSM document AWS-RunShellScript.
Check SSM Run Command.
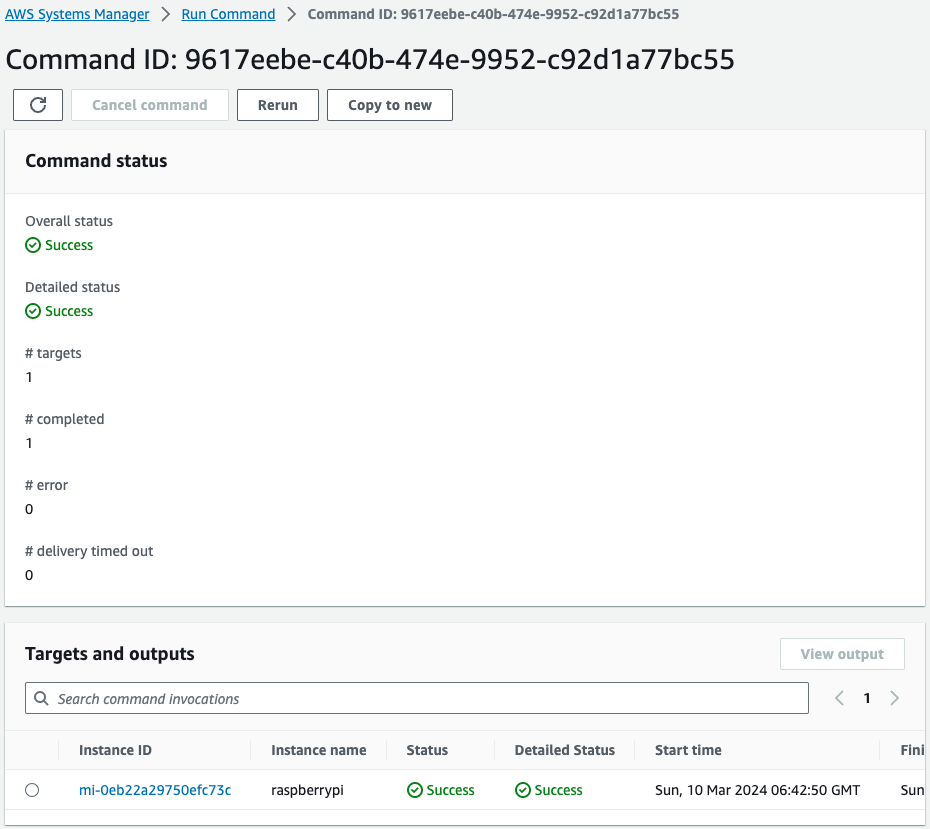
Here you can see that the Run Command was executed against the Raspberry Pi and completed successfully.
This means that the Run Command was executed through State Manager.
Finally, access the Raspberry Pi and check the results of the Run Command execution.
awstut@raspberrypi:~ $ ls /tmp
ssh-XXXXXX1IKqpP
ssm
systemd-private-17099a81f2ff43059a22854d9f6f1f63-bluetooth.service-Z7slQf
systemd-private-17099a81f2ff43059a22854d9f6f1f63-ModemManager.service-SWnEDs
systemd-private-17099a81f2ff43059a22854d9f6f1f63-systemd-logind.service-44pZrv
systemd-private-17099a81f2ff43059a22854d9f6f1f63-systemd-timesyncd.service-kTxxXi
test.txt
tmp.iATINIcQGt
Code language: Bash (bash)
Indeed, test.txt is located in the /tmp directory of the Raspberry Pi.
We have confirmed that we were able to execute the command on the Raspberry Pi using the Systems Manager feature.
Summary
We have identified how to initially set up the Raspberry Pi 5.
Confirmed how to create/remove SSM Hybrid Activation by using CloudFormation custom resources.
Confirmed how to register with Systems Manager by installing SSM Agent while using activation on Raspberry Pi.
As an example of managing the Raspberry Pi with Systems Manager, we have identified how to execute commands on the Raspberry Pi using the Systems Manager features.