Four ways to attach EBS to Windows instance
We will check a configuration that attaches EBS (Elastic Block Store) to a Windows instance.
In this page, we will review the steps to attach EBS to a Windows instance and make it available for storage.
The procedures after attaching will follow those described in the AWS official website Make an Amazon EBS volume available for use on Windows.
Specifically, the following four patterns are identified.
- using disk management utilities
- execute the Diskpart command
- How to execute PowerShell commands
- how to execute PowerShell commands from SSM documentation
Also, please refer to the following page for the procedure to attach EBS to a Linux instance.
Environment
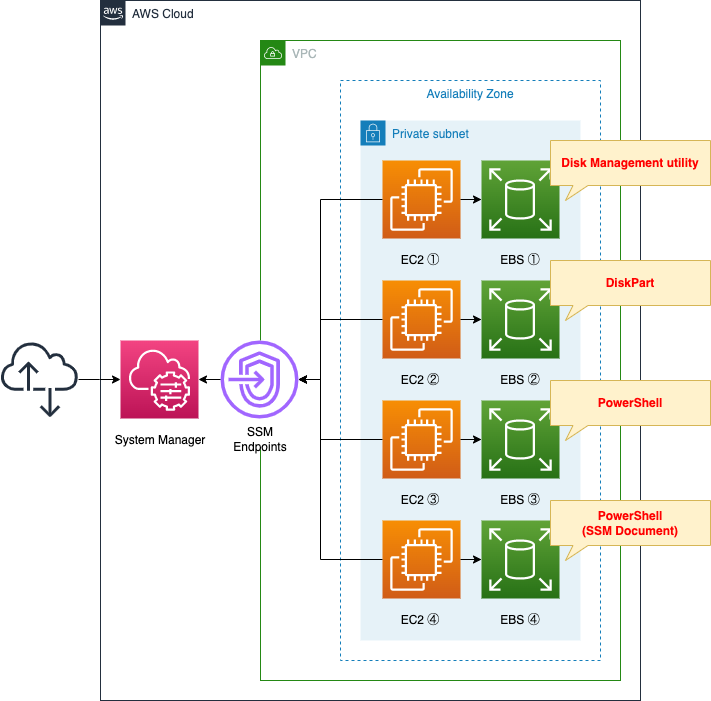
Create four EC2 instances.
All will be the latest Windows Server 2019-based instances.
Create four EBSs as well.
Attach one EBS to each of the four instances mentioned above.
CloudFormation template files
We will build the above configuration using CloudFormation.
The CloudFormation template is placed at the following URL
https://github.com/awstut-an-r/awstut-fa/tree/main/009
Template file points
We will cover the key points of each template file to configure this environment.
Create EC2 instance
Resources:
  Instance1:
    Type: AWS::EC2::Instance
    Properties:
      IamInstanceProfile: !Ref InstanceProfile
      ImageId: !Ref ImageId
      InstanceType: !Ref InstanceType1
      KeyName: !Ref KeyName
      NetworkInterfaces:
        - DeviceIndex: 0
          SubnetId: !Ref PrivateSubnet
          GroupSet:
            - !Ref InstanceSecurityGroup
Code language: YAML (yaml)
No special configuration is required.
Define 4 instances with similar settings.
Attaching EBS to an instance
Create EBS.
Attach it to the instance you just defined.
Resources:
  EBS1:
    Type: AWS::EC2::Volume
    Properties:
      AvailabilityZone: !Sub "${AWS::Region}${AvailabilityZone}"
      Size: !Ref VolumeSize
      VolumeType: !Ref VolumeType

  EBSAttachment1:
    Type: AWS::EC2::VolumeAttachment
    Properties:
      Device: !Sub "xvd${DeviceNameSuffix}"
      InstanceId: !Ref Instance1
      VolumeId: !Ref EBS1
Code language: YAML (yaml)
After defining the EBS itself, define the resources to be attached to the instance.
This time, the EBS type is gp3, the capacity to be secured is 1 GiB, and the device name is “xvdf”.
For more details, please also check Attaching EBS to a Linux instance – Attaching EBS to an instance.
Enabling EBS with SSM Documentation
We will show you how to do this later using PowerShell commands, but you can also run the commands through SSM documentation.
Resources:
  RunPowerShellScriptAssociation:
    Type: AWS::SSM::Association
    Properties:
      AssociationName: !Sub "${Prefix}-run-powershellscript-association"
      Name: AWS-RunPowerShellScript
      Parameters:
        commands:
          - "Stop-Service -Name ShellHWDetection"
          - !Sub "Get-Disk | Where PartitionStyle -eq 'raw' | Initialize-Disk -PartitionStyle MBR -PassThru | New-Partition -AssignDriveLetter -UseMaximumSize | Format-Volume -FileSystem NTFS -NewFileSystemLabel '${VolumeLabel}' -Confirm:$false"
          - "Start-Service -Name ShellHWDetection"
      Targets:
        - Key: InstanceIds
          Values:
            - !Ref Instance
      WaitForSuccessTimeoutSeconds: !Ref WaitForSuccessTimeoutSeconds
Code language: YAML (yaml)
The SSM document AWS-RunPowerShellScript can be used to execute the specified PowerShell command against a Windows instance.
More details will follow.
Architecting
Using CloudFormation, we will build this environment and check its actual behavior.
Create CloudFormation stacks and check resources in stacks
Create a CloudFormation stacks.
For more information on how to create stacks and check each stack, please refer to the following page.

After checking the resources for each stack, the following information is available for the main resources created this time.
- ID of instance 1: i-0f4aa951f2a85a27f
- ID of instance 2: i-07c4964c4dc003aac
- ID of instance 3: i-0fce29170aa28679c
- ID of instance 4: i-0d463301f996c2e66
- ID of EBS to be attached to instance 1: vol-0882997dc762f6833
- ID of EBS to be attached to instance 2: vol-031ab2c2168b22d49
- ID of EBS to be attached to instance 3: vol-096b4f032fc4e71ea
- ID of EBS to be attached to instance 4: vol-0560cb05ba2d12f9a
Next, the password to access Instance1 can be confirmed from the AWS Management Console or AWS CLI.
Please refer to the following page for details.
Check the EBS attach status1
Check the status of each instance from the AWS Management Console.
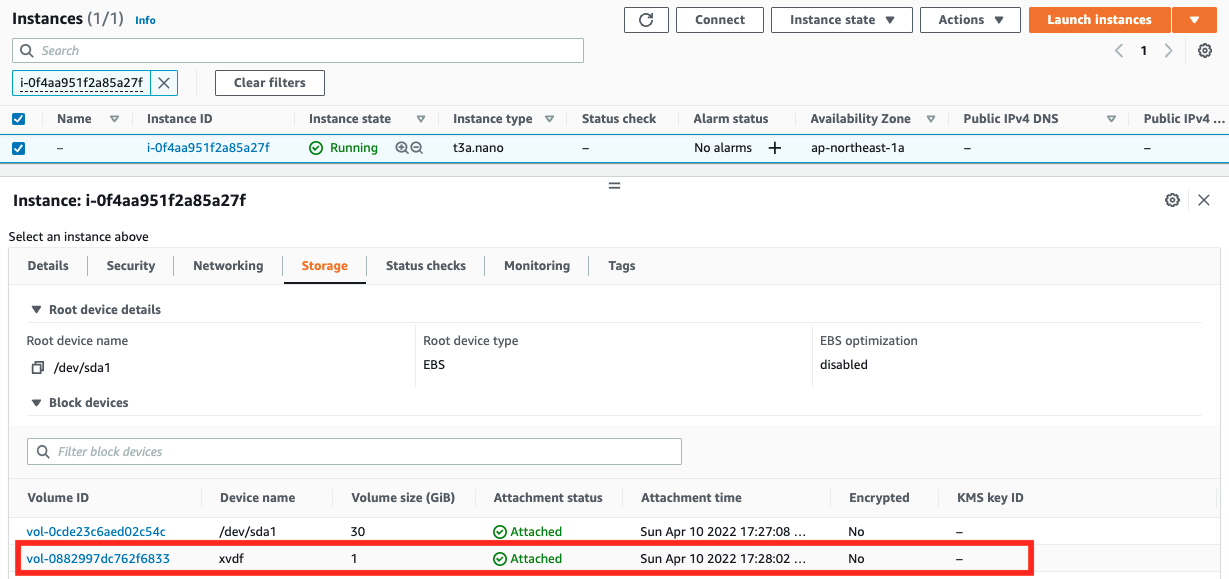
Check Instance1 as a representative.
Checking the value of BlockDeviceMappings, we can confirm that two EBSs are attached to each.
The “/dev/sda1” is the root device. This device name is reserved for the root.
The other “xvdf” is the EBS created this time. You can see that it is attached normally.
Make EBS available for Windows instances: Disk Management Utility
Now that the preparations are ready, we would like to actually access the instance and check the settings for EBS.
First, access Instance1 and check the settings for remote desktop connection. To access the instance, we will use SSM Session Manager to access it via tunneled access and remote desktop connection.
First, execute the following command on the client side.
% aws ssm start-session \
--target i-0f4aa951f2a85a27f \
--document-name AWS-StartPortForwardingSession \
--parameters "portNumber=3389, localPortNumber=13389"

Starting session with SessionId: root-0a6891e618ed3616b
Port 13389 opened for sessionId root-0a6891e618ed3616b.
Waiting for connections...
Code language: Bash (bash)
Next, make a remote desktop connection as follows
- Remote desktop connection destination: localhost:13389
- User name: Administrator
- Password: [rdp-password]
For more details, please refer to Accessing a Windows instance via SSM Session Manager – Using SSM Session Manager for tunneled access with a remote desktop connection.
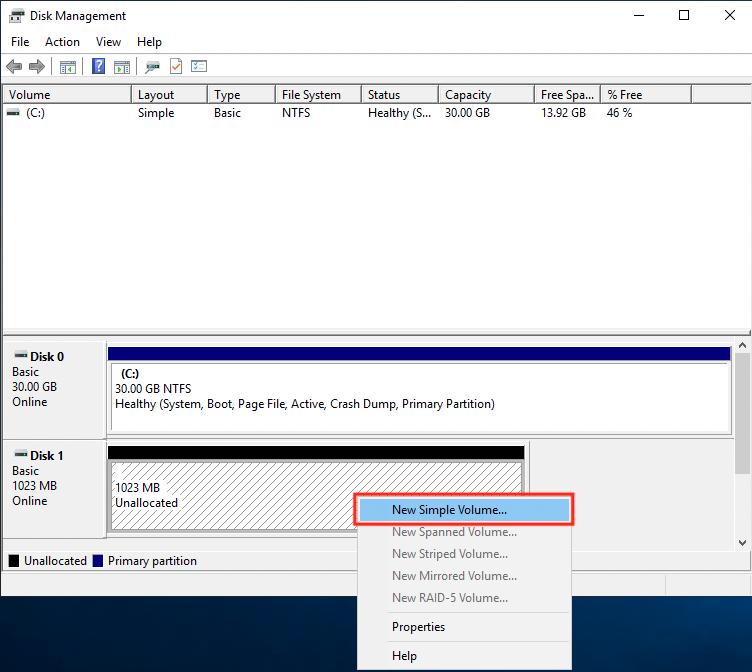
After completing the remote desktop connection, launch Disk Management.
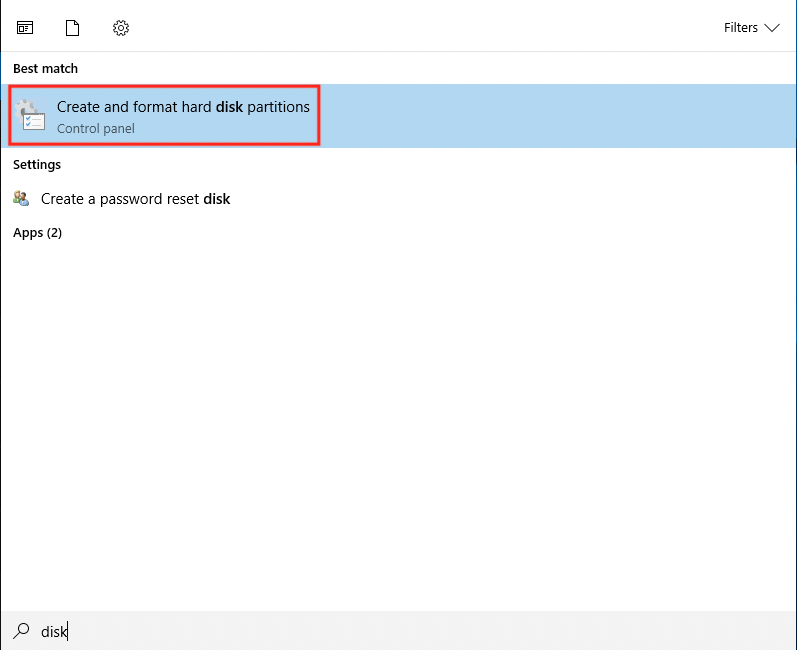
Disk 1″ is EBS.
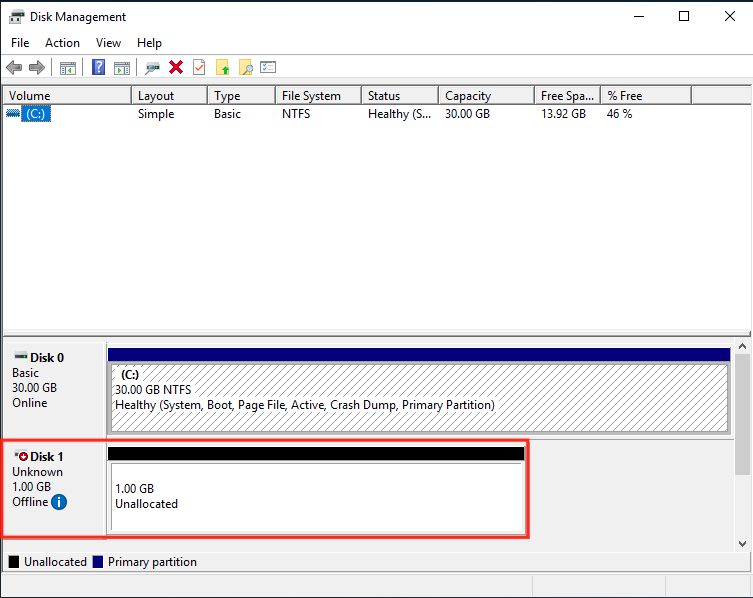
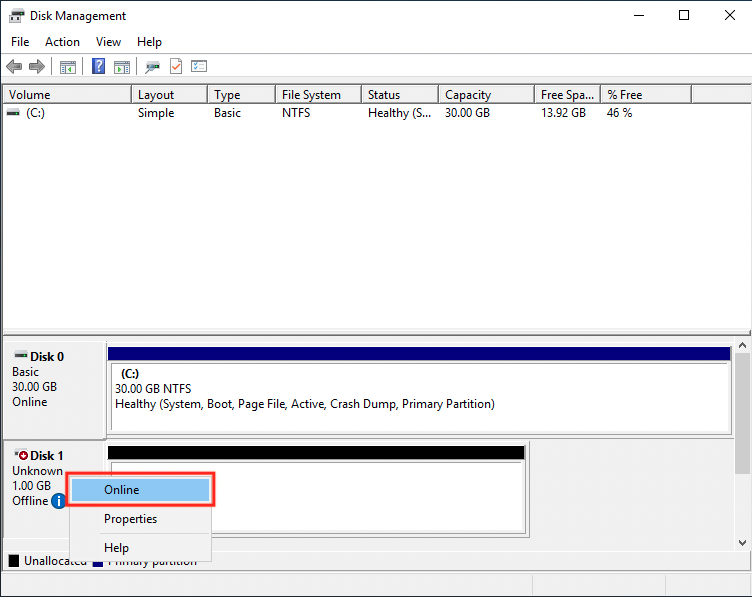
Right-click “Disk 1” and press “Online”.
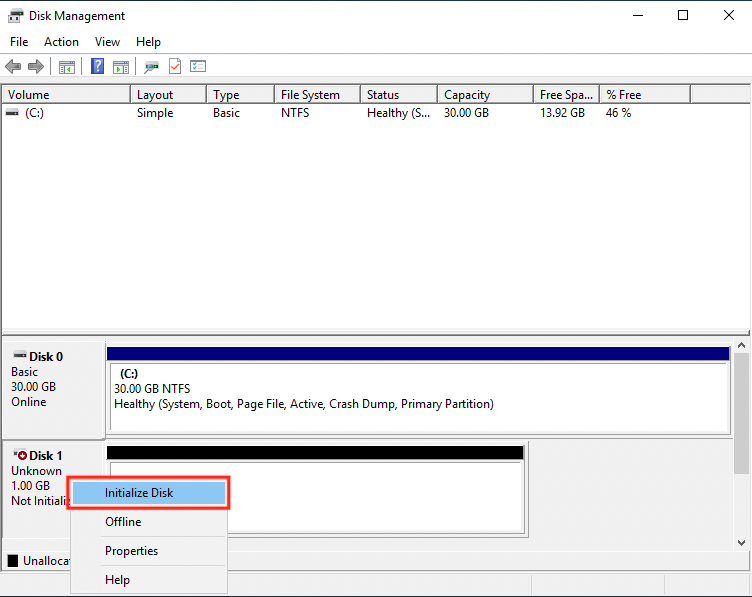
Continue to right-click on “Disk 1” and press “Initialize Disk”.
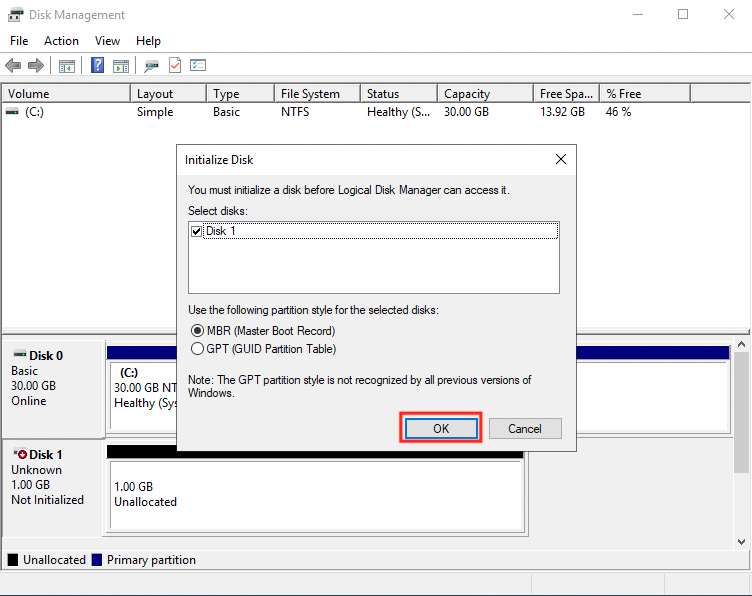
A new “Disk Initialization” window will appear. Press “OK” with the default settings.
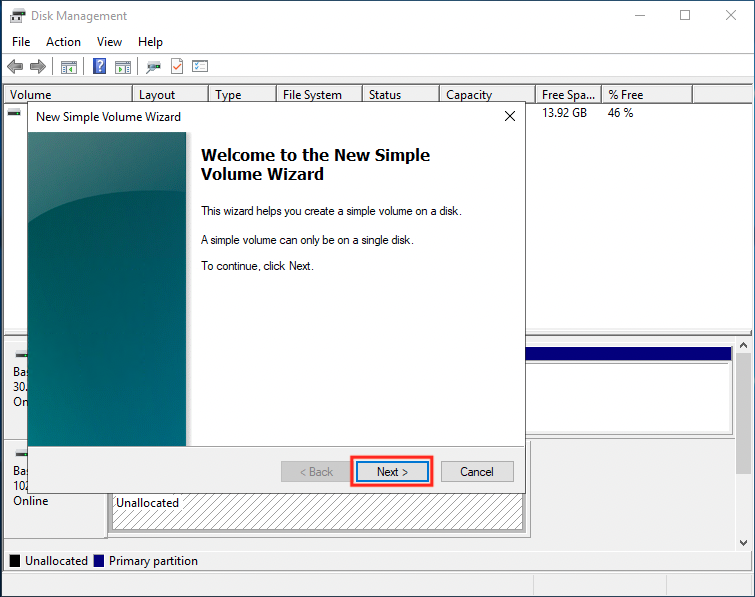
The status of Disk 1 has changed to “Online”. Right-click and press “New Simple Volume”.
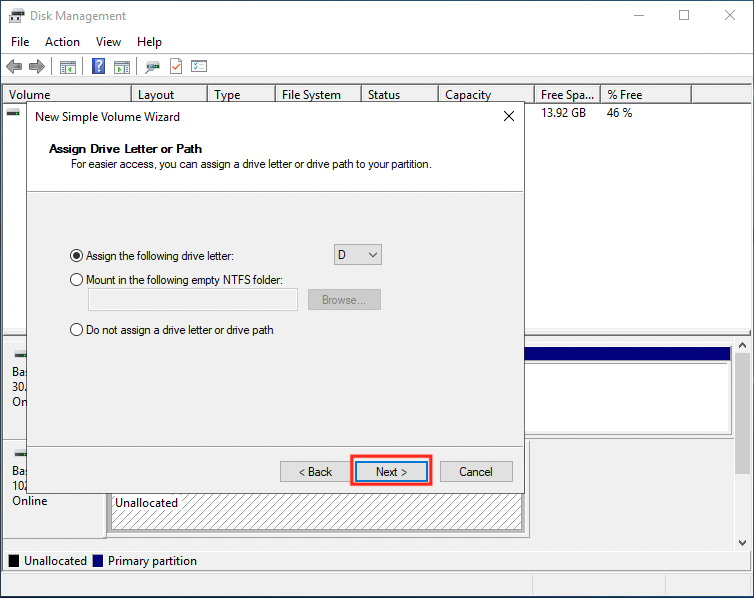
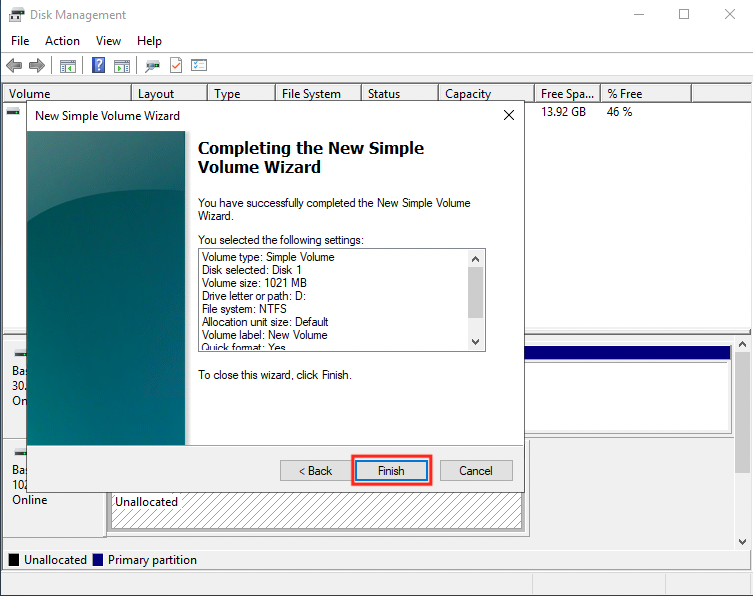
The “New Simple Volume Wizard” will be launched. We will basically proceed with the default settings. The disk letter is set to “D”.

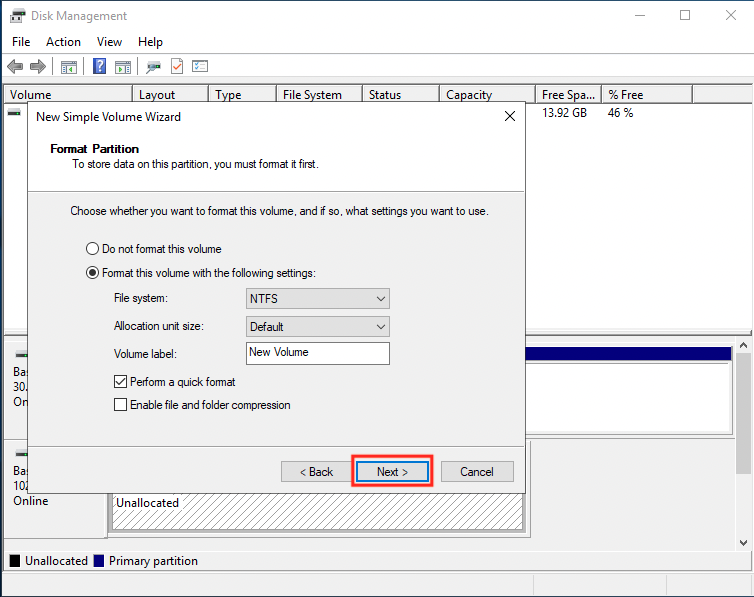
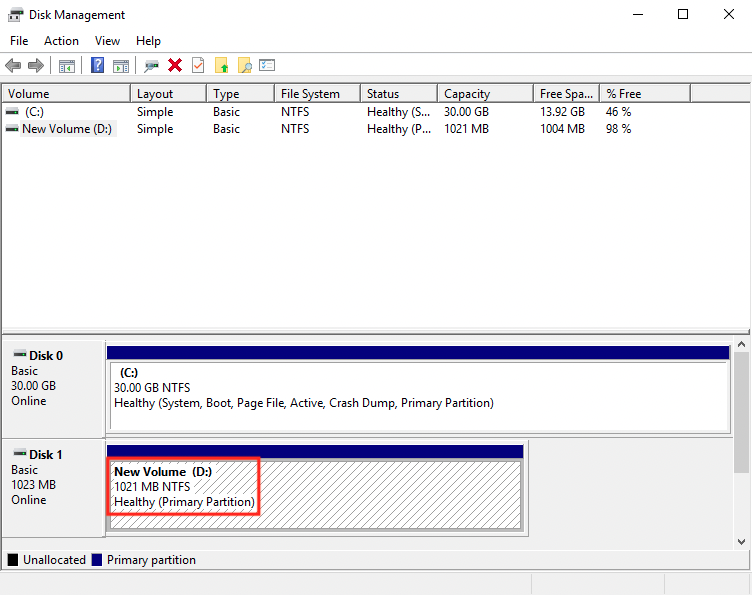
It will now appear as “New Volume (D:)”.
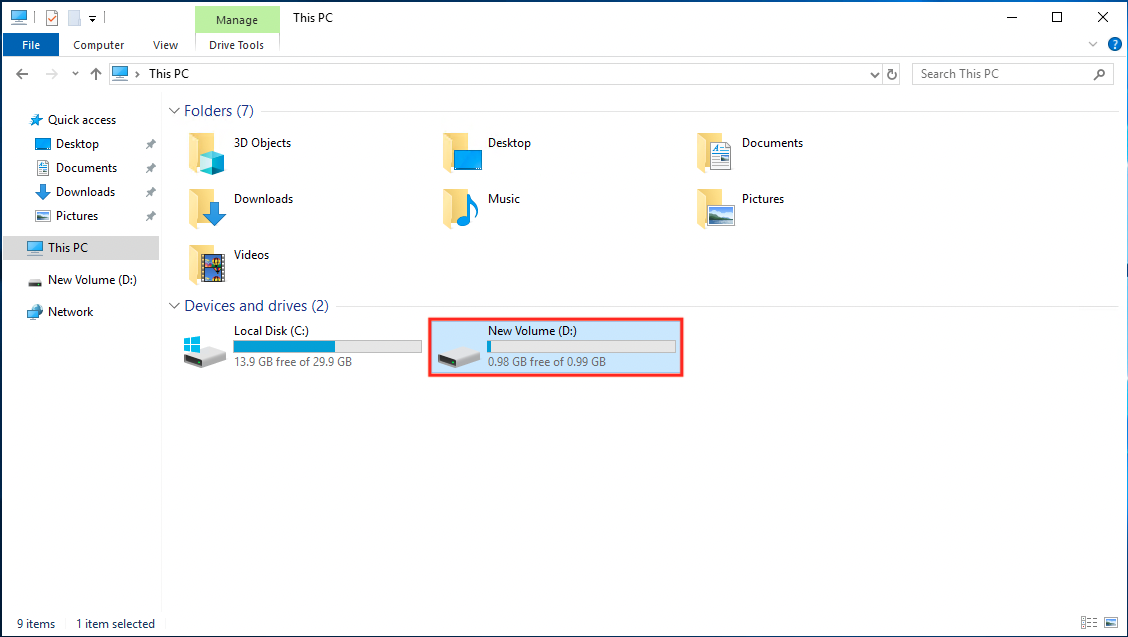
It now shows up in Explorer as drive D, alongside drive C.
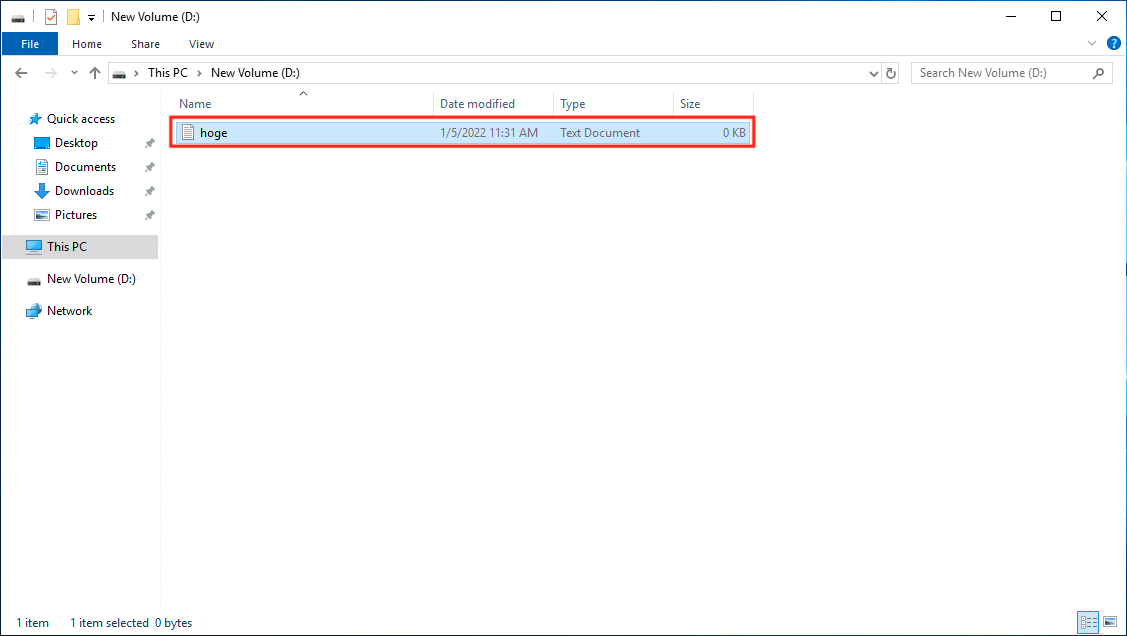
You can also write files to drive D.
As mentioned above, we have confirmed the procedure to make EBS available for use by using the Disk Management application after the Remote Desktop connection.
Make EBS available for Windows instances: Diskpart
We will access Instance2 and see how it is configured for PowerShell connection.
To access the instance, we will use the SSM Session Manager to make a PowerShell connection.
$ aws ssm start-session \
--target i-07c4964c4dc003aac

Starting session with SessionId: root-01a3b44912e7eca4d

Windows PowerShell
Copyright (C) Microsoft Corporation. All rights reserved.

PS C:\Windows\system32>
Code language: Bash (bash)
For details, please see Accessing Windows Instances via SSM Session Manager – Behavior check 2: Using SSM Session Manager to access the instance via PowerShell connection.
After launching PowerShell, run the diskpart command.
PS C:\Windows\system32> diskpart

Microsoft DiskPart version 10.0.17763.1911

Copyright (C) Microsoft Corporation.
On computer: EC2AMAZ-P64AB4OCode language: PowerShell (powershell)
subcommand to check the disks recognized by the instance.
DISKPART> list disk

  Disk ###  Status         Size     Free     Dyn  Gpt
  --------  -------------  -------  -------  ---  ---
  Disk 0    Online           30 GB      0 B
  Disk 1    Online         1024 MB  1024 MB
Code language: PowerShell (powershell)
Next, after selecting “Disk 1”, follow the official website for the subsequent steps and run the subcommands for configuration.
DISKPART> select disk 1

Disk 1 is now the selected disk.

DISKPART> attributes disk clear readonly

Disk attributes cleared successfully.

DISKPART> online disk

Virtual Disk Service error:
This disk is already online.


DISKPART> convert mbr

DiskPart successfully converted the selected disk to MBR format.

DISKPART> create partition primary

DiskPart succeeded in creating the specified partition.

DISKPART> format quick fs=ntfs label="test-volume"

  100 percent completed

DiskPart successfully formatted the volume.

DISKPART> assign letter="D"

DiskPart successfully assigned the drive letter or mount point.

DISKPART> exit

Leaving DiskPart...
Code language: PowerShell (powershell)
Now that the configuration is complete, exit diskpart and check the instance-recognized volume.
PS C:\Windows\system32> Get-Volume

DriveLetter FriendlyName FileSystemType DriveType HealthStatus OperationalStatus SizeRemaining       Size
----------- ------------ -------------- --------- ------------ ----------------- -------------       ----
D           test-volume  NTFS           Fixed     Healthy      OK                   1008.34 MB 1022.93 MB
C                        NTFS           Fixed     Healthy      OK                     14.08 GB      30 GB
Code language: PowerShell (powershell)
In addition to drive C, drive D is shown. Finally, access drive D.
PS D:\> ls

    Directory: D:\

Mode                LastWriteTime         Length Name
----                -------------         ------ ----
-a----         1/5/2022  11:40 AM             14 test.txt
Code language: PowerShell (powershell)
We were able to install the files for testing.
As described above, we have confirmed the procedure to make the EBS available for use by using the diskpart command after connecting to PowerShell.
Make EBS available for Windows instances: PowerShell
Find out how to access Instance3 and configure it with PowerShell commands.
As before, access it with SSM Session Manager.
After connecting, execute the following commands
PS C:\Windows\system32> Stop-Service -Name ShellHWDetection

PS C:\Windows\system32> Get-Disk | Where PartitionStyle -eq 'raw' | Initialize-Disk -PartitionStyle MBR -PassThru | New-Partition -AssignDriveLetter -Us
eMaximumSize | Format-Volume -FileSystem NTFS -NewFileSystemLabel "D" -Confirm:$false

DriveLetter FriendlyName FileSystemType DriveType HealthStatus OperationalStatus SizeRemaining       Size
----------- ------------ -------------- --------- ------------ ----------------- -------------       ----
D           D            NTFS           Fixed     Healthy      OK                   1008.34 MB 1022.93 MB

PS C:\Windows\system32> Start-Service -Name ShellHWDetection
Code language: PowerShell (powershell)
Check the status of the EBS area in the same way as for Instance 2.
PS C:\Windows\system32> Get-Volume

DriveLetter FriendlyName FileSystemType DriveType HealthStatus OperationalStatus SizeRemaining       Size
----------- ------------ -------------- --------- ------------ ----------------- -------------       ----
D           D            NTFS           Fixed     Healthy      OK                   1008.34 MB 1022.93 MB
C                        NTFS           Fixed     Healthy      OK                     13.15 GB      30 GB

PS C:\Windows\system32> cd D:
PS D:\> echo null > test.txt
PS D:\> ls

    Directory: D:\

Mode                LastWriteTime         Length Name
----                -------------         ------ ----
-a----        4/10/2022   7:40 AM             14 test.txt
Code language: PowerShell (powershell)
We were able to install the file for testing.
As described above, we were able to verify the procedure for making the EBS available by using the PowerShell command.
Make EBS available for Windows instances: PowerShell(SSM Document)
Instance4 was configured to use SSM documentation (AWS-RunPowerShellScript).
The commands specified to run in the SSM document are the same as for Instance3.
Below is the log of the document execution.
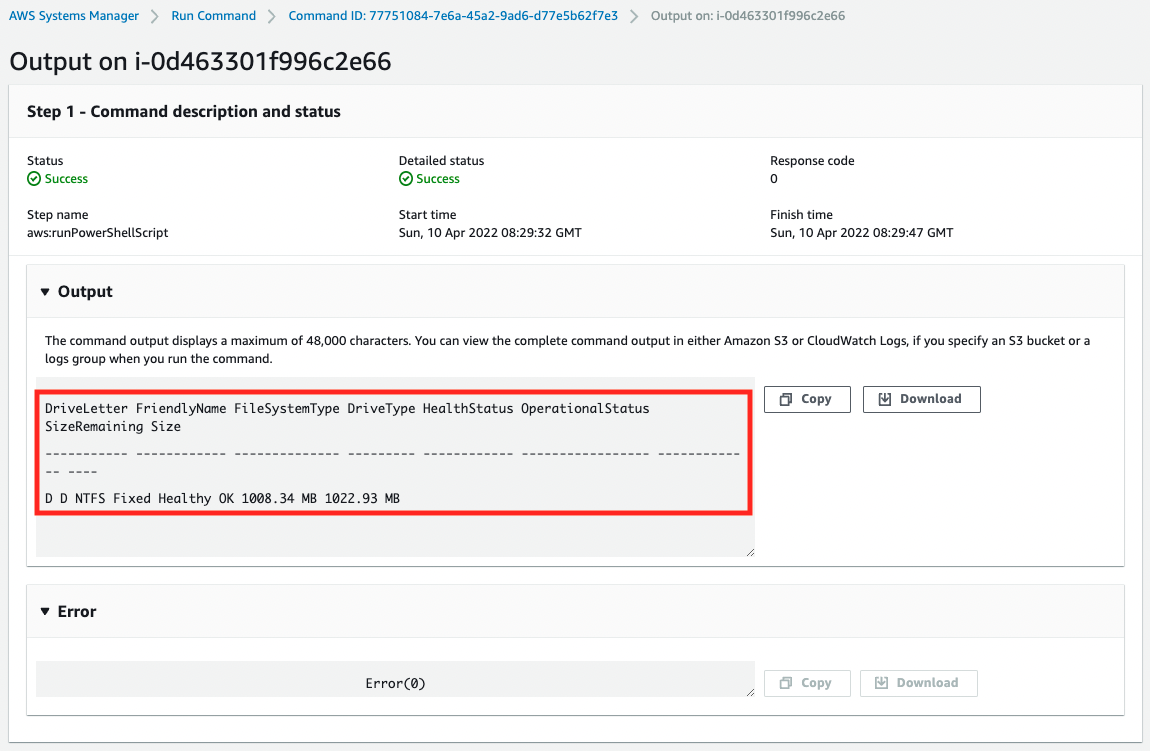
You can see that it is running successfully.
Finally, check the status of the EBS after accessing it with SSM Session Manager.
PS C:\Windows\system32> Get-Volume

DriveLetter FriendlyName FileSystemType DriveType HealthStatus OperationalStatus SizeRemaining       Size
----------- ------------ -------------- --------- ------------ ----------------- -------------       ----
D           D            NTFS           Fixed     Healthy      OK                   1008.34 MB 1022.93 MB
C                        NTFS           Fixed     Healthy      OK                     13.49 GB      30 GB

PS C:\Windows\system32> cd D:
PS D:\> echo null > test.txt
PS D:\> ls

    Directory: D:\

Mode                LastWriteTime         Length Name
----                -------------         ------ ----
-a----        4/10/2022   8:12 AM             14 test.txt
Code language: PowerShell (powershell)
We were able to install the file for testing.
As described above, we were able to verify the procedure for making the EBS available by running the PowerShell command from the SSM documentation.
Summary
We have confirmed how to attach EBS to an EC2 instance using CloudFormation.
Checked the steps to make the attached EBS available for use.