Configuration to access your own domain with HTTPS using ACM certificate
In the following page, we have introduced the configuration to access ALB using your own domain obtained with Route 53.
However, the above configuration can only be accessed via HTTP communication without SSL. In this article, we will use a certificate obtained from ACM and configure it to allow access via HTTPS.
Environment
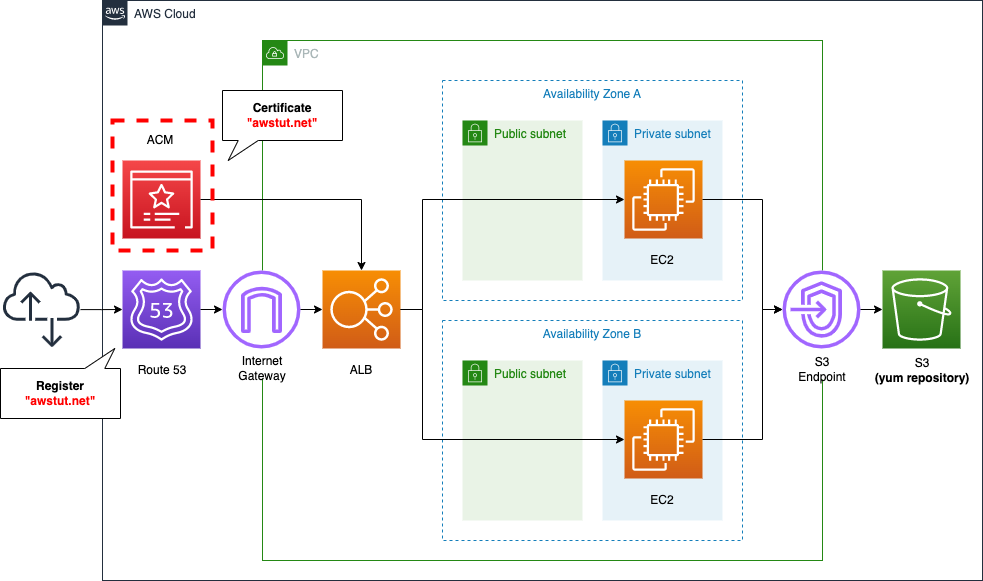
The basic configuration is the same as that described in the previous page. This time, we will use an ACM certificate to enable SSL access to the domain (awstut.net) obtained from Route 53.
CloudFormation Template Files
We will build the above configuration using CloudFormation. We have placed the CloudFormation template at the following URL.
https://github.com/awstut-an-r/awstut-fa/tree/main/023
Explanation of key points of template files
In this page, we will only provide explanations regarding ACM and SSL. For information on how to attach EC2 in a private subnet to ALB, and Route 53, please refer to the following page.

Obtaining ACM certificate
We define the ACM resource in fa-023-acm.yaml.
Resources:
  Certificate:
    Type: AWS::CertificateManager::Certificate
    Properties:
      DomainName: !Ref DomainName
      DomainValidationOptions:
        - DomainName: !Ref DomainName
          HostedZoneId: !Ref HostedZoneId
      ValidationMethod: DNS
Code language: YAML (yaml)
In the DomainName property, set the domain name for which you want to obtain the certificate. In this case, specify “awstut.net”.
When obtaining a certificate with ACM, the ownership of the domain must go through validation.
Before the Amazon certificate authority (CA) can issue a certificate for your site, AWS Certificate Manager (ACM) must prove that you own or control all of the domain names that you specify in your request. You can choose to prove your ownership with either Domain Name System (DNS) validation or with email validation at the time you request a certificate.
In general, we recommend using DNS validation over email validation for the following reasons:
Validating domain ownership
In this case, we will follow the recommendation and use DNS validation: set the ValidationMethod property to “DNS” and specify DNS validation; in the DomainValidationOptions property, you can set the necessary parameters for DNS validation: DomainName and In the DomainName and HostedZoneId properties, set the information of the domain to be associated. Specify the domain name of “awstut.net” and the host zone ID.
Make ALB listen on port 443
The key to SSL communication is the port number. In this configuration, the communication will occur as shown in the figure below.
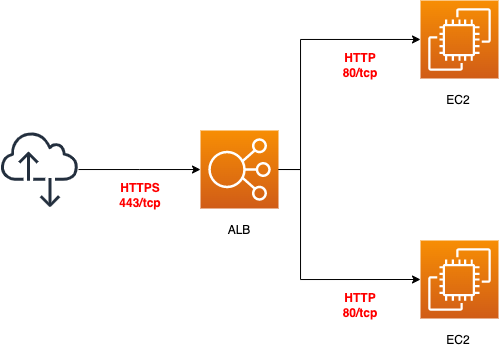
In order to make the ALB listen on port 443, we need to take care of two points.
ALB security group
The first point is the security group to be applied to the ALB. The security group is defined in fa-023-vpc.yaml.
Resources:
  ALBSecurityGroup:
    Type: AWS::EC2::SecurityGroup
    Properties:
      GroupName: !Sub "${Prefix}-ALBSecurityGroup"
      GroupDescription: Allow HTTPS Only.
      VpcId: !Ref VPC
      SecurityGroupIngress:
        - IpProtocol: tcp
          FromPort: !Ref HTTPSPort
          ToPort: !Ref HTTPSPort
          CidrIp: 0.0.0.0/0
Code language: YAML (yaml)
Set the FromPort and ToPort properties to “443”. This means that only HTTPS communication will be allowed. In addition, set the CidrIp property to “0.0.0.0/0” to allow communication from the Internet without restricting the source.
ALB Listener
The second point is the ALB listener. ALB related resources are defined in fa-023-alb.yaml.
Resources:
  ALBListener:
    Type: AWS::ElasticLoadBalancingV2::Listener
    Properties:
      Certificates:
        - CertificateArn: !Ref Certificate
      DefaultActions:
        - TargetGroupArn: !Ref ALBTargetGroup
          Type: forward
      LoadBalancerArn: !Ref ALB
      Port: !Ref HTTPSPort
      Protocol: HTTPS
Code language: YAML (yaml)
Specify “HTTPS” as the Protocol property and “443” as the Port property. Now you will be able to listen for HTTPS communication as an ALB listener as well.
Attaching ACM certificate to ALB
Let’s check the ALB listener again.
Resources:
  ALBListener:
    Type: AWS::ElasticLoadBalancingV2::Listener
    Properties:
      Certificates:
        - CertificateArn: !Ref Certificate
      ...
Code language: YAML (yaml)
In order to attach the ACM certificate to the ALB, set the Certificates property. Specify the ID of the certificate as described earlier.
Architecting
We will use CloudFormation to build this environment and check its actual behavior.
Create CloudFormation stacks and check resources in stacks
We will create a CloudFormation stack.
For information on how to create a stack and check each stack, please refer to the following page

After checking the resources in each stack, the information for the main resources created this time is as follows
- ID of Instance 1: i-0e050ebec2df09db5
- ID of instance 2: i-02470fc6eacfe5a6f
- ID of ALB: fa-023-ALB
- Route 53 record: awstut.net
- ID of ACM certificate: 413e0700-093b-4783-9dee-575c9d345fe8
We will also check the resource creation status from the AWS Management Console. First, check the creation status of the Route 53 record.
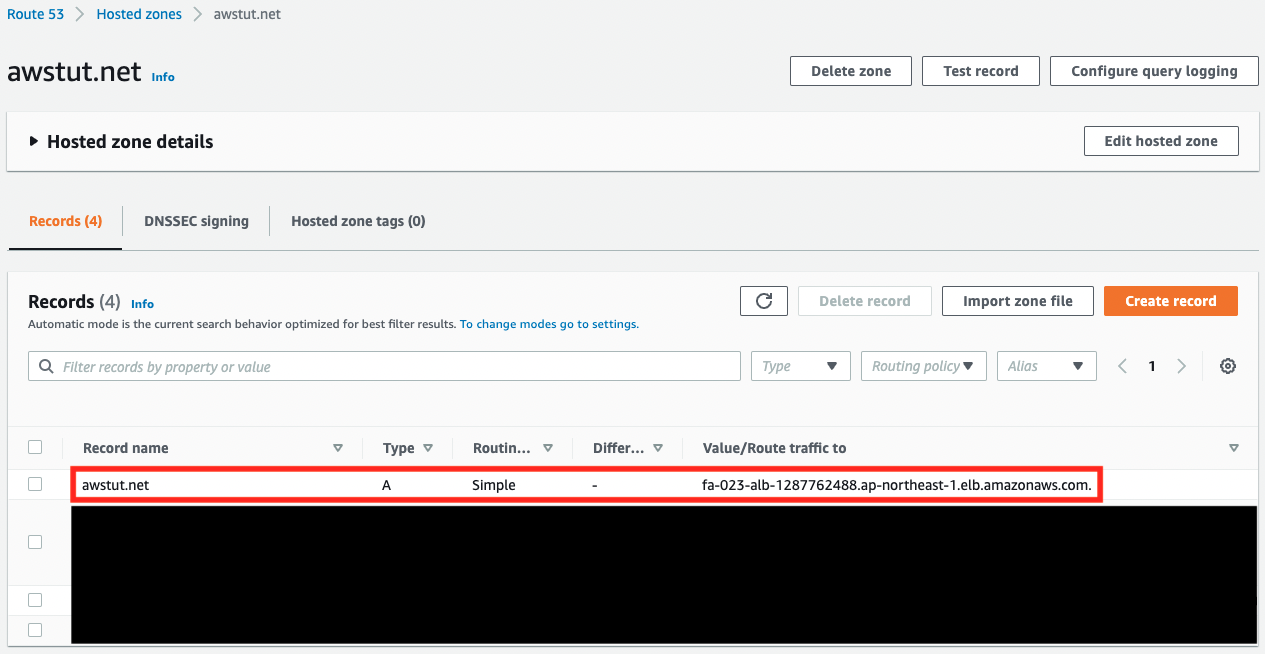
We can see that the ALB is associated with our domain “awstut.net”. Next, check the ACM.
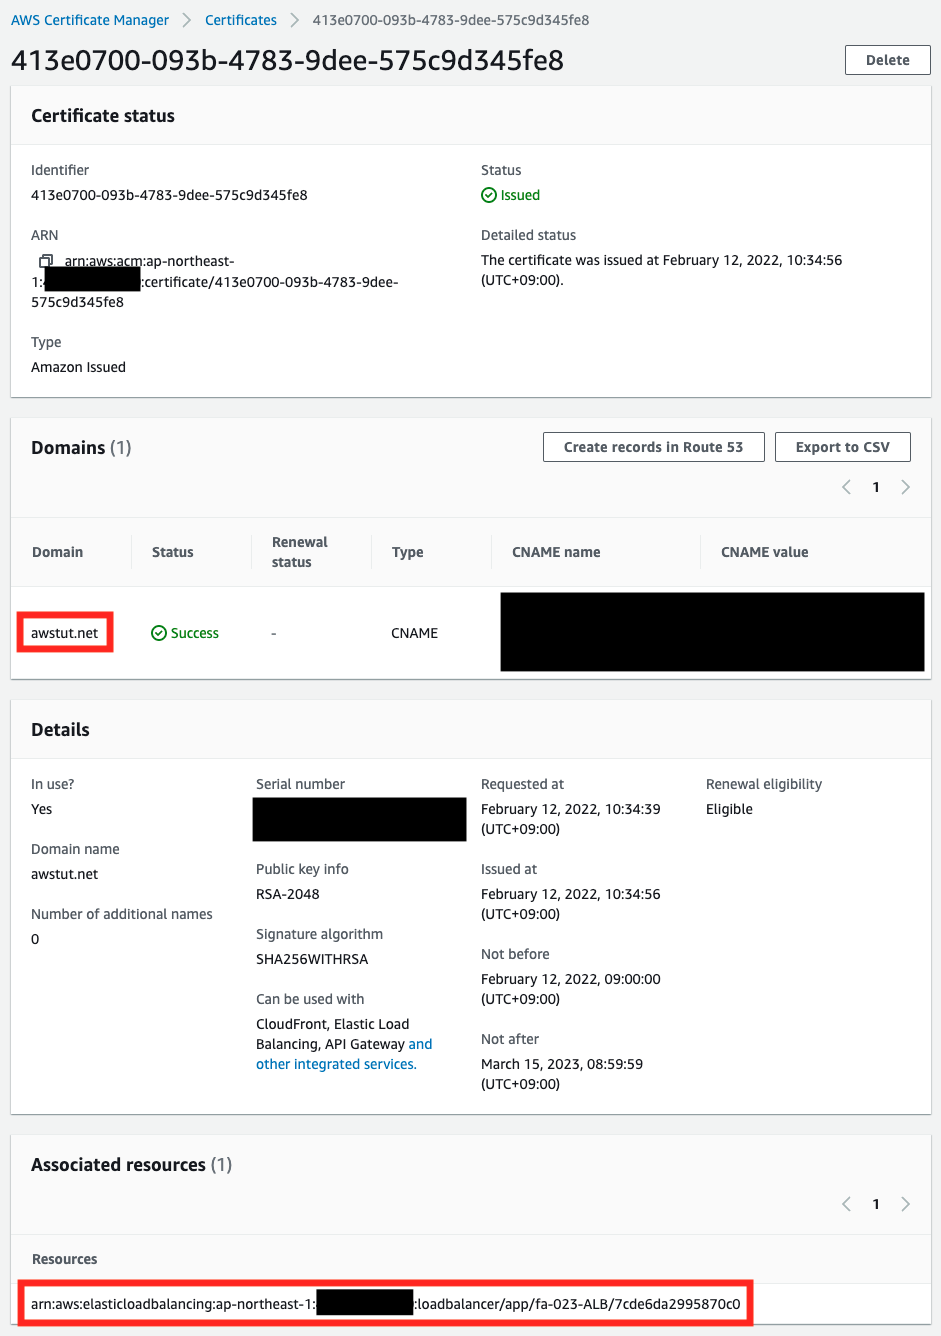
You can see that a certificate for “awstut.net” has been created, and in the Associated resources section, you can also see that this certificate is associated with ALB. Next, let’s check the ALB.
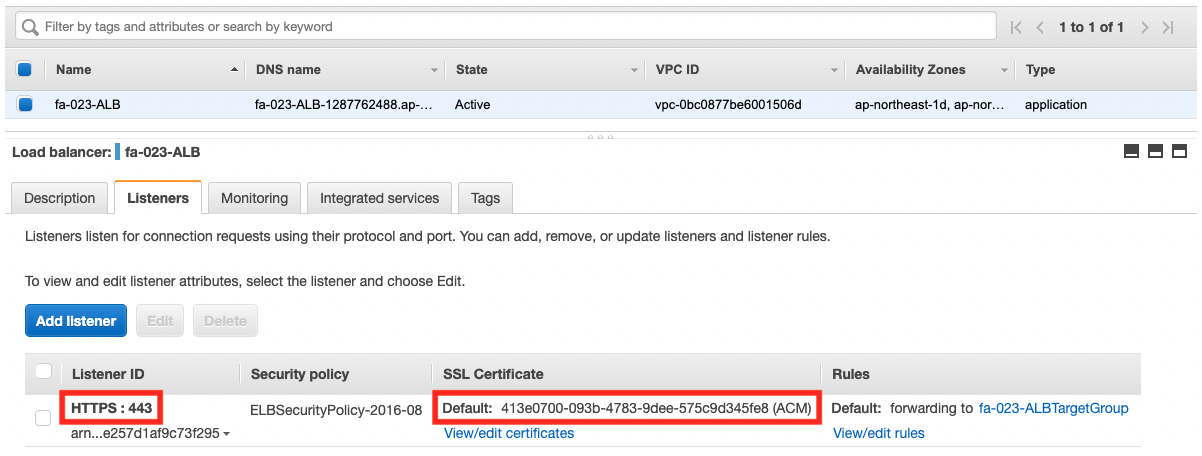
Looking at the ALB listener, we can see that it accepts HTTPS (443) as configured in the template, and that the ACM mentioned above is attached.
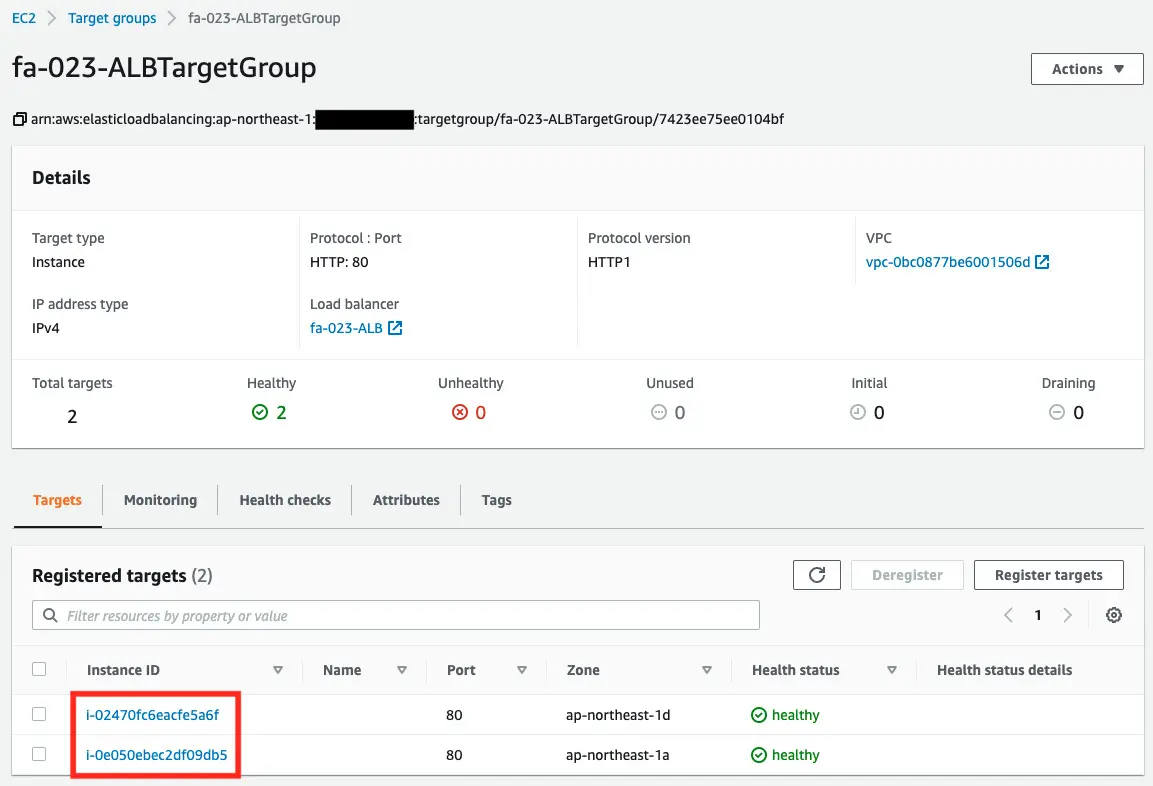
Looking at the ALB target group, we can see that the two EC2 instances that we created are registered.
Accessing ALB via HTTPS
Now that everything is ready, access your own domain via HTTPS from your browser.


You are now able to access the ALB via HTTPS. As you can see above, you can now use SSL to access the ALB using your own domain.
Summary
We have now confirmed how to use an ACM certificate to SSL access to the ALB.
In order to access the ALB with HTTPS, we confirmed that we need to pay attention to the ALB security group and ALB listener settings.