Scaling based on CloudWatch custom metrics – number of connections version
In the following pages, we have shown how to scale according to memory usage in Auto Scaling groups.
The idea is to install a CloudWatch agent on the EC2 instance and deliver custom metrics of memory usage, scaling according to this value.
This time we will see how to scale according to the number of user connections.
Environment
Basically, the configuration is the same as that described at the beginning of this section.
The scaling policy is key. In this configuration, scaling is based on the number of user connections.
CloudFormation template files
The above configuration is built with CloudFormation.
The CloudFormation templates are placed at the following URL
https://github.com/awstut-an-r/awstut-dva/tree/main/03/007
Explanation of key points of template files
This page focuses on how to set the number of user connections as a custom metric and scale accordingly.
CloudWatch Agent Configuration
Resources:
  CloudWatchConfigParemeter:
    Type: AWS::SSM::Parameter
    Properties:
      Name: AmazonCloudWatch-linux
      Type: String
      Value: |
        {
          "agent": {
            "metrics_collection_interval": 60,
            "run_as_user": "root"
          },
          "metrics": {
            "append_dimensions": {
              "ImageId": "${aws:ImageId}",
              "InstanceId": "${aws:InstanceId}",
              "InstanceType": "${aws:InstanceType}",
              "AutoScalingGroupName": "${aws:AutoScalingGroupName}"
            },
            "metrics_collected": {
              "netstat": {
                "measurement": [
                  "netstat_tcp_established"
                ],
                "metrics_collection_interval": 60
              }
            },
            "aggregation_dimensions": [["AutoScalingGroupName"]]
          }
        }
Code language: YAML (yaml)
Register the settings for the CloudWatch agent in the SSM Parameter Store.
For more information about CloudWatch agents, please see the following page.

Specify the metrics to be collected with metrics_collected.
The metrics that can be specified are summarized on the following page.
This time we will scale according to the number of user connections, so we specify netstat_tcp_established as the metric to collect.
This metric means the number of established TCP connections.
This means that the number of TCP connections is taken as the number of user connections and the number of instances is scaled according to this value.
Scaling Policy
Resources:
  ScalingPolicy:
    Type: AWS::AutoScaling::ScalingPolicy
    Properties:
      AutoScalingGroupName: !Ref AutoScalingGroup
      PolicyType: TargetTrackingScaling
      TargetTrackingConfiguration:
        CustomizedMetricSpecification:
          Dimensions:
            - Name: AutoScalingGroupName
              Value: !Ref AutoScalingGroupName
          MetricName: netstat_tcp_established
          Namespace: CWAgent
          Statistic: Average
          Unit: Count
        TargetValue: !Ref TargetTrackingConfigurationTargetValue
Code language: YAML (yaml)
This time we will set the scaling policy for the target tracking type.
For more information on this, please see the following page.

Specify the aforementioned netstat_tcp_established in the MetricName property in the TargetTrackingConfiguration property and set scaling according to this value.
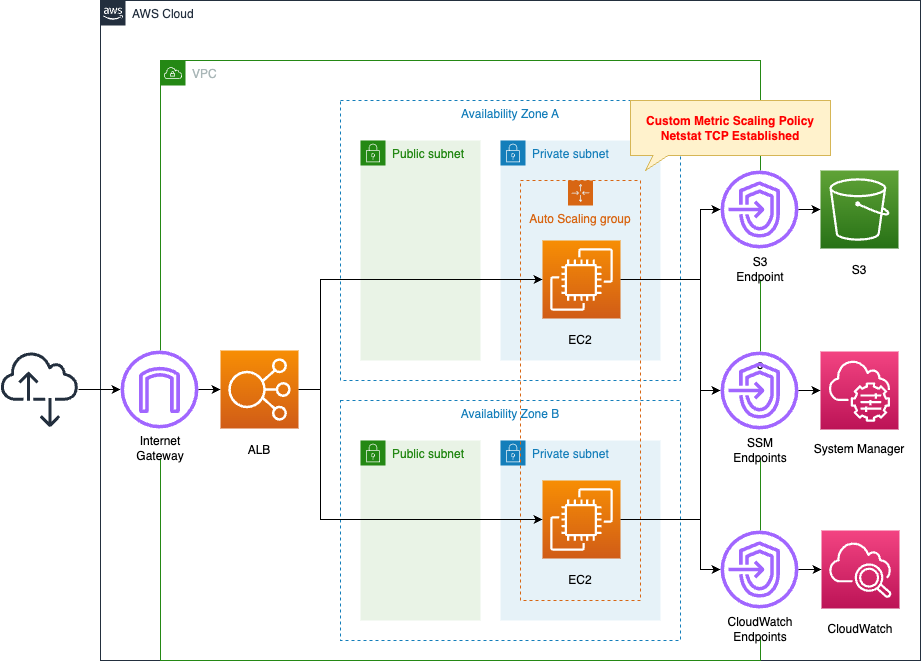
Architecting
Use CloudFormation to build this environment and check its actual behavior.
Create CloudFormation stacks and check the resources in the stacks
Create CloudFormation stacks.
For information on how to create stacks and check each stack, please see the following page.

After reviewing the resources in each stack, information on the main resources created in this case is as follows
- ALB: dva-03-007-ALB
- ALB Target Group: dva-03-007-ALBTargetGroup
- Domain name for ALB: http://dva-03-007-alb-602194787.ap-northeast-1.elb.amazonaws.com/
- Auto Scaling Group: dva-03-007-AutoScalingGroup
Check each resource from the AWS Management Console.
Check the Auto Scaling group.
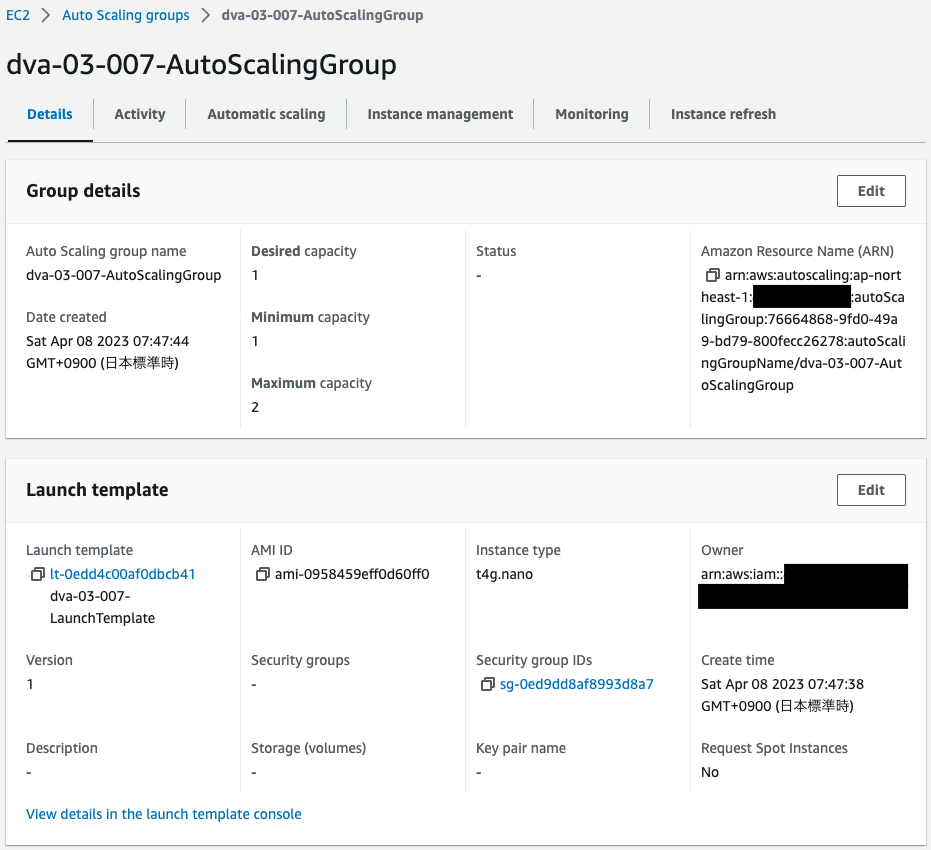
Auto Scaling group has been successfully created.
The desired and minimum numbers are 1 and the maximum number is 2.
Check the scaling policy.
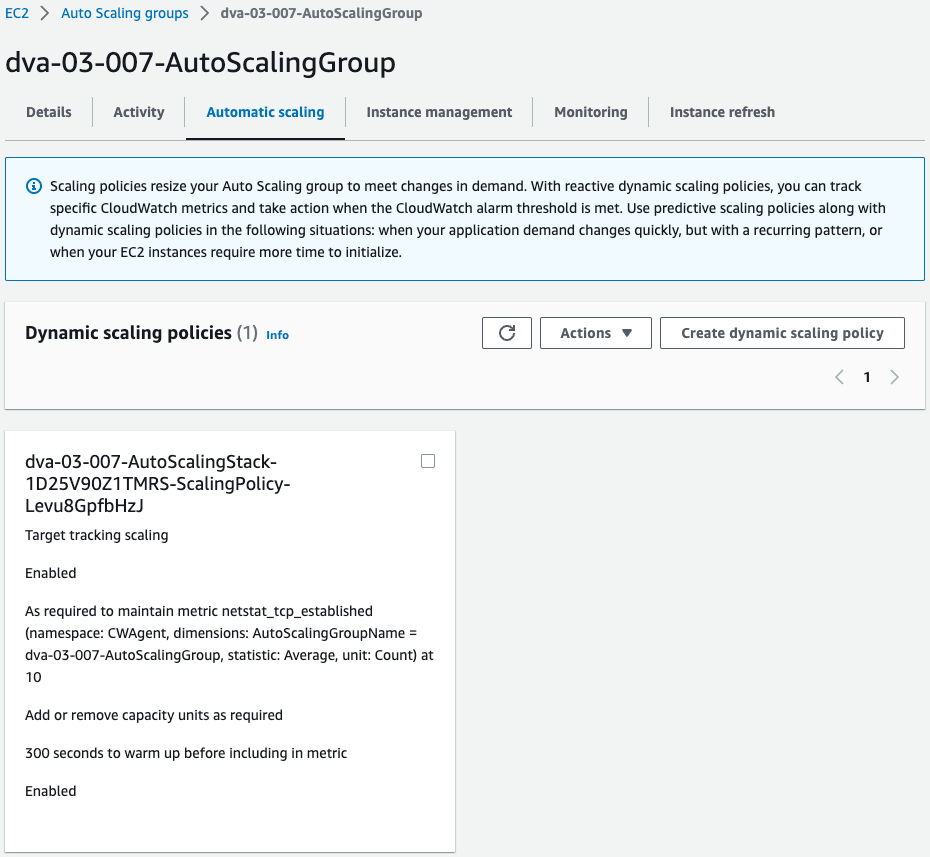
Indeed, the scaling policy is set.
The average value of netstat_tcp_established for instances in this group is what scales out/in based on 10.
Check the instances created in the current group.
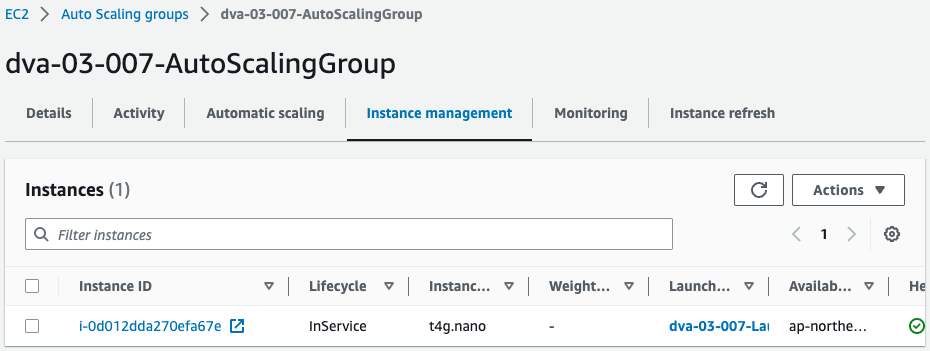
One instance was created.
An instance was created as desired.
Operation Check
Now that it is ready, check the operation.
Make multiple connections to the ALB DNS name to increase the number of concurrent users.
This time we will use Apache Bench to reproduce the simultaneous connections.
For example, execute the following command
% ab -c 15 -t 10000000 -k http://dva-03-007-ALB-602194787.ap-northeast-1.elb.amazonaws.com/
Code language: Bash (bash)
The -c option is a parameter that specifies the number of parallelisms, which is adjusted to exceed the condition (10) to scale out by setting it to 15.
Wait a while and then check the CloudWatch metrics.
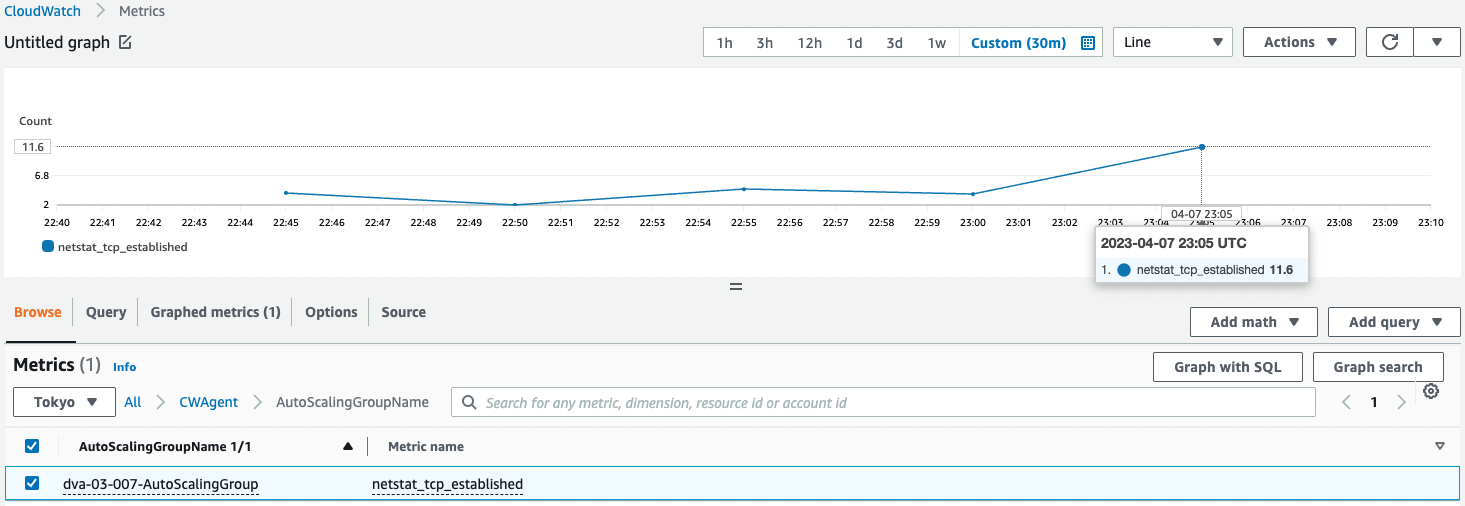
You can see that the value of netstat_tcp_established is delivered as a custom metric.
And you can also see that the threshold has been exceeded.
This should trigger the scale-out.
Check the activity of the Auto Scaling group.
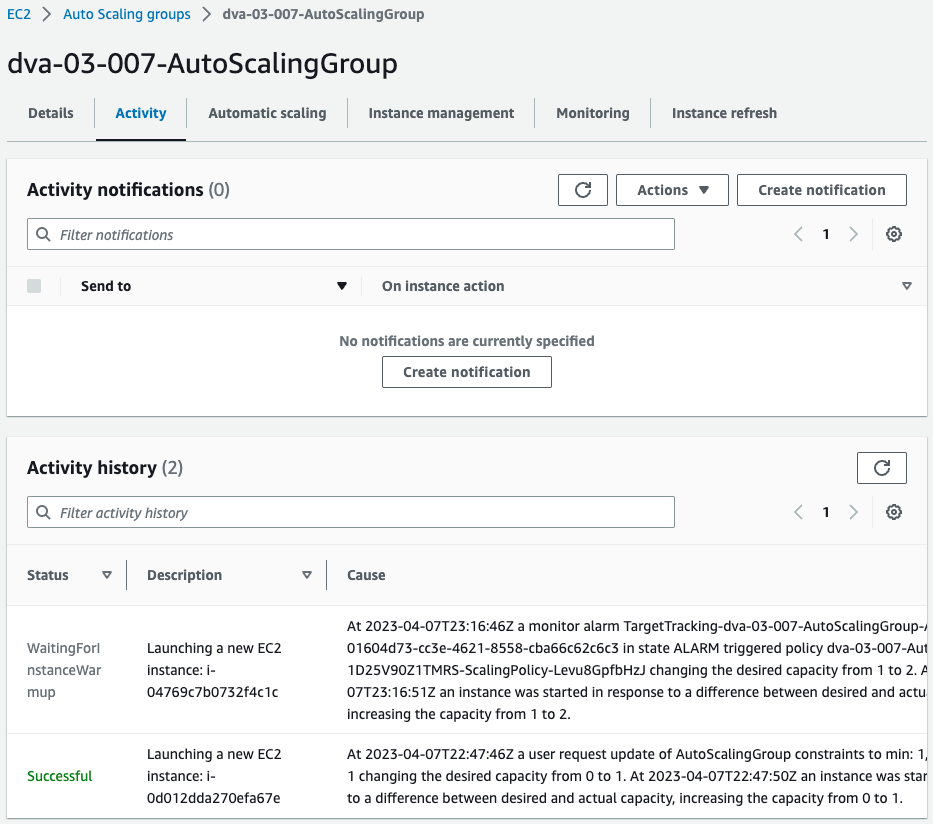
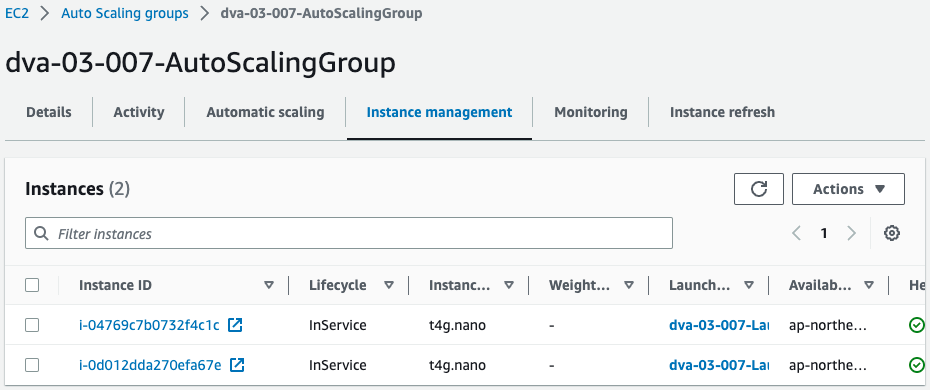
Indeed, the second instance was started.
Thus, scaling could be done based on the number of user connections.
Summary
By installing a CloudWatch agent on the EC2 instance and delivering the number of user connections as a custom metric, we were able to scale according to this value.