5 patterns of OAuth scopes for Cognito User Pool
By default, the following OAuth scopes can be used to specify the scope of privileges to be granted when configuring the app client for the Cognito user pool.
- phone
- profile
- openid
- aws.cognito.signin.user.admin
In this article, we will check the specific changes caused by these different OAuth scope specifications.
Environment
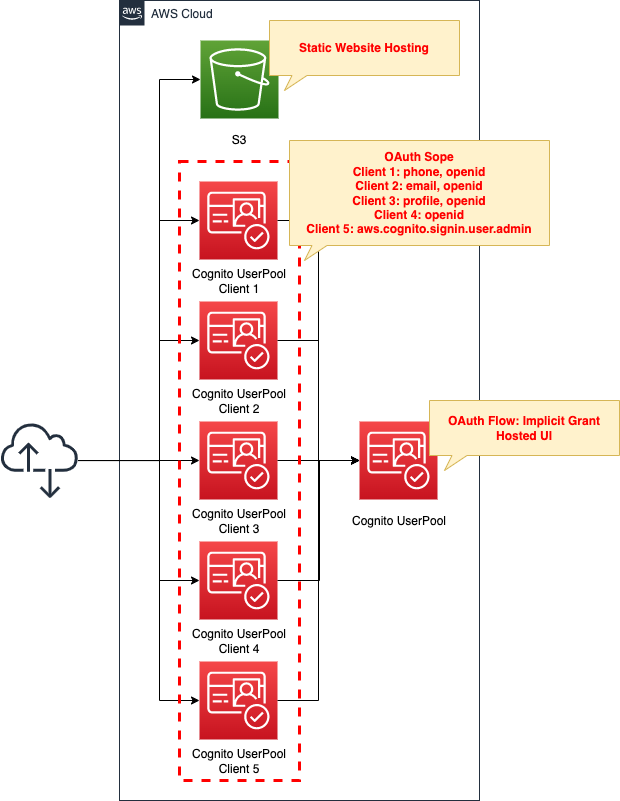
Create an S3 bucket and enable the static website hosting feature.
Prepare content by placing HTML files inside.
Create a Cognito user pool.
In addition, create 5 app clients, each with a different OAuth scope to grant.
Specifically, configure as follows
- Client 1: phone, openid
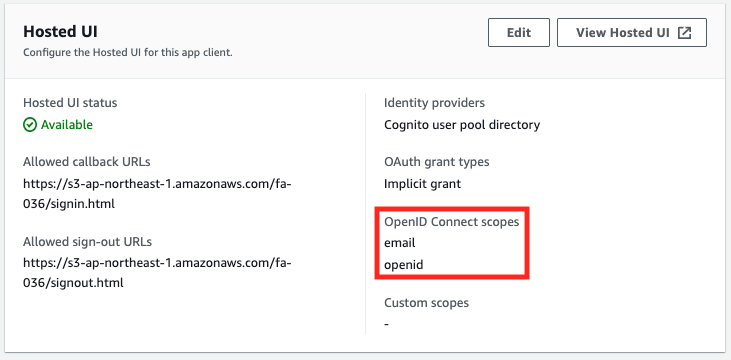
- Client 2: email, openid
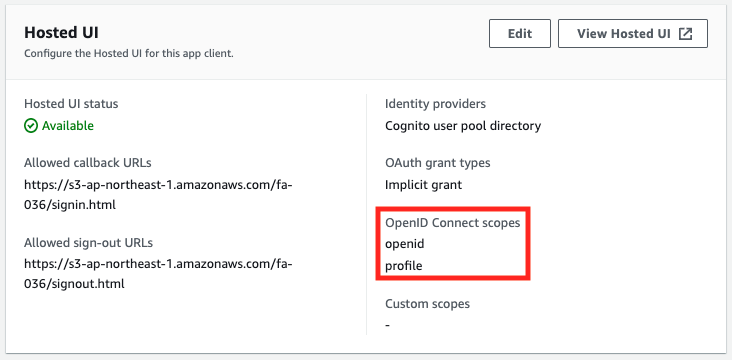
- Client 3: profile, openid
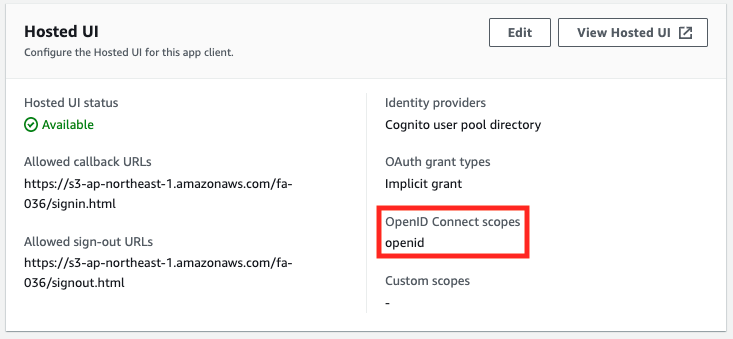
- Client 4: openid
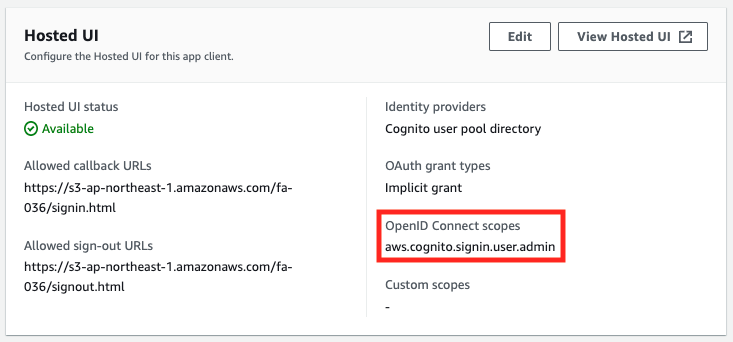
- Client 5: aws.cognito.signin.user.admin
Two scopes are specified for clients 1-3. This is due to the app client specification.
Please refer to the following page for details.
https://docs.aws.amazon.com/cognito/latest/developerguide/cognito-user-pools-app-idp-settings.html
CloudFormation template files
The above configuration is built with CloudFormation.
The following URL contains the CloudFormation template as well as browser scripts, etc.
https://github.com/awstut-an-r/awstut-fa/tree/main/036
Explanation of key points
User Pool Schema
Check the settings of the user pool itself.
The key point this time is the settings related to the attributes to be registered at sign-up.
Resources:
  UserPool:
    Type: AWS::Cognito::UserPool
    Properties:
      AutoVerifiedAttributes:
        - email
      UsernameAttributes:
        - email
      UserPoolName: !Sub "${Prefix}-UserPool"
      Schema:
        - AttributeDataType: String
          Mutable: true
          Name: name
          Required: true
        - AttributeDataType: String
          Mutable: true
          Name: phone_number
          Required: true
Code language: YAML (yaml)
The Schema property allows you to specify the attributes to be registered during sign-up.
In this case, in addition to the email address used for verification, name and phone_number are required to be registered at sign-up.
User Pool App Client OAuth Scope
Check the app client in the user pool.
Resources:
  UserPoolClient:
    Type: AWS::Cognito::UserPoolClient
    Properties:
      AllowedOAuthFlowsUserPoolClient: true
      AllowedOAuthFlows:
        - implicit
      AllowedOAuthScopes: !Ref Scopes
      CallbackURLs:
        - !Sub "${BucketWesSiteEndpointUrl}/${SigninHtml}"
      ClientName: !Sub ${Prefix}-UserPoolClient
      ExplicitAuthFlows:
        - ALLOW_REFRESH_TOKEN_AUTH
        - ALLOW_USER_SRP_AUTH
      LogoutURLs:
        - !Sub "${BucketWesSiteEndpointUrl}/${SignoutHtml}"
      SupportedIdentityProviders:
        - COGNITO
      UserPoolId: !Ref UserPool
Code language: YAML (yaml)
The AllowedOAuthScopes property allows setting the OAuth scope to be granted.
Use the built-in function Fn::Ref to specify the scopes for each app client.
You can specify OAuth flows with the AllowedOAuthFlows property.
In this case, Implicit grant (implicit authorization) is specified.
For more information on this flow, please refer to the following page
Browser Script
Use JavaScript to implement Cognito functionality after sign-in.
For instructions on how to create a browser script using AWS SDK for JavaScript v3, please see the following page.

This page will cover only the key points.
Access token and ID token confirmation
One thing that makes a difference depending on the specification of the OAuth scope is the access token and ID token.
const getPayloadFromJWT = (token) => {
  return token.split(".")[1]
};

const params = new URLSearchParams(location.hash.slice(1));
const accessToken = params.get("access_token");
const idToken = params.get("id_token");

const showAccessToken = () => {
  document.getElementById("access-token").innerText = JSON.stringify(
    JSON.parse(atob(getPayloadFromJWT(accessToken))), null , 2);
};

const showIdToken = () => {
  if (idToken !== null) {
    document.getElementById("id-token").innerText = JSON.stringify(
      JSON.parse(atob(getPayloadFromJWT(idToken))), null , 2);
  } else {
    document.getElementById("id-token").innerText = "No ID Token.";
  }
};

showAccessToken();
showIdToken();
Code language: JavaScript (javascript)
In this configuration, both tokens are passed as URL parameters because Implicit grant is specified for the OAuth flow.
Both tokens are JWT (JSON Web Token). The payload portion is cut out, the Base64-format string is decoded, and the contents are embedded in HTML.
API call using Access token
To check the behavior of aws.cognito.signin.user.admin, we run an API that uses an access token.
import {
  CognitoIdentityProviderClient,
  GetUserCommand
} from "@aws-sdk/client-cognito-identity-provider";

const client = new CognitoIdentityProviderClient({
  region: REGION
});

const showUser = async () => {
  try {
    const response = await client.send(
      new GetUserCommand({
        AccessToken: accessToken
      })
    );
    document.getElementById("get-user").innerText = JSON.stringify(response, null, 2);
  } catch (err) {
    document.getElementById("get-user").innerText = JSON.stringify(err, null, 2);
  }
}

showUser();
Code language: JavaScript (javascript)
This time, since the API uses an access token, GetUser is executed.
Embed the execution result in HTML.
S3 Static Website Hosting
The static website hosting function publishes HTML files placed in S3 buckets.
Please check the following page for details.

Architecting
Use CloudFormation to build this environment and verify actual behavior.
Create CloudFormation stacks and check resources in stacks
Create a CloudFormation stack.
For information on how to create stacks and check each stack, please refer to the following page

Cognito resources
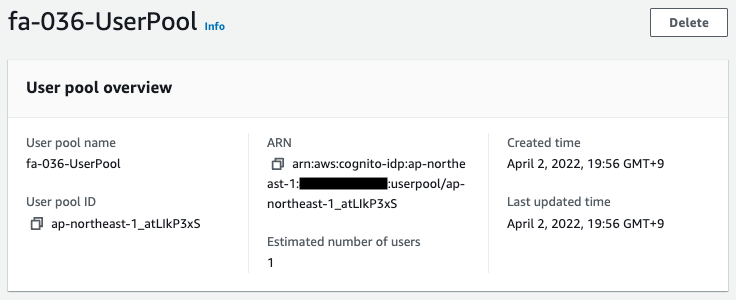
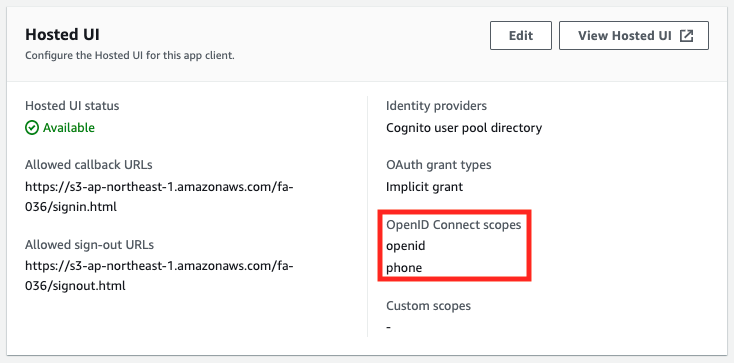
Check the creation status of Cognito resources from the AWS Management Console.
Place HTML in S3 bucket
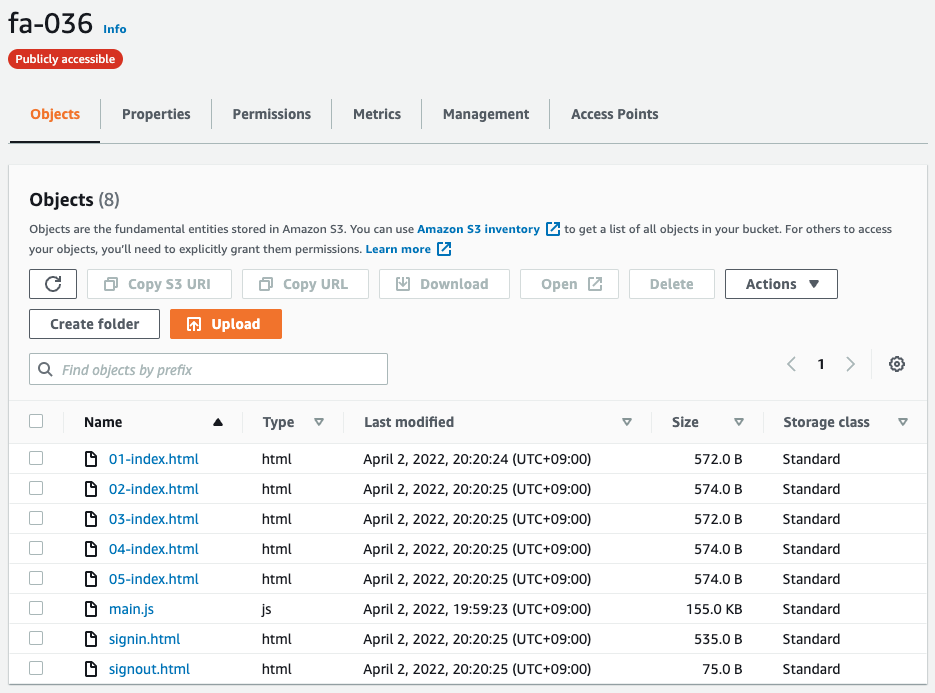
We have created an S3 bucket (fa-036) with static website hosting enabled.
The following four types of content will be placed in this bucket
- index page ([app client number]-index.html)
- page after sign-in (signin.html)
- sign-out page (signout.html)
- Browser script (main.js)
Five index pages are prepared for each application client, i.e., five index pages.
This is to embed the ID of the app client in the sign-in/sign-out URL.
The following is an image of the content after it has been placed in the bucket.
Sign Up
Now that you are ready, access the hosted UI.
Initially, access the URL to use the app client 1.
https://s3-ap-northeast-1.amazonaws.com/fa-036/01-index.html
The index page will then appear.
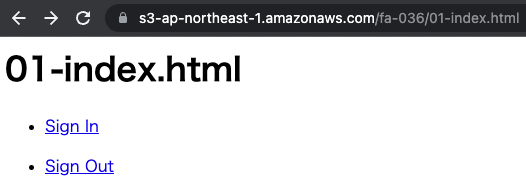
Press “Sign In” to display the sign-in page.
Only the first time, the sign-up process is required. For more information on the sign-up process, please refer to the following page.

Since “name” and “phone_number” are specified as additional schemas this time, these attributes are also registered.
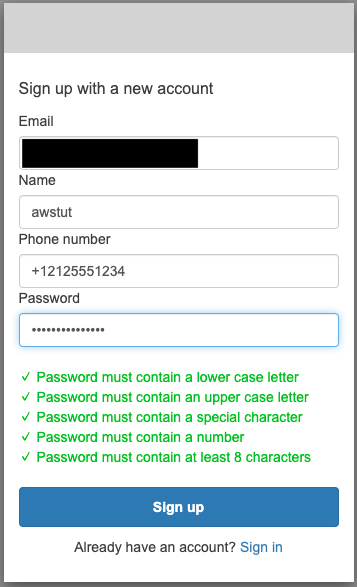
This time, we set them as follows
- name: awstut
- phone_number: +1212125551234
OAuth scope verification 1: phone, openid
Now that sign-up is complete, perform sign-in.
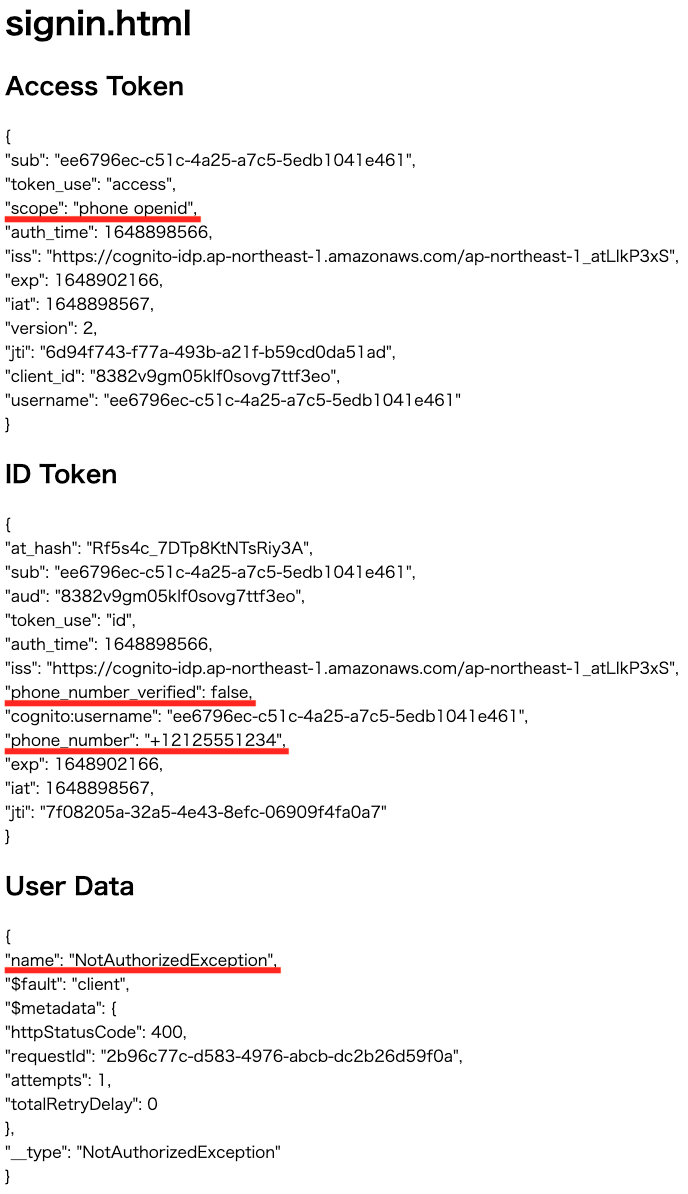
Looking at the access token, the scope is “phone openid”.
Looking at the ID token, we can see the phone number and the authentication status with the phone number.
Looking at the GetUser API execution result, we see “NoetAuthorizedException”, indicating that the user is not authorized to execute the API.
From the above, we can see that when “phone” and “openid” are selected as the OAuth scope, the attributes related to the phone number can be accessed from the ID token, while the API that uses the access token cannot be executed.
OAuth scope validation 2: email, openid
Sign in from 02-index.html.
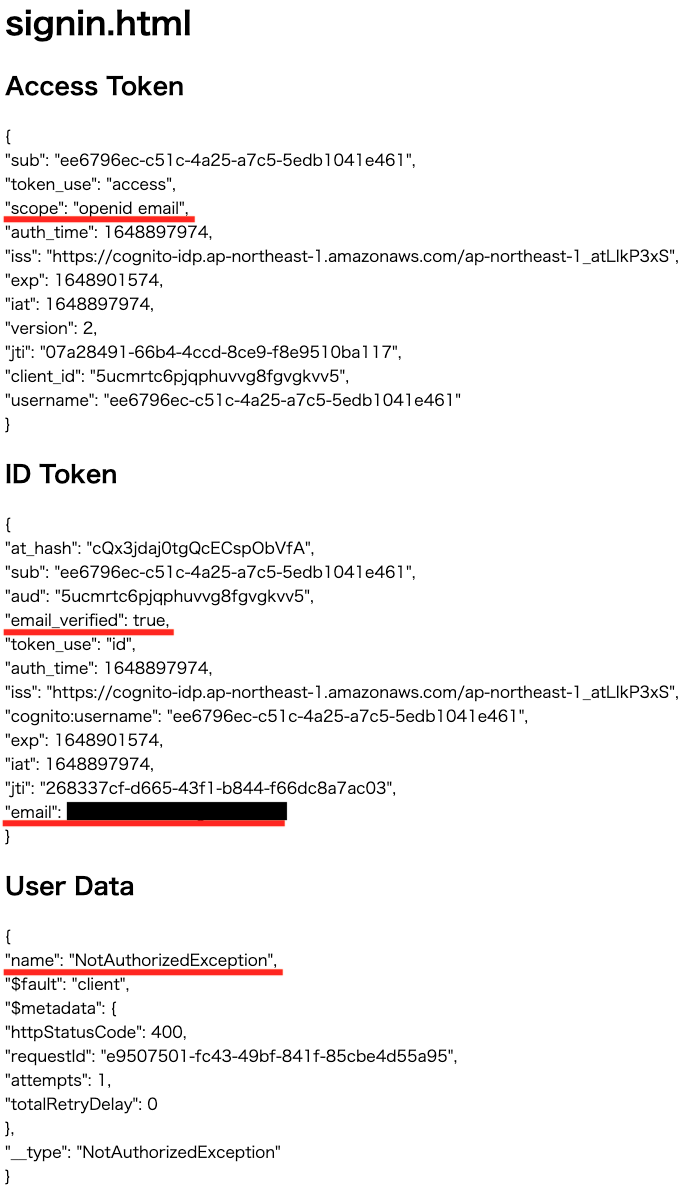
Looking at the access token, the scope is “openid email”.
Looking at the ID token, you can check the authentication status by email address and email.
Looking at the GetUser API execution result, we see “NoetAuthorizedException”, indicating that the user is not authorized to execute the API.
From the above, we can see that when “email” and “openid” are selected as the OAuth scope, the attributes related to the email address can be accessed from the ID token, while the API that uses the access token cannot be executed.
OAuth scope validation 3: profile, openid
Sign in from 03-index.html.
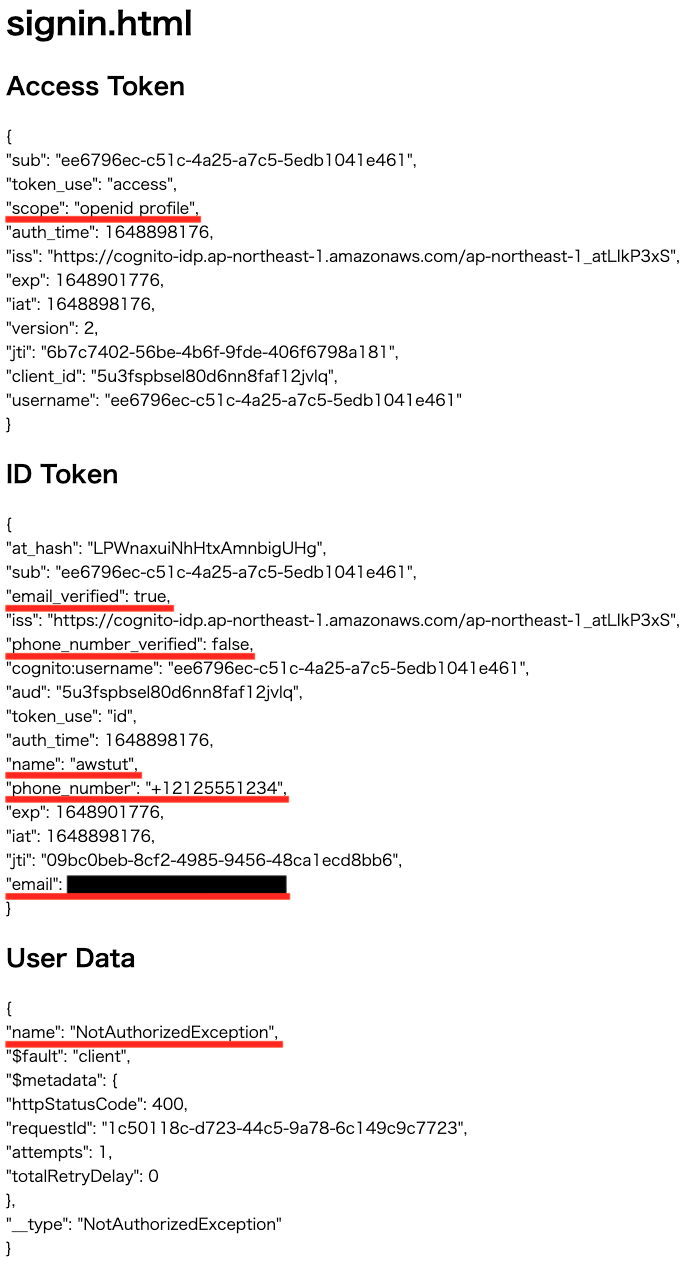
Looking at the access token, the scope is “openid profile”.
Looking at the ID token, we can see the name in addition to the phone number and email address information.
The GetUser API execution result shows “NoetAuthorizedException”, indicating that the user is not authorized to execute the API.
From the above, we can see that when “profile” and “openid” are selected for the OAuth scope, all attributes registered with the ID token can be accessed, while APIs that use access tokens cannot be executed.
OAuth Scope Verification 4: openid
Sign in from 04-index.html.
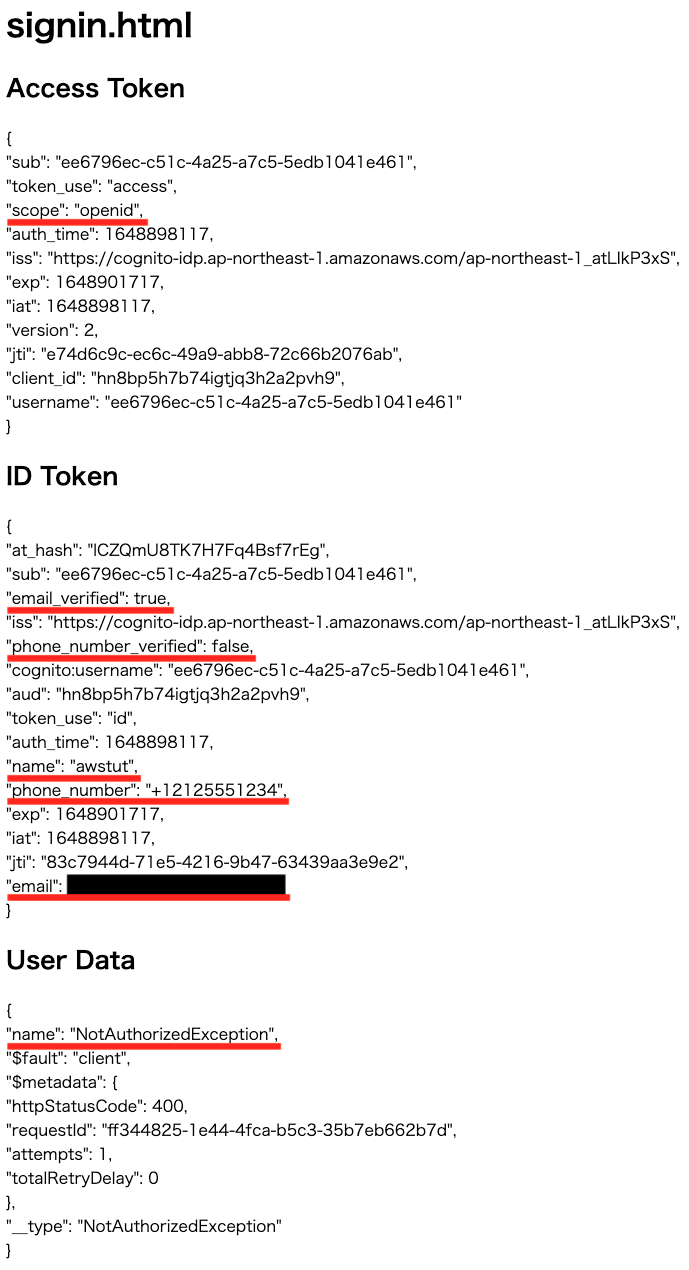
Looking at the access token, the scope is “openid”.
Looking at the ID token, we can see the name in addition to the phone number and email address information.
The GetUser API execution result shows “NoetAuthorizedException,” indicating that the user is not authorized to execute the API.
From the above, it is clear that when “openid” is selected as the OAuth scope, all attributes registered with the ID token can be accessed, while APIs that use access tokens cannot be executed.
This behavior may be due to the use of a hosted UI. The original specification is as follows
The openid scope returns all user attributes in the ID token that are readable by the client. The ID token is not returned if the openid scope is not requested by the client.
Allowed OAuth Scopes
OAuth Scope Validation 5: aws.cognito.signin.user.admin
Sign in from 05-index.html.
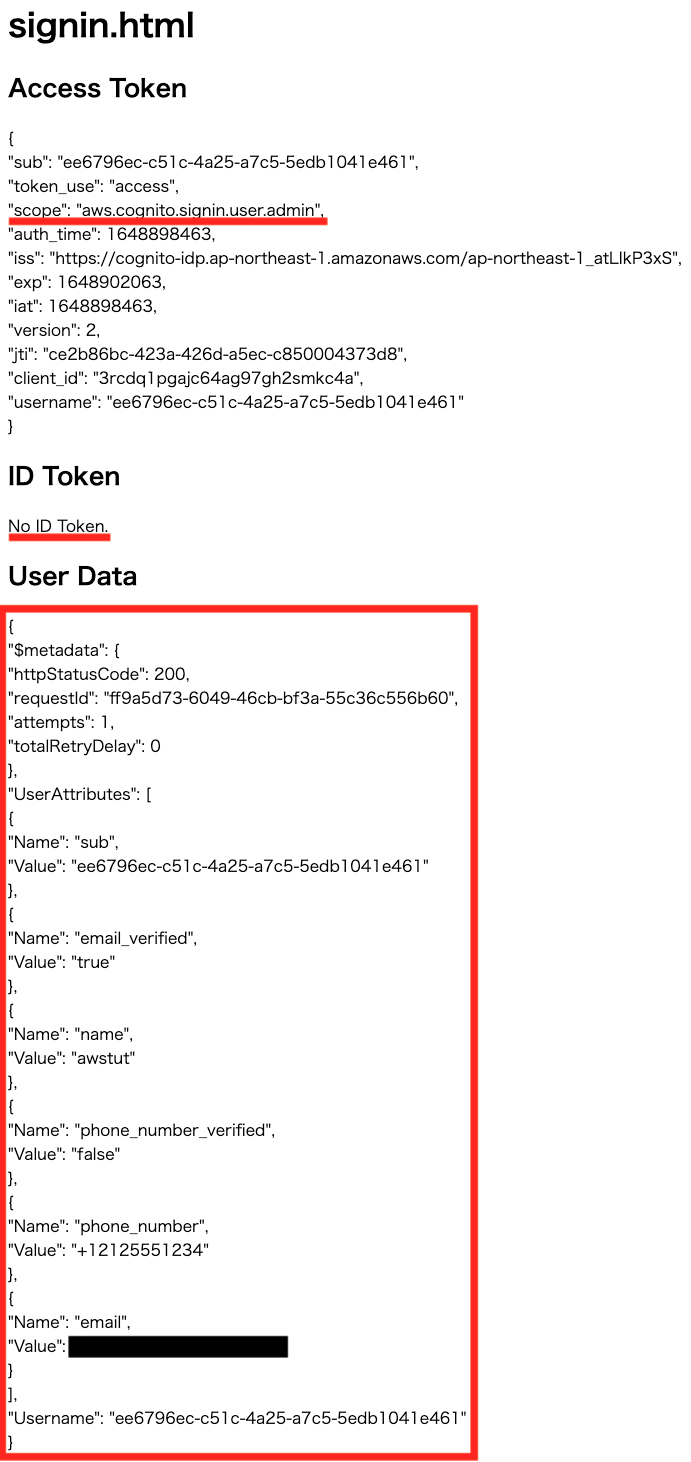
Looking at the access token, the scope is “aws.cognito.signin.user.admin”.
Looking at the ID token, we see that it could not be retrieved.
The GetUser API ran successfully. All registered attributes were displayed.
When “aws.cognito.signin.user.admin” is selected as the OAuth scope, we see that the API using the access token can be executed while the ID token cannot be obtained.
Summary
We have confirmed the difference depending on the OAuth scope.
The results of this verification are summarized below.
| Scopes | ID token | Amazon Cognito user pool API operations | Remarks |
| phone, openid | phone_number phone_number_verified | × | |
| email, openid | email email_verified | × | |
| profile, openid | all user attributes | × | |
| openid | all user attributes(※) | × | The ID token is not returned if the openid scope is not requested by the client. |
| aws.cognito.signin.user.admin | × | ◯ |