Extending Attached EBS
One of the topics covered in AWS SOA is deployment, provisioning, and automation.
We will review how to extend an EBS attached to an EC2 instance.
We will review the following three patterns
- accessing and expanding Amazon Linux 2 via SSM Session Manager
- access and expansion via SSM Session Manager (RDP) on Windows Server
- access and extend via SSM Session Manager (PowerShell) to WIndows Server
Environment

Create and attach three EC2 instances and an EBS.
Since the instances will be accessed using SSM Session Manager, create a VPC endpoint for the service.
CloudFormation template files
The above configuration is built with CloudFormation.
The CloudFormation template file is located at the following URL
https://github.com/awstut-an-r/awstut-soa/tree/main/03/001
Explanation of points in template files
Attaching EBS to instance
Ensure EBS is created and attached to instance.
Resources:
  EBS1:
    Type: AWS::EC2::Volume
    Properties:
      AvailabilityZone: !Sub "${AWS::Region}${AvailabilityZone}"
      Size: !Ref VolumeSize
      VolumeType: !Ref VolumeType

  EBSAttachment1:
    Type: AWS::EC2::VolumeAttachment
    Properties:
      Device: !Sub "/dev/sd${DeviceNameSuffix}"
      InstanceId: !Ref Instance1
      VolumeId: !Ref EBS1
Code language: YAML (yaml)
After defining the EBS itself, define resources to attach to the instance.
The type of EBS will be gp3 and the capacity to be allocated will be 1 GiB.
As for the device name, EBS1 to be attached to Instance1, a Linux instance, is assumed to be “/dev/sdf”, and the other two are Windows instances, so “xvdf” is assumed.
For more details, please refer to the following page.
Use SSM documentation to make EBS available
The purpose of this configuration is to verify how to expand the EBS, but to do so, we need to set the EBS to a usable state on each instance.
In this case, we will use the SSM documentation (AWS-RunShellScript, AWS-RunPowerShellScript) to execute the commands to make it available.
For more information, please check the following pages
Using SSM Session Manager to Access EC2
SSH for Linux and Remote Desktop Connection for Windows are commonly used to access instances, but this time SSM Session Manager will be used.
In this configuration, the instance is located on a private subnet, so SSM is accessed through the VPC endpoint for SSM.
For details, please refer to the following page.
Architecting
Use CloudFormation to build this environment and check its actual behavior.
Create CloudFormation stacks and check resources in stacks
Create a CloudFormation stack.
For information on how to create stacks and check each stack, please refer to the following page

After checking the resources in each stack, the following is the information on the main resources created in this case.
- ID of instance 1: i-0e79c9134ceb59b25
- ID of instance 2: i-06a0ec6c05879a8b2
- ID of instance 3: i-05905eee44a840587
- ID of EBS to be attached to instance 1: vol-09d2c3c14709e87db
- ID of EBS to be attached to instance 2: vol-02ef94d7f63643a55
- ID of EBS to be attached to instance 3: vol-0ecab6c58edfe0585
Preparation: Make EBS attached to instance available
When CloudFormation is executed, an EBS is automatically attached to each instance.
However, the EBS volume that has just been attached cannot be used as is.
For example, in the case of a Linux instance, it is necessary to create a file system and mount it.
After you attach an Amazon EBS volume to your instance, it is exposed as a block device. You can format the volume with any file system and then mount it. After you make the EBS volume available for use, you can access it in the same ways that you access any other volume.
Make an Amazon EBS volume available for use on Linux
As mentioned earlier, this time we will use the SSM documentation to execute the necessary commands and set the EBS up for use.
Specifically, configure as follows
- Linux
- File system: xfs
- Mount point: /data
- Windows
- Volume label: D
For more information, please refer to the following page.
Expanding EBS capacity with AWS CLI
Extend the capacity of the attached EBS from 1 GiB to 2 GiB.
Expansion is performed from the AWS CLI.
$ aws ec2 modify-volume \
--volume-id vol-09d2c3c14709e87db \
--size 2
{
    "VolumeModification": {
        "VolumeId": "vol-09d2c3c14709e87db",
        "ModificationState": "modifying",
        "TargetSize": 2,
        "OriginalSize": 1,
        ...
    }
}

$ aws ec2 modify-volume \
--volume-id vol-02ef94d7f63643a55 \
--size 2
{
    "VolumeModification": {
        "VolumeId": "vol-02ef94d7f63643a55",
        "ModificationState": "modifying",
        "TargetSize": 2,
        "OriginalSize": 1,
        ...
    }
}

$ aws ec2 modify-volume \
--volume-id vol-0ecab6c58edfe0585 \
--size 2
{
    "VolumeModification": {
        "VolumeId": "vol-0ecab6c58edfe0585",
        "ModificationState": "modifying",
        "TargetSize": 2,
        "OriginalSize": 1,
        ...
    }
}
Code language: Bash (bash)
Extend the OriginalSize from 1GB to 2GB of TargetSize.
Wait for a while and it will complete.

Extend file system on Linux instance
We will check this from Instance1, a Linux instance.
For the procedure in the Linux instance, proceed with reference to the AWS official “Expanding Linux File System after Volume Size Change“.
Access Instance1 using SSM Session Manager.
$ aws ssm start-session \
--target i-0e79c9134ceb59b25

Starting session with SessionId: root-0aca5cc809bc1f452
sh-4.2$
Code language: Bash (bash)
Check the capacity of the recognized block devices with the lsblk command.
sh-4.2$ lsblk
NAME          MAJ:MIN RM SIZE RO TYPE MOUNTPOINT
nvme0n1       259:0    0   8G  0 disk
├─nvme0n1p1   259:1    0   8G  0 part /
└─nvme0n1p128 259:2    0   1M  0 part
nvme1n1       259:3    0   2G  0 disk /data
Code language: Bash (bash)
There is “2G” capacity for “nvme1n1” which means EBS storage. We can see that it has been successfully expanded.
Next, check the available capacity with the df command.
sh-4.2$ df -hT
Filesystem     Type      Size  Used Avail Use% Mounted on
devtmpfs       devtmpfs  221M     0  221M   0% /dev
tmpfs          tmpfs     231M     0  231M   0% /dev/shm
tmpfs          tmpfs     231M  348K  230M   1% /run
tmpfs          tmpfs     231M     0  231M   0% /sys/fs/cgroup
/dev/nvme0n1p1 xfs       8.0G  1.2G  6.8G  15% /
/dev/nvme1n1   xfs      1014M   34M  981M   4% /data
Code language: Bash (bash)
The capacity of “/dev/nvme1n1” is “1014M”. Since the file system is not extended, only the original 1GB of the 2GB is available.
Since the file system format is XFS, we will extend the file system with the xfs_growfs command.
sh-4.2$ sudo xfs_growfs -d /data
meta-data=/dev/nvme1n1           isize=512    agcount=4, agsize=65536 blks
         =                       sectsz=512   attr=2, projid32bit=1
         =                       crc=1        finobt=1 spinodes=0
data     =                       bsize=4096   blocks=262144, imaxpct=25
         =                       sunit=0      swidth=0 blks
naming   =version 2              bsize=4096   ascii-ci=0 ftype=1
log      =internal               bsize=4096   blocks=2560, version=2
         =                       sectsz=512   sunit=0 blks, lazy-count=1
realtime =none                   extsz=4096   blocks=0, rtextents=0
data blocks changed from 262144 to 524288
Code language: Bash (bash)
The file system expansion has been completed successfully.
Check the available space again.
sh-4.2$ df -hT
Filesystem     Type      Size  Used Avail Use% Mounted on
devtmpfs       devtmpfs  221M     0  221M   0% /dev
tmpfs          tmpfs     231M     0  231M   0% /dev/shm
tmpfs          tmpfs     231M  348K  230M   1% /run
tmpfs          tmpfs     231M     0  231M   0% /sys/fs/cgroup
/dev/nvme0n1p1 xfs       8.0G  1.2G  6.8G  15% /
/dev/nvme1n1   xfs       2.0G   35M  2.0G   2% /data
Code language: Bash (bash)
The capacity that was “1014M” earlier is now “2.0G”.
From the above, it was confirmed that when EBS attached to a Linux instance is expanded, the capacity for the expansion can be used by expanding the file system with the above command.
Expanding file system on Windows instance (GUI version)
Next, we will review the procedure in a Windows instance.
For the procedure for the Windows version, proceed with reference to the official AWS “Expanding Windows File System after Volume Size Change“.
We will target Instance2, which will be accessed via a mote desktop connection with tunneled access using SSM Session Manager.
First, execute the following command on the client side
% aws ssm start-session \
--target i-06a0ec6c05879a8b2 \
--document-name AWS-StartPortForwardingSession \
--parameters "portNumber=3389, localPortNumber=13389"

Starting session with SessionId: root-0d5d84484b5c085cb
Port 13389 opened for sessionId root-0d5d84484b5c085cb.
Waiting for connections...
Code language: Bash (bash)
Next, make a remote desktop connection as follows
- Remote desktop connection to: localhost:13389
- User name: Administrator
- Password: [password set in key pair].
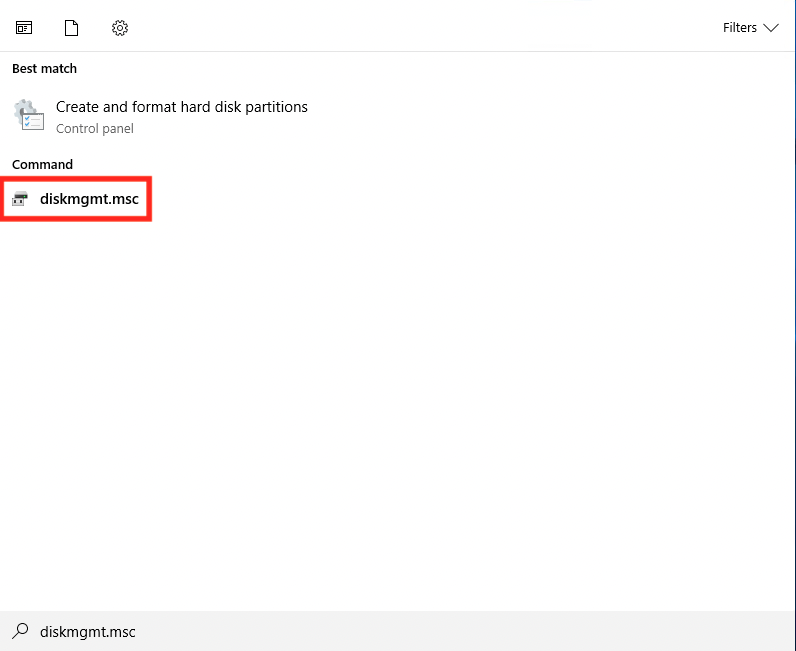
After the remote desktop connection is complete, launch diskmgmt.msc (disk management).
You will see that the expanded capacity exists in the form of “Unallocated”.
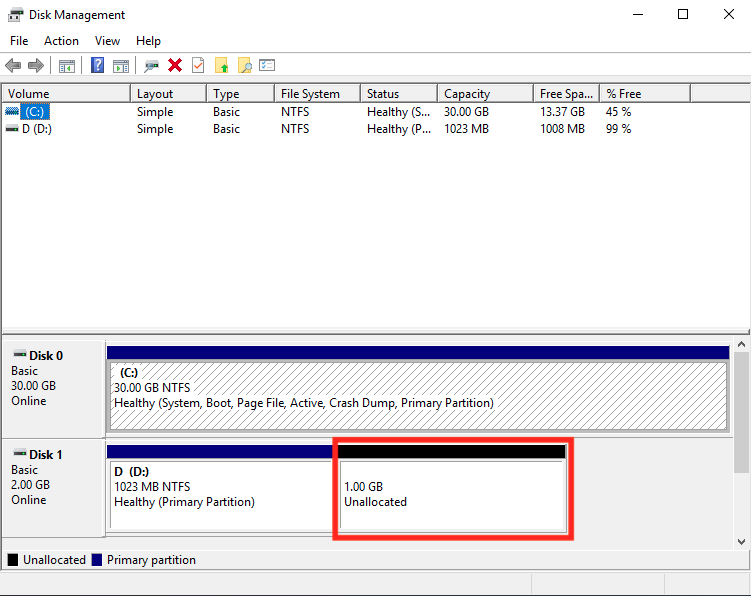
Execute “Action > Rescan Disks.”

Right click on “Volume (D:)” and click “Extend Volume”.

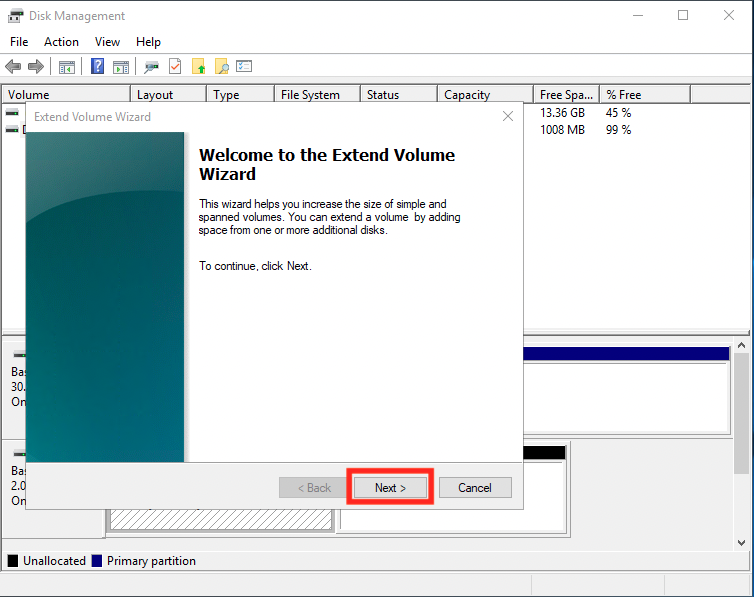
The “Extend Volume Wizard” will be launched.
Basically, proceed as default.
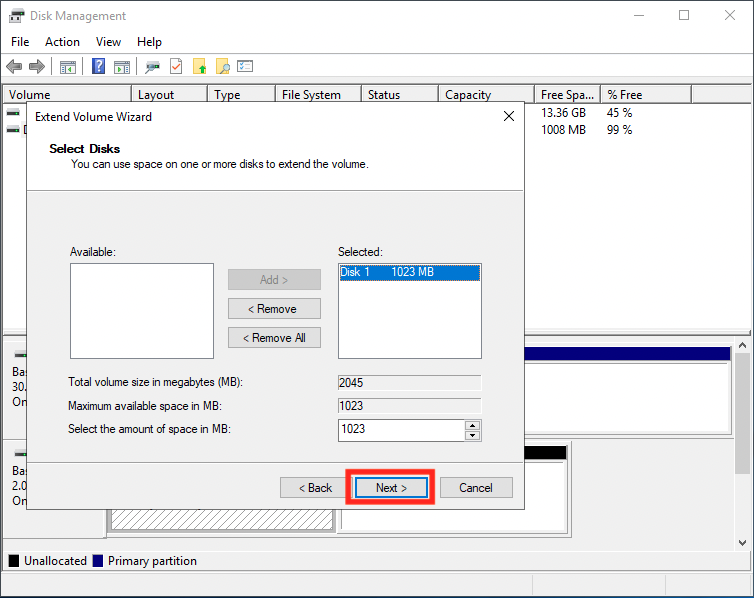
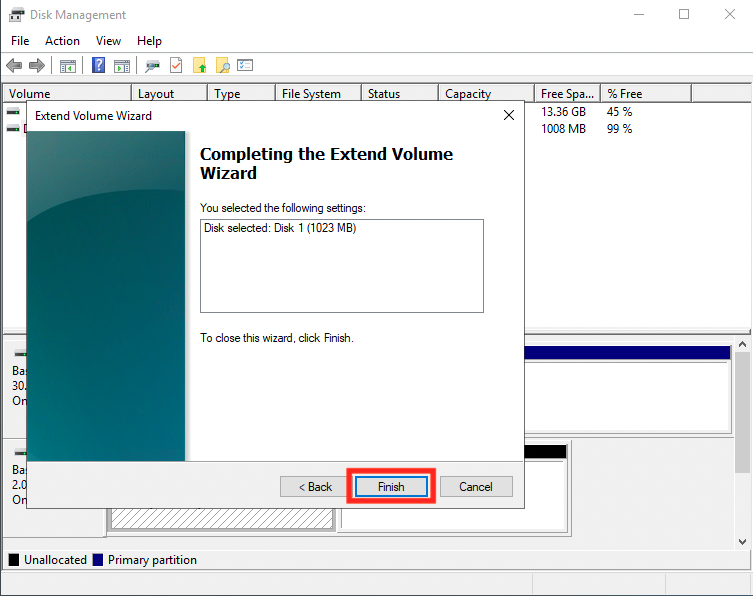
When the expansion is complete, you will see that the capacity of the D drive has changed to 2 GB.
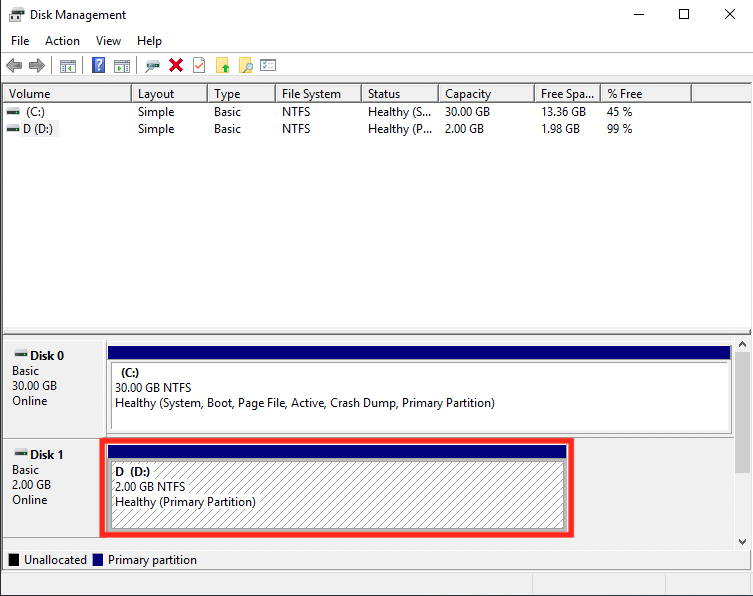
You can also see the same contents from Explorer.
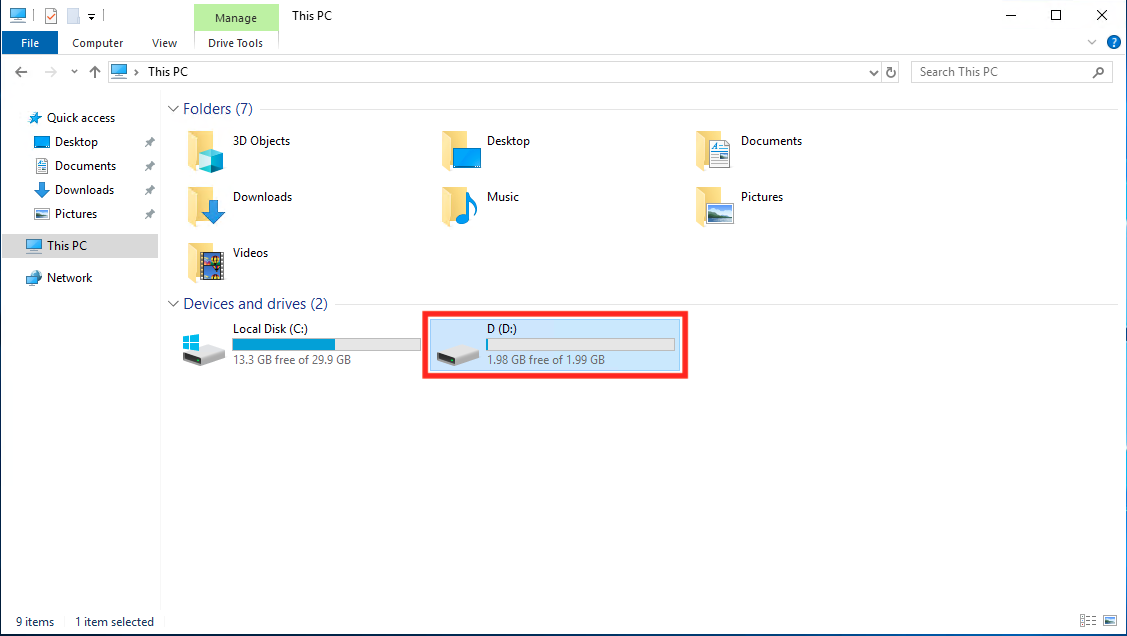
As described above, we have confirmed that after the remote desktop connection, the file system can be expanded using the Disk Management application to use the expanded amount of space.
Extending file system on Windows instance (CLI version)
Finally, we will target Instance3.
Instance3 is accessed via a PowerShell connection using SSM Session Manager.
$ aws ssm start-session --target i-05905eee44a840587

Starting session with SessionId: root-00f9c6b7806859aee
Windows PowerShell
Copyright (C) Microsoft Corporation. All rights reserved.

PS C:\Windows\system32>
Code language: Bash (bash)
First, obtain the current partition information.
PS C:\Windows\system32> Get-Partition


   DiskPath: \\?\scsi#disk&ven_nvme&prod_amazon_elastic_b#4&26a12046&0&000000#{53f56307-b6bf-11d0-94f2-00a0c91efb8b}

PartitionNumber  DriveLetter Offset                                                              Size Type
---------------  ----------- ------                                                              ---- ----
1                C           1048576                                                            30 GB IFS


   DiskPath: \\?\scsi#disk&ven_nvme&prod_amazon_elastic_b#4&34763423&0&000000#{53f56307-b6bf-11d0-94f2-00a0c91efb8b}

PartitionNumber  DriveLetter Offset                                                              Size Type
---------------  ----------- ------                                                              ---- ----
1                D           65536                                                         1022.94 MB IFS
Code language: PowerShell (powershell)
You can see that the capacity of D Live is recognized as “1022.04 MB”.
Next, rescan the disk.
PS C:\Windows\system32> "rescan" | diskpart

Microsoft DiskPart version 10.0.17763.1911

Copyright (C) Microsoft Corporation.
On computer: EC2AMAZ-ROULMFJ

DISKPART>
Please wait while DiskPart scans your configuration...

DiskPart has finished scanning your configuration.

DISKPART>
Code language: PowerShell (powershell)
Check the maximum size of the partition.
PS C:\Windows\system32> Get-PartitionSupportedSize -DriveLetter D

  SizeMin    SizeMax
  -------    -------
409968640 2146369536
Code language: PowerShell (powershell)
Extend to the maximum size identified in the above command.
PS C:\Windows\system32> Resize-Partition -DriveLetter D -Size 2146369536
Code language: PowerShell (powershell)
Check the status after expansion.
PS C:\Windows\system32> Get-Partition


   DiskPath: \\?\scsi#disk&ven_nvme&prod_amazon_elastic_b#4&26a12046&0&000000#{53f56307-b6bf-11d0-94f2-00a0c91efb8b}

PartitionNumber  DriveLetter Offset                                                              Size Type
---------------  ----------- ------                                                              ---- ----
1                C           1048576                                                            30 GB IFS


   DiskPath: \\?\scsi#disk&ven_nvme&prod_amazon_elastic_b#4&34763423&0&000000#{53f56307-b6bf-11d0-94f2-00a0c91efb8b}

PartitionNumber  DriveLetter Offset                                                              Size Type
---------------  ----------- ------                                                              ---- ----
1                D           65536                                                               2 GB IFS
Code language: PowerShell (powershell)
Indeed, D live has been changed to “2GB”.
As described above, we have confirmed that after connecting to PowerShell, the commands for file system expansion can be used for the expansion.
Summary
We have seen how to expand an EBS already attached to an instance.
We confirmed one procedure for Linux and two procedures for Windows on how to expand the file system on the instance side after EBS expansion.